Checking and Filling Fuel
![]() WARNING! To prevent serious injury from fire:
WARNING! To prevent serious injury from fire:
Fill the fuel tank in a
1.To fill the Fuel Tank, first wipe off the
Fuel Tank Cap and the surrounding area.
2.Unscrew, and remove the Fuel Tank Cap. Remove the Strainer.
3.Check the fuel level by peering into the tank. If the fuel level is well below the top of the tank, the fuel should be topped off before using.
4.Mix fuel stabilizer (not included) with 89+ octane unleaded gasoline ac- cording to fuel stabilizer directions.
5.Fill the Fuel Tank to about 1 inch under the fill neck (fuel should barely cover bottom of the Strainer).
6.Replace the Strainer and Fuel Tank Cap.
Starting the Engine
Inspect engine and equipment looking for damaged, loose, and missing parts before set up and starting. If any problems are found, do not use equipment until fixed properly.
Before starting the engine: a. Inspect the equipment and
engine.
b. Fill the engine with the prop-
er amount and type of fuel and oil.
c. Read the Equipment Opera- tion section that follows.
1.Unplug all loads from the Gas Gen- erator before starting to prevent per- manent damage to any appliances, tools, or equipment.
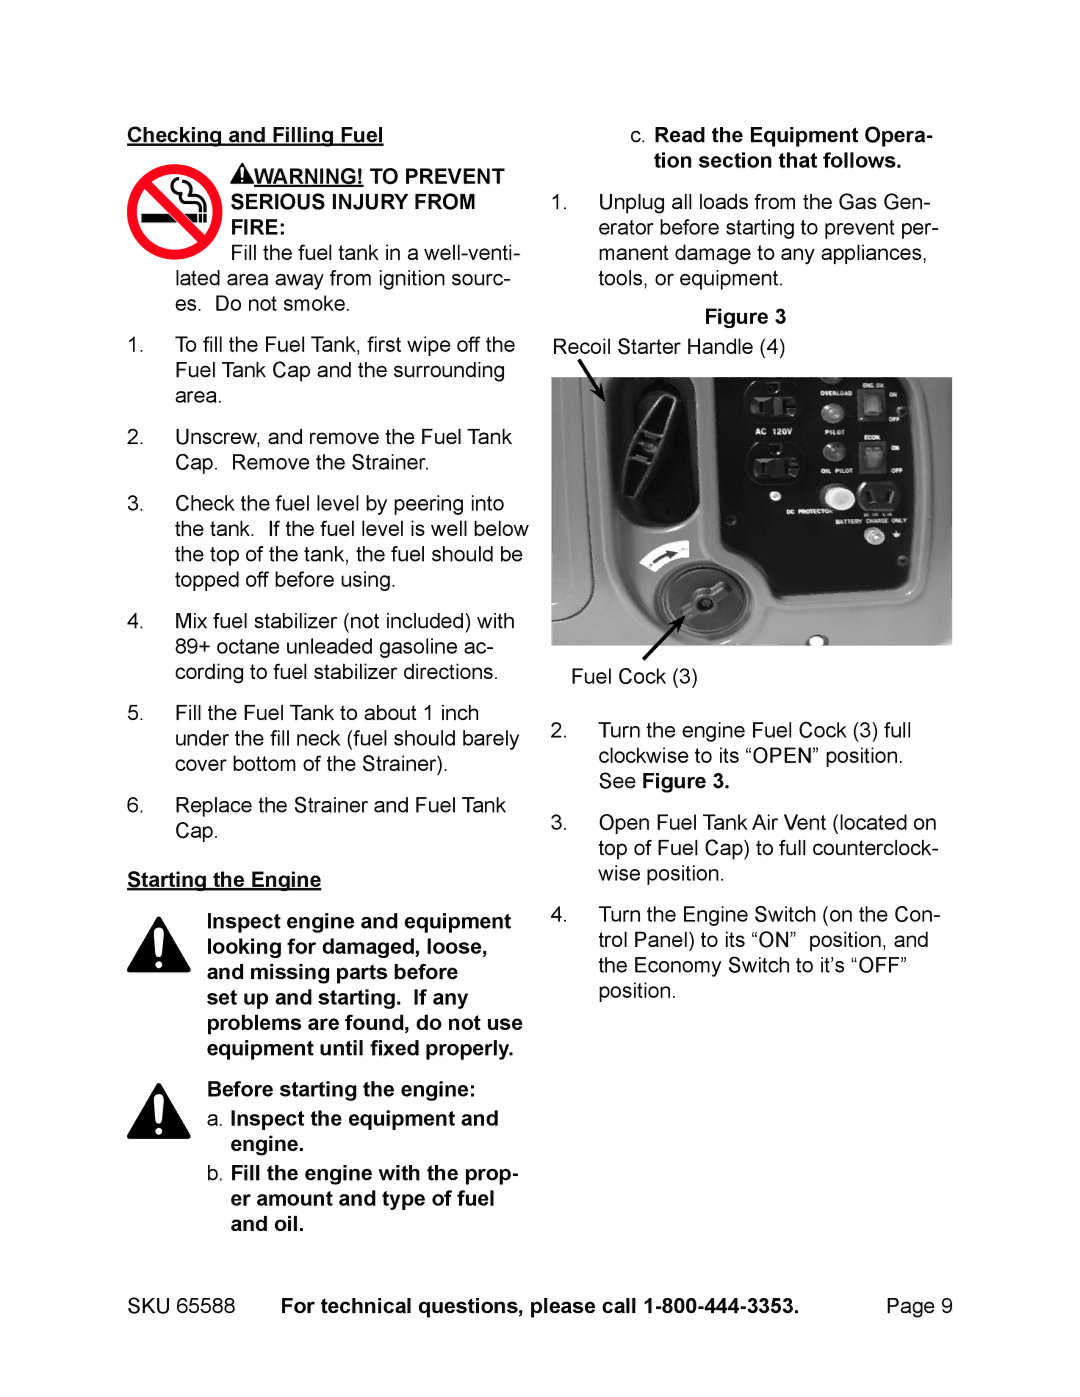
Figure 3
Recoil Starter Handle (4)
Fuel Cock (3)
2.Turn the engine Fuel Cock (3) full clockwise to its “OPEN” position. See Figure 3.
3.Open Fuel Tank Air Vent (located on top of Fuel Cap) to full counterclock- wise position.
4.Turn the Engine Switch (on the Con- trol Panel) to its “ON” position, and the Economy Switch to it’s “OFF” position.
SKU 65588 | For technical questions, please call | Page 9 |
