Model | Installation Instructions |
|
|
WALL BRACKET INSTALLATION
Secure Wall Bracket
WARNING: It is the responsibility of the installer to verify that the surface to which the mount is anchored will safely support the combined load of all attached components and equipment.
To install the mount:
1.Determine the exact mounting location prior to installation, considering the unit’s swing and extension radius.
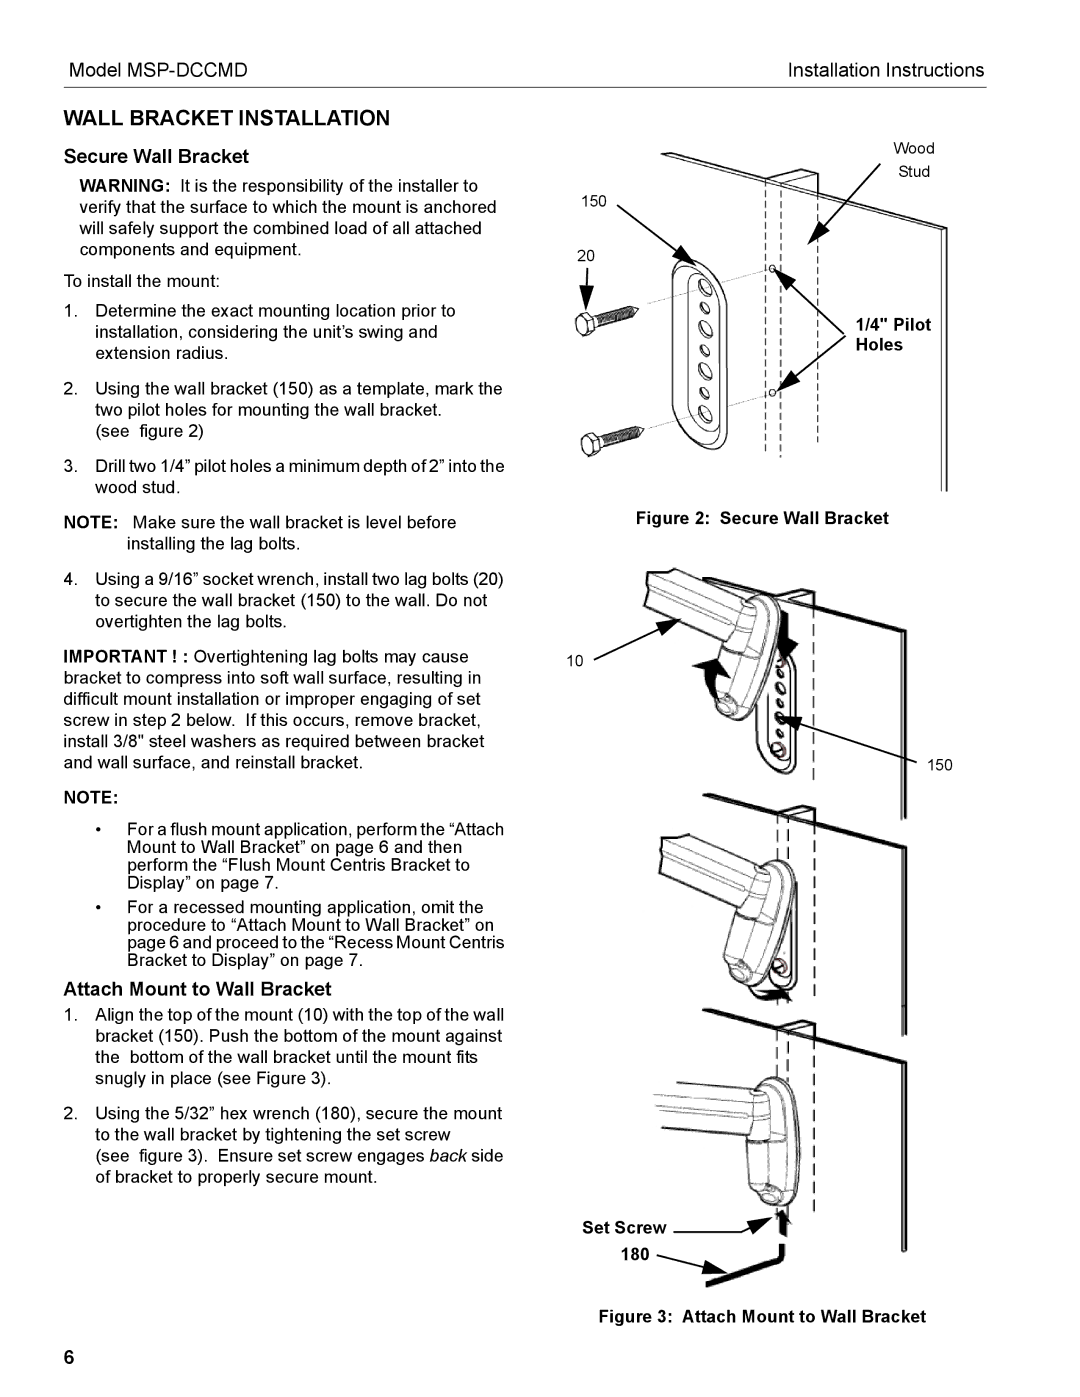
2.Using the wall bracket (150) as a template, mark the two pilot holes for mounting the wall bracket.
(see figure 2)
3.Drill two 1/4” pilot holes a minimum depth of 2” into the wood stud.
NOTE: Make sure the wall bracket is level before installing the lag bolts.
4.Using a 9/16” socket wrench, install two lag bolts (20) to secure the wall bracket (150) to the wall. Do not overtighten the lag bolts.
IMPORTANT ! : Overtightening lag bolts may cause bracket to compress into soft wall surface, resulting in difficult mount installation or improper engaging of set screw in step 2 below. If this occurs, remove bracket, install 3/8" steel washers as required between bracket and wall surface, and reinstall bracket.
NOTE:
•For a flush mount application, perform the “Attach Mount to Wall Bracket” on page 6 and then perform the “Flush Mount Centris Bracket to Display” on page 7.
•For a recessed mounting application, omit the procedure to “Attach Mount to Wall Bracket” on page 6 and proceed to the “Recess Mount Centris Bracket to Display” on page 7.
Attach Mount to Wall Bracket
1.Align the top of the mount (10) with the top of the wall bracket (150). Push the bottom of the mount against the bottom of the wall bracket until the mount fits snugly in place (see Figure 3).
2.Using the 5/32” hex wrench (180), secure the mount to the wall bracket by tightening the set screw (see figure 3). Ensure set screw engages back side of bracket to properly secure mount.
Wood
Stud
150
20
1/4" Pilot
Holes
Figure 2: Secure Wall Bracket
10
150
Set Screw ![]()
![]() 180
180
Figure 3: Attach Mount to Wall Bracket
6