XSM/XTM Series | Installation Instructions |
XTM Model
NOTE: Proceed to Step 8 for XSM Model instructions.
3.Hang top hook of interface brackets onto the top bar of the mount. (See Figure 9)
NOTE: The screen initially installs into the "kickstand mode" to allow easy cable access.
4.Slide screen and bars to desired viewing position.
5.Route cables between wall and bars.
CAUTION: PINCH POINTS! Keep fingers, hands and cables out of pinch point areas.
6.Pull downward on the pull straps and swing inward toward wall, latching interface brackets to lower bar and locking bottom of screen to the mount. (See Figure 9)
7.Proceed to Adjusting Roll/Height of Wall Brackets section.
(Screen not shown for clarity) |
Top |
Hook |
3 |
6 |
Pull straps |
Figure 9
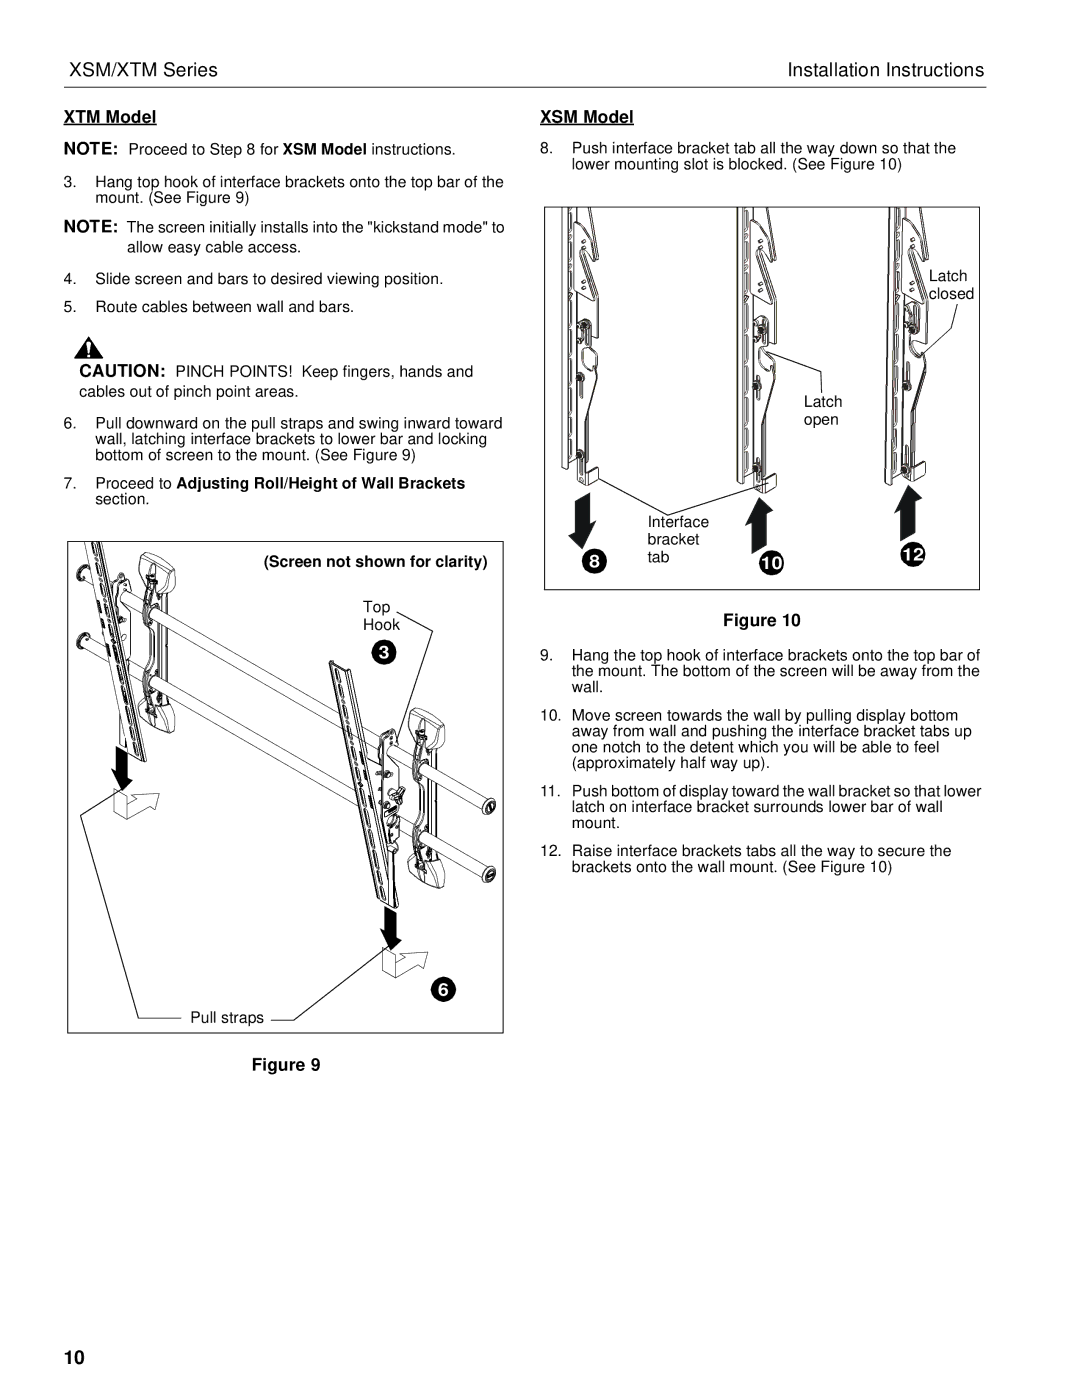
XSM Model
8.Push interface bracket tab all the way down so that the lower mounting slot is blocked. (See Figure 10)
|
|
| Latch |
|
|
| closed |
|
|
| Latch |
|
|
| open |
| Interface |
|
|
| bracket |
| 12 |
8 | tab | 10 | |
|
|
Figure 10
9.Hang the top hook of interface brackets onto the top bar of the mount. The bottom of the screen will be away from the wall.
10.Move screen towards the wall by pulling display bottom away from wall and pushing the interface bracket tabs up one notch to the detent which you will be able to feel (approximately half way up).
11.Push bottom of display toward the wall bracket so that lower latch on interface bracket surrounds lower bar of wall mount.
12.Raise interface brackets tabs all the way to secure the brackets onto the wall mount. (See Figure 10)
10