COMPUTER INPUT
MANUAL PC ADJUSTMENT
This projector can automatically tune to display signals from most personal computers currently distributed. However, some computers employ special signal formats which are different from standard ones and may not be tuned by
This projector has a Manual PC Adjustment to enable you to precisely adjust several parameters to match with those special signal formats. This projector has 5 independent memory areas to memorize those parameters manually adjusted. This enables you to recall setting for a specific computer whenever you use it.
Note : This PC ADJUST Menu cannot be operated when in digital signal input on DVI terminal is selected on PC SYSTEM MENU (P24).
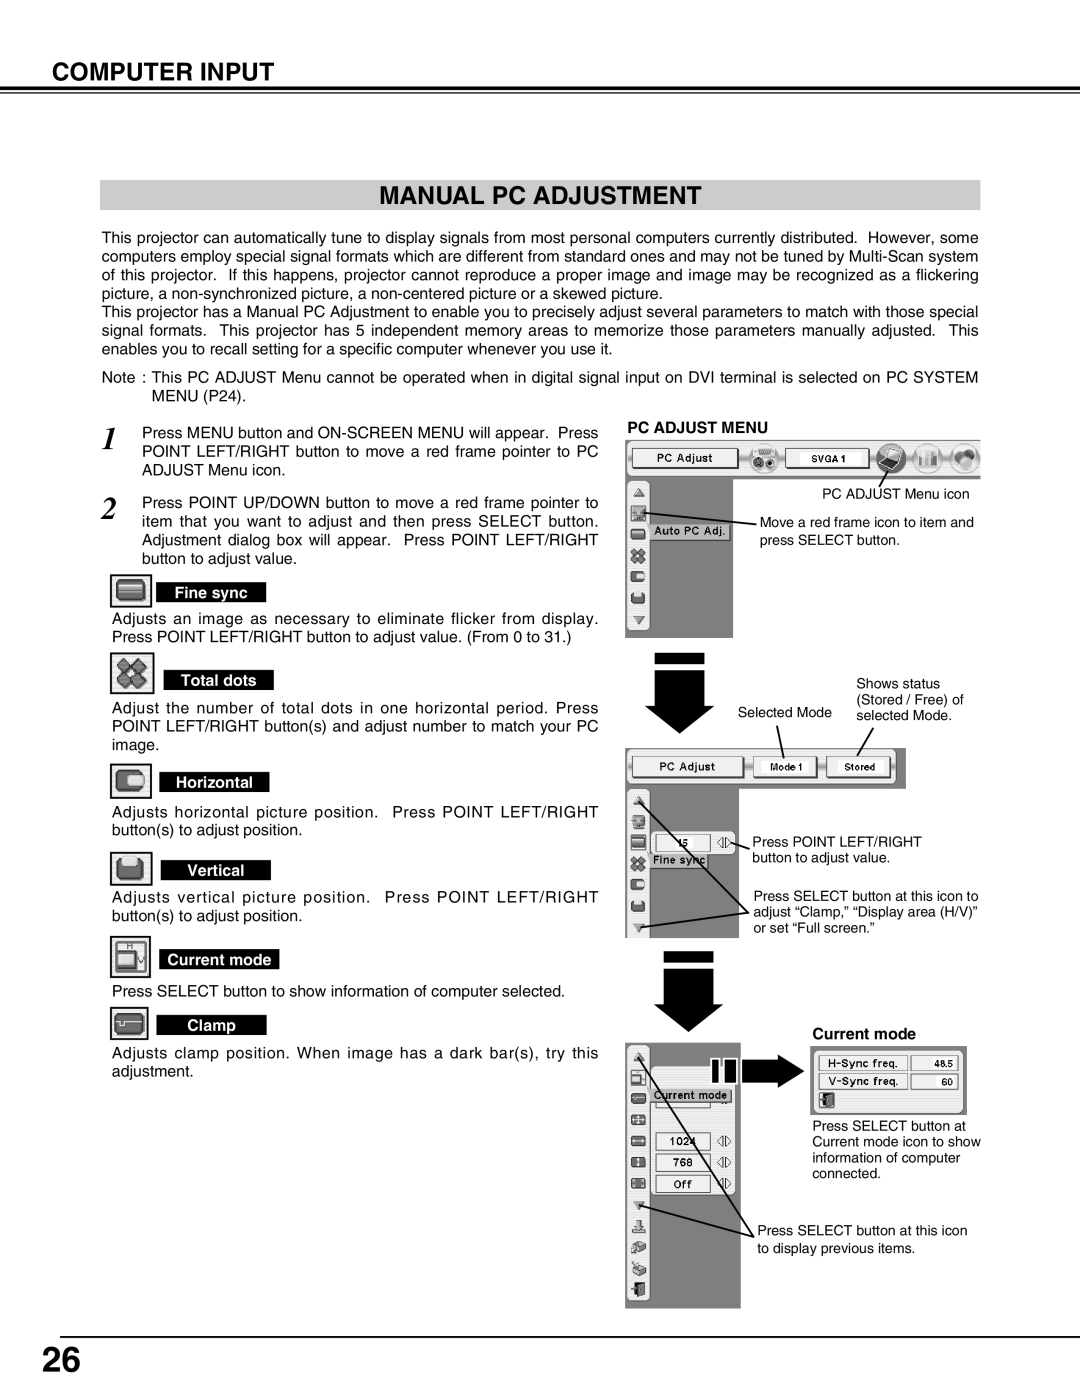
1 | Press MENU button and |
POINT LEFT/RIGHT button to move a red frame pointer to PC | |
| ADJUST Menu icon. |
2 | Press POINT UP/DOWN button to move a red frame pointer to |
item that you want to adjust and then press SELECT button. |
Adjustment dialog box will appear. Press POINT LEFT/RIGHT button to adjust value.
Fine sync
Adjusts an image as necessary to eliminate flicker from display. Press POINT LEFT/RIGHT button to adjust value. (From 0 to 31.)
Total dots
Adjust the number of total dots in one horizontal period. Press POINT LEFT/RIGHT button(s) and adjust number to match your PC image.
Horizontal
Adjusts horizontal picture position. Press POINT LEFT/RIGHT button(s) to adjust position.
Vertical
Adjusts vertical picture position. Press POINT LEFT/RIGHT button(s) to adjust position.
Current mode
Press SELECT button to show information of computer selected.
Clamp
Adjusts clamp position. When image has a dark bar(s), try this adjustment.
PC ADJUST MENU
PC ADJUST Menu icon
![]() Move a red frame icon to item and press SELECT button.
Move a red frame icon to item and press SELECT button.
Shows status
(Stored / Free) of
Selected Mode selected Mode.
![]() Press POINT LEFT/RIGHT button to adjust value.
Press POINT LEFT/RIGHT button to adjust value.
Press SELECT button at this icon to adjust “Clamp,” “Display area (H/V)” or set “Full screen.”
Current mode
Press SELECT button at Current mode icon to show information of computer connected.
![]() Press SELECT button at this icon to display previous items.
Press SELECT button at this icon to display previous items.
26
