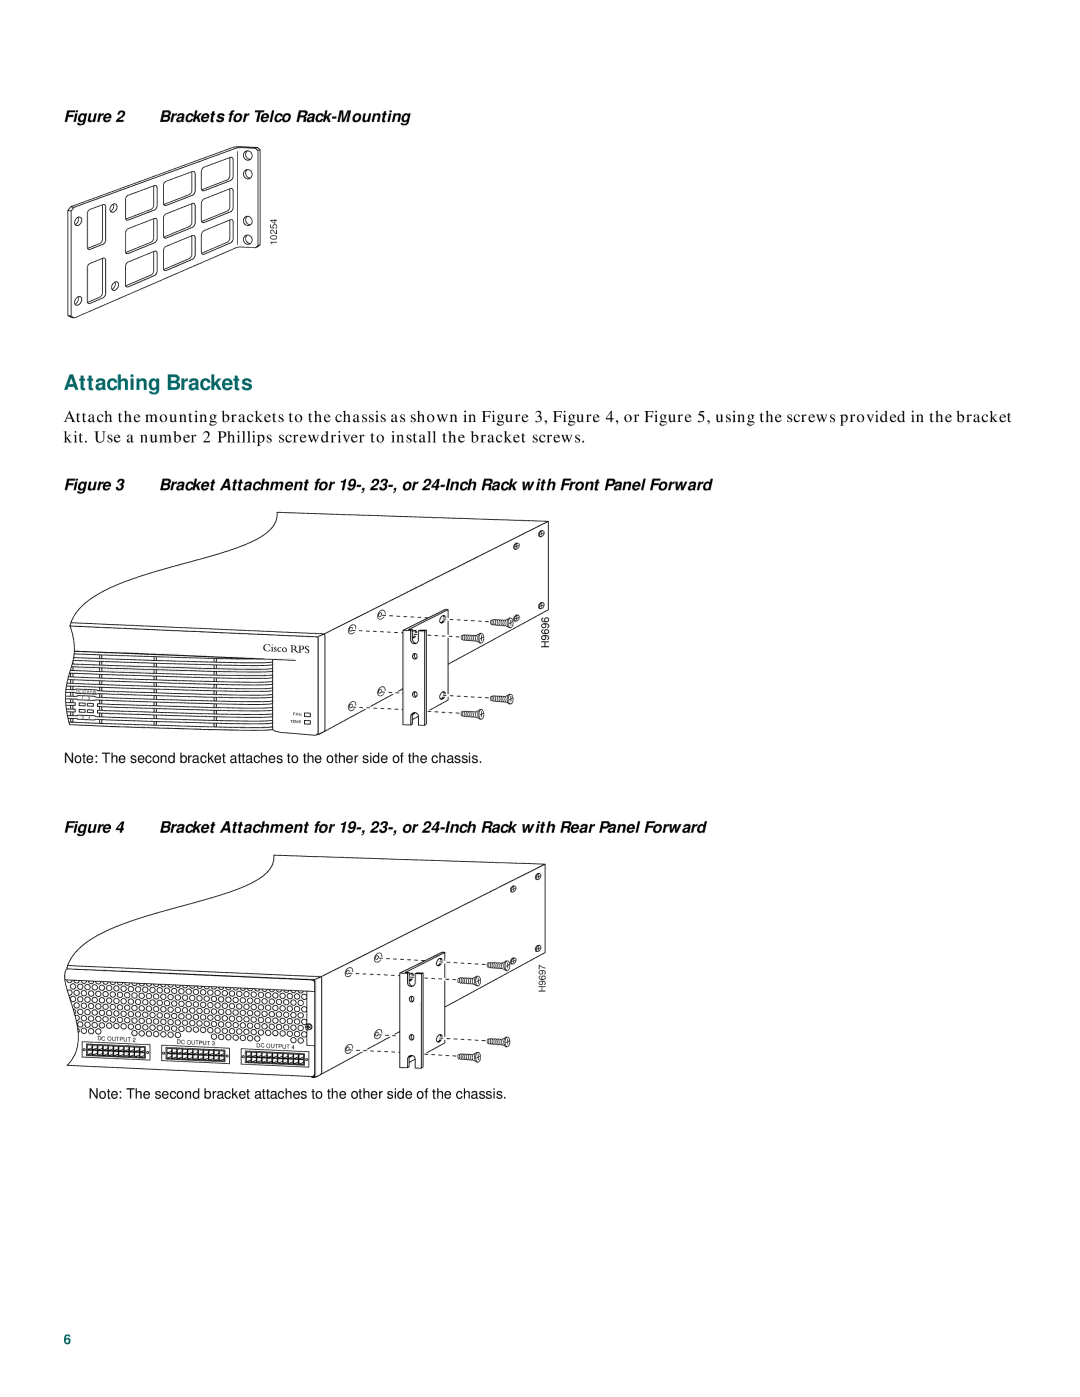
Figure 2 Brackets for Telco Rack-Mounting
10254
Attaching Brackets
Attach the mounting brackets to the chassis as shown in Figure 3, Figure 4, or Figure 5, using the screws provided in the bracket kit. Use a number 2 Phillips screwdriver to install the bracket screws.
Figure 3 Bracket Attachment for 19-, 23-, or 24-Inch Rack with Front Panel Forward
DC STATUS | |
1 | 2 |
3 | 4 |
H9696
FAN
TEMP
Note: The second bracket attaches to the other side of the chassis.
Figure 4 Bracket Attachment for 19-, 23-, or 24-Inch Rack with Rear Panel Forward
H9697
DC OUTPUT 2 | DC OUTPUT 3 | DC OUTPUT 4 |
| ||
|
|
Note: The second bracket attaches to the other side of the chassis.
6
