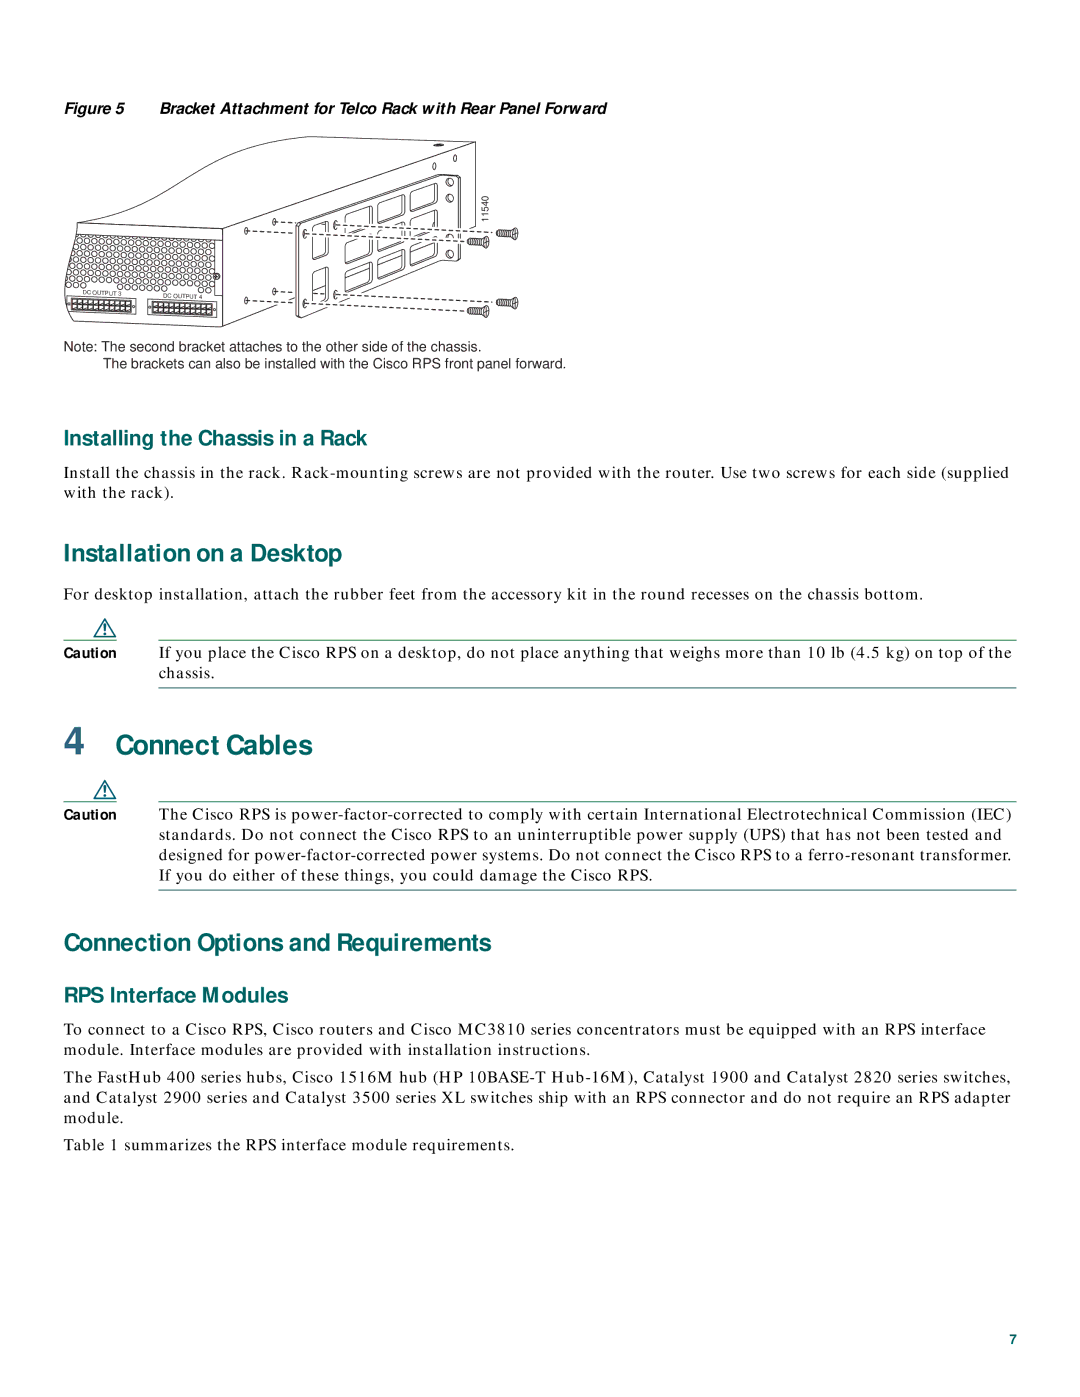
Figure 5 Bracket Attachment for Telco Rack with Rear Panel Forward
11540
Note: The second bracket attaches to the other side of the chassis.
The brackets can also be installed with the Cisco RPS front panel forward.
Installing the Chassis in a Rack
Install the chassis in the rack.
Installation on a Desktop
For desktop installation, attach the rubber feet from the accessory kit in the round recesses on the chassis bottom.
Caution If you place the Cisco RPS on a desktop, do not place anything that weighs more than 10 lb (4.5 kg) on top of the chassis.
4Connect Cables
Caution The Cisco RPS is
Connection Options and Requirements
RPS Interface Modules
To connect to a Cisco RPS, Cisco routers and Cisco MC3810 series concentrators must be equipped with an RPS interface module. Interface modules are provided with installation instructions.
The FastHub 400 series hubs, Cisco 1516M hub (HP
Table 1 summarizes the RPS interface module requirements.
7