Connecting the Switch Ports
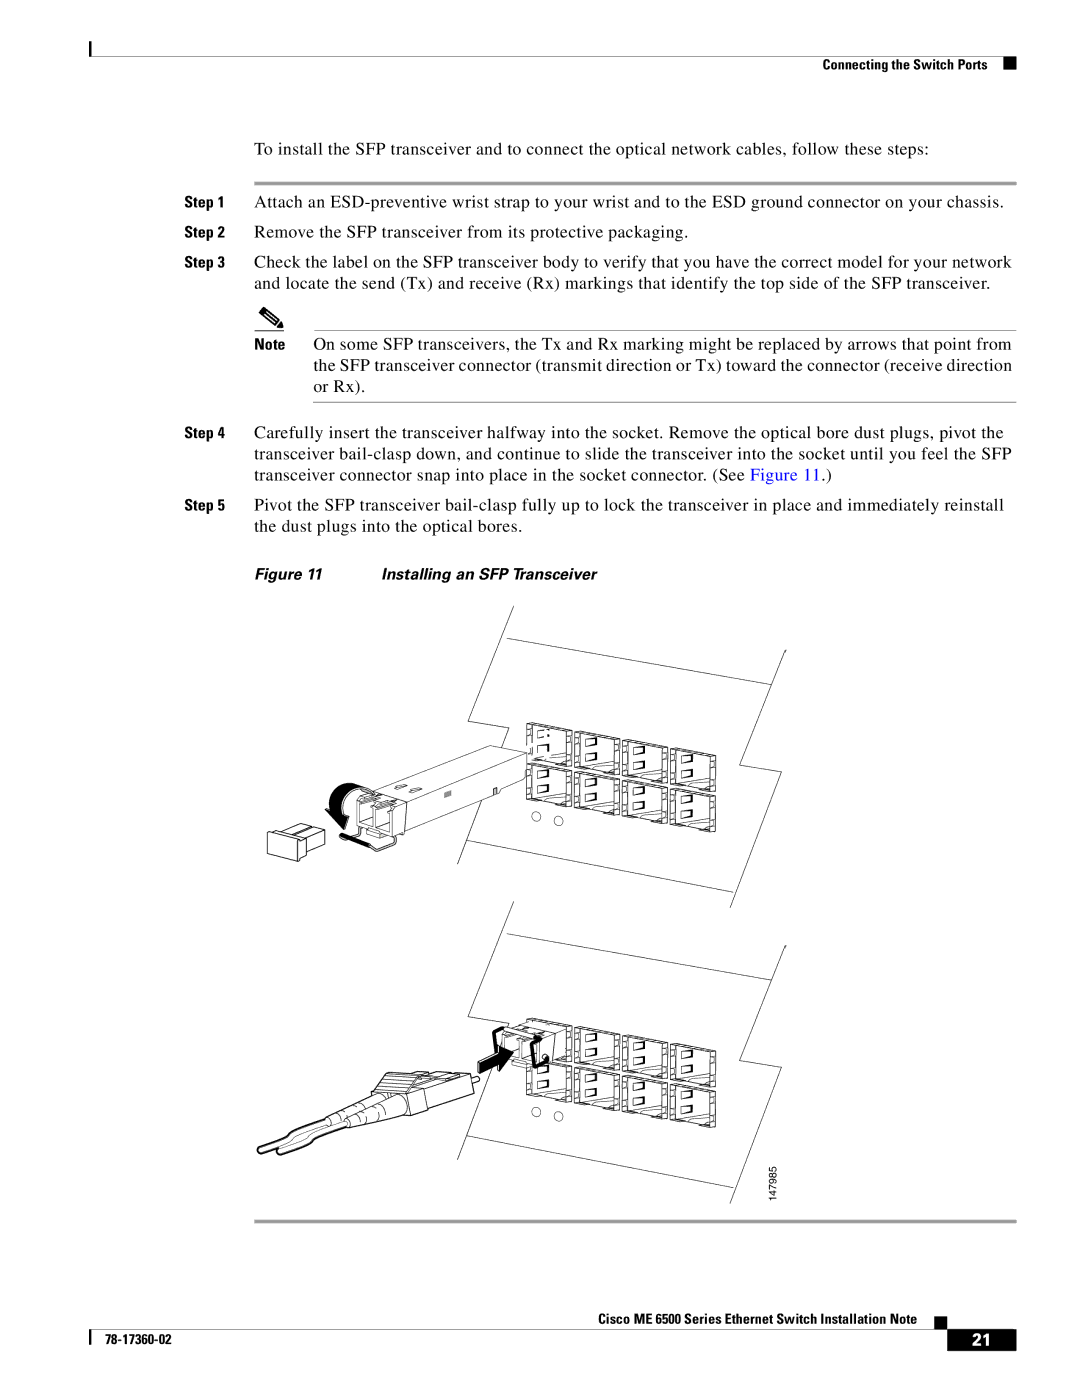
To install the SFP transceiver and to connect the optical network cables, follow these steps:
Step 1 Attach an
Step 3 Check the label on the SFP transceiver body to verify that you have the correct model for your network and locate the send (Tx) and receive (Rx) markings that identify the top side of the SFP transceiver.
Note On some SFP transceivers, the Tx and Rx marking might be replaced by arrows that point from the SFP transceiver connector (transmit direction or Tx) toward the connector (receive direction or Rx).
Step 4 Carefully insert the transceiver halfway into the socket. Remove the optical bore dust plugs, pivot the transceiver
Step 5 Pivot the SFP transceiver
Figure 11 | Installing an SFP Transceiver |
1 2
1 | 2 |
1 2
1 | 2 |
147985
Cisco ME 6500 Series Ethernet Switch Installation Note
|
| 21 |
|
|
|
