- Step Nine -
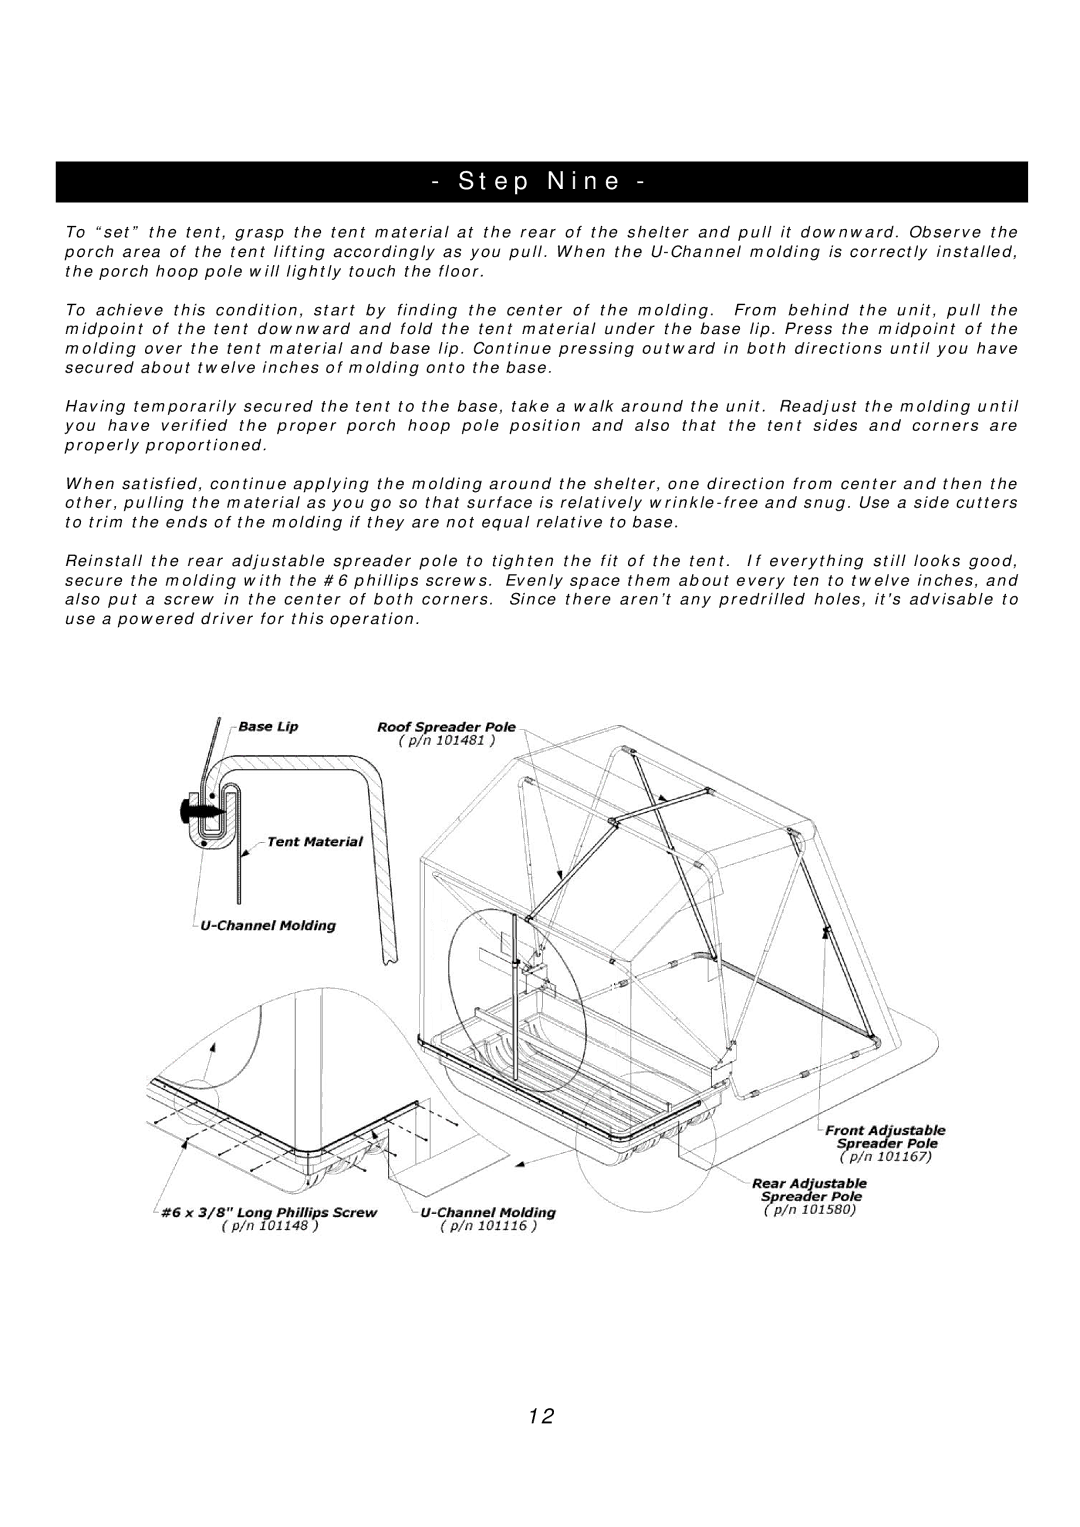
To “set”the tent, grasp the tent material at the rear of the shelter and pull it downward. Observe the porch area of the tent lifting accordingly as you pull. When the
To achieve this condition, start by finding the center of the molding. From behind the unit, pull the midpoint of the tent downward and fold the tent material under the base lip. Press the midpoint of the molding over the tent material and base lip. Continue pressing outward in both directions until you have secured about twelve inches of molding onto the base.
Having temporarily secured the tent to the base, take a walk around the unit. Readjust the molding until you have verified the proper porch hoop pole position and also that the tent sides and corners are properly proportioned.
When satisfied, continue applying the molding around the shelter, one direction from center and then the other, pulling the material as you go so that surface is relatively
Reinstall the rear adjustable spreader pole to tighten the fit of the tent. If everything still looks good, secure the molding with the #6 phillips screws. Evenly space them about every ten to twelve inches, and also put a screw in the center of both corners. Since there aren’t any predrilled holes, it's advisable to use a powered driver for this operation.
12