CHANNEL SETTINGS
The AlertMaster System uses radio signals to communicate between the console unit and all of its accessories. For the accessories (Door Announcer, Baby Sound Monitor and Audio Alarm Transmitter) to “talk” to the base unit, they all have to be on the same “channel.” A DIP switch is used for channel selection.
Your system and all of the accessories have been preset in the factory to a standard channel. Under normal operating conditions, there is no adjustment necessary.
If your system encounters interference and repeatedly activates by itself for no obvious reasons, it may be triggered by a system nearby in your neighborhood.
If necessary, check the DIP switch settings on all components of your AlertMaster Notification System to ensure they are identical.
If interference from another AlertMaster Notification System or other wireless source is present, change channel switch settings on all components.
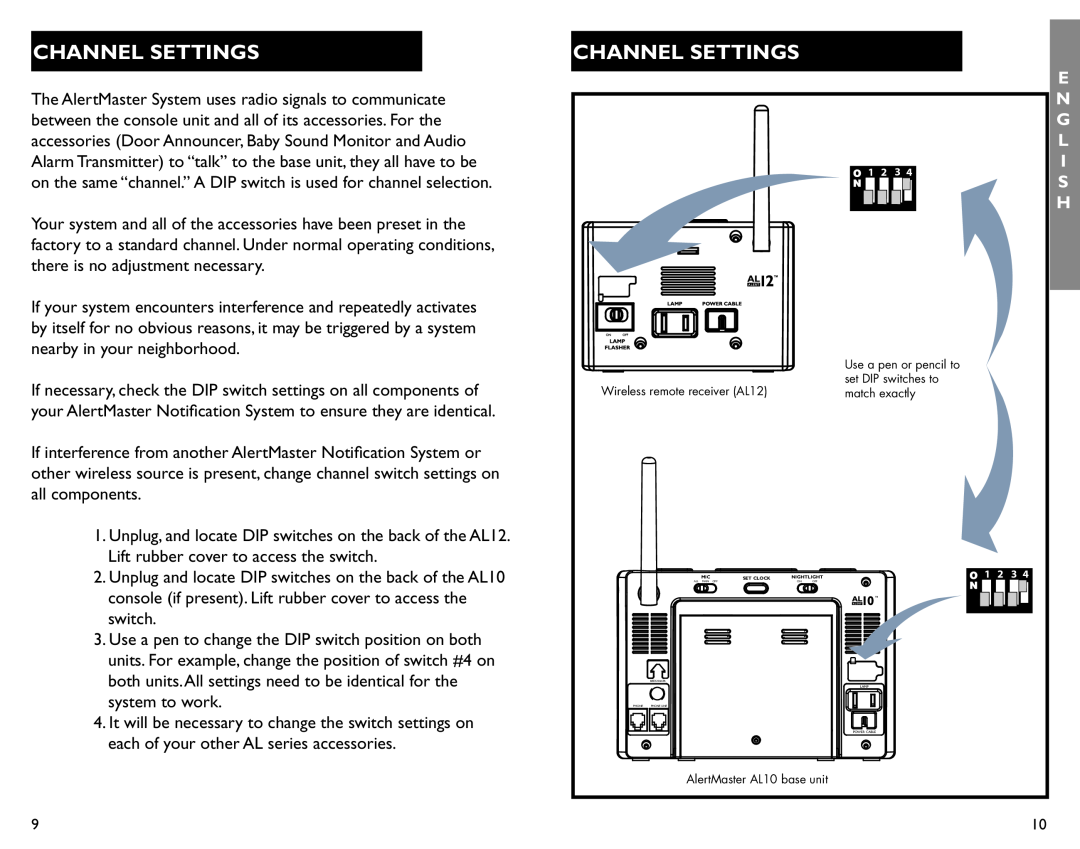
1.Unplug, and locate DIP switches on the back of the AL12. Lift rubber cover to access the switch.
2.Unplug and locate DIP switches on the back of the AL10 console (if present). Lift rubber cover to access the switch.
3.Use a pen to change the DIP switch position on both units. For example, change the position of switch #4 on both units.All settings need to be identical for the system to work.
4.It will be necessary to change the switch settings on each of your other AL series accessories.
CHANNEL SETTINGS
1 2 3 4
| Use a pen or pencil to |
Wireless remote receiver (AL12) | set DIP switches to |
match exactly |
MIC | SET CLOCK | NIGHTLIGHT | 1 2 3 4 |
ALL MAIN OFF |
| ON OFF |
|
|
|
| ™ |
| BEDSHAKER |
| LAMP |
PHONE | PHONE LINE |
POWER CABLE
AlertMaster AL10 base unit
E
N G L I S H
9 | 10 |