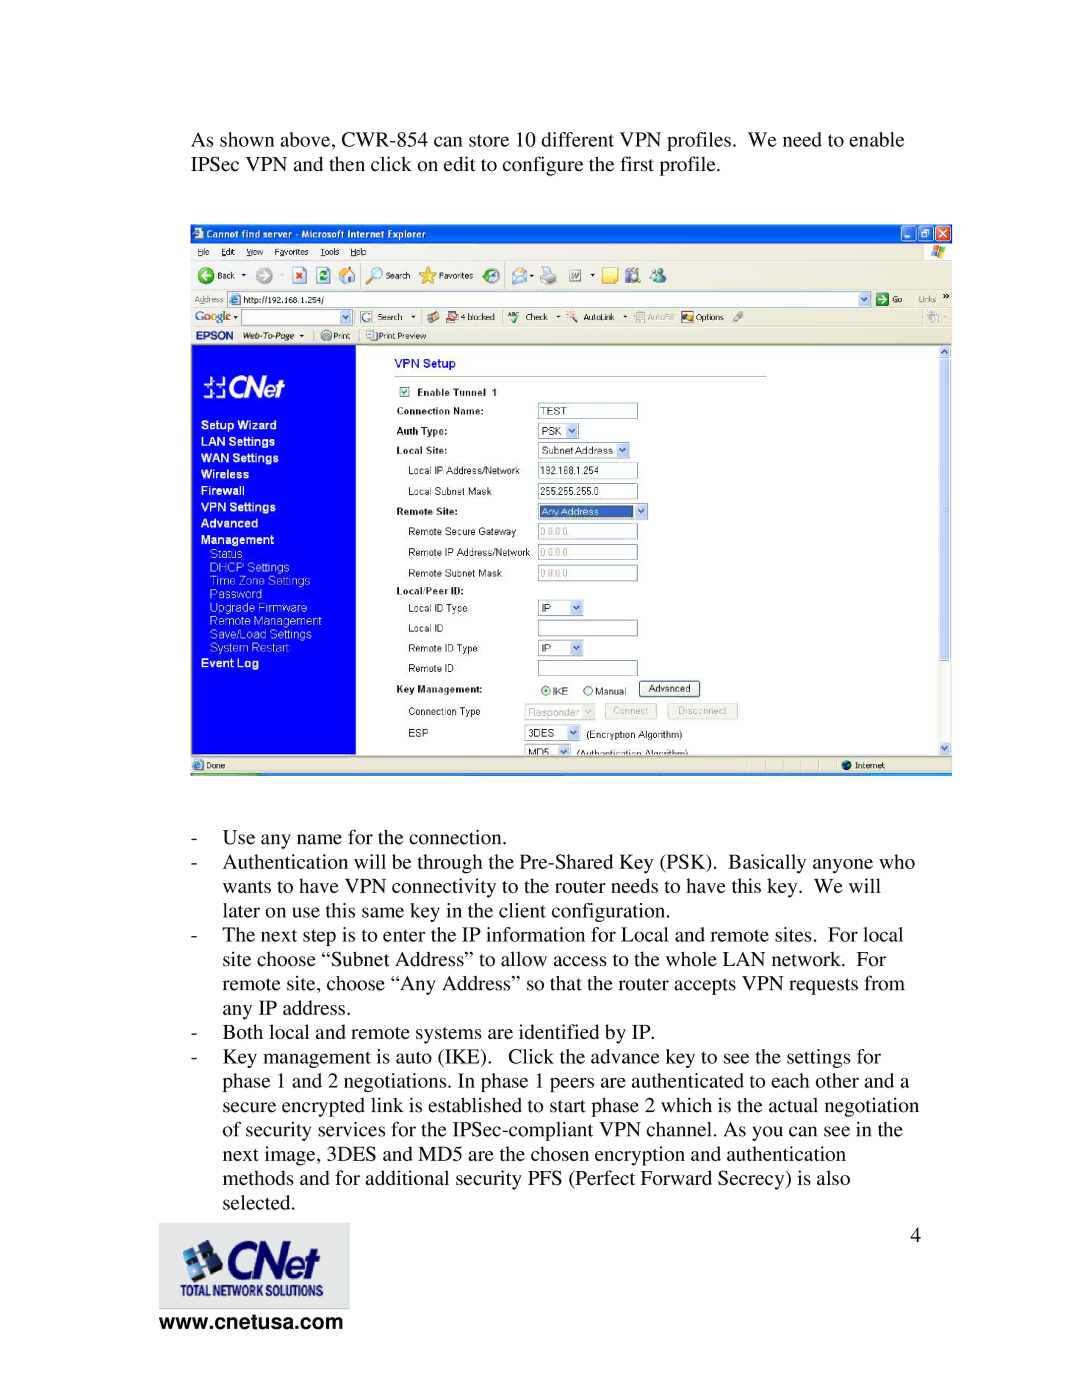
As shown above,
-Use any name for the connection.
-Authentication will be through the
-The next step is to enter the IP information for Local and remote sites. For local site choose “Subnet Address” to allow access to the whole LAN network. For remote site, choose “Any Address” so that the router accepts VPN requests from any IP address.
-Both local and remote systems are identified by IP.
-Key management is auto (IKE). Click the advance key to see the settings for phase 1 and 2 negotiations. In phase 1 peers are authenticated to each other and a secure encrypted link is established to start phase 2 which is the actual negotiation of security services for the
4
www.cnetusa.com
