Trade/Road Inverter Manual 9/15/97 10:16 AM Page 8
INSTALLATION (continued)
DISTANCE TO | INVERTER MODEL | |
BATTERY | ||
|
REMOTE CONTROL
Each inverter comes with a removable connector for remote
5FEET
10 FEET
15 FEET
TRADESMAN
AWG 4
AWG 3
AWG 2
ROAD WARRIOR
AWG 3
AWG 2
NOT
RECOMMENDED
The terminals viewed
The first two, (1) and (2), are connected internally to the two terminals of the built in switch. Connecting (1) and (2) together will turn on the inverter. Therefore, a pair of wires may run from these terminals to any kind of switch within, say, 50 feet, and that switch will control
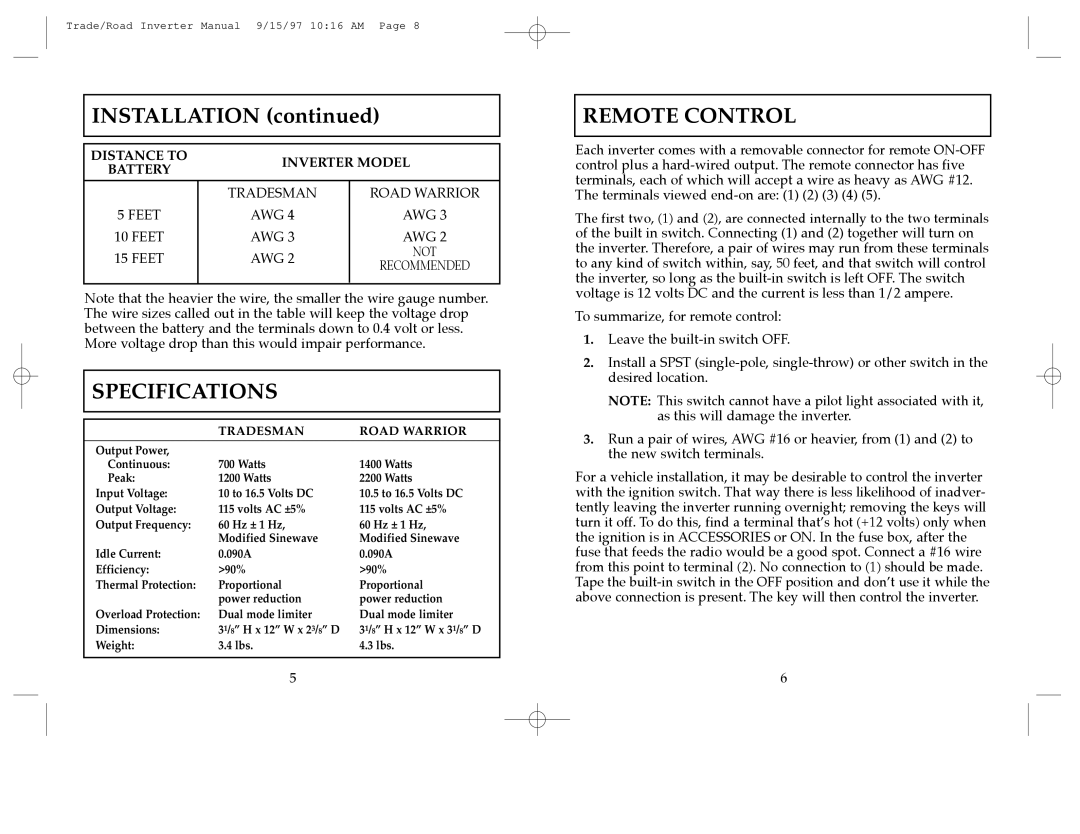
Note that the heavier the wire, the smaller the wire gauge number. The wire sizes called out in the table will keep the voltage drop between the battery and the terminals down to 0.4 volt or less. More voltage drop than this would impair performance.
SPECIFICATIONS
| TRADESMAN | ROAD WARRIOR |
|
|
|
Output Power, |
|
|
Continuous: | 700 Watts | 1400 Watts |
Peak: | 1200 Watts | 2200 Watts |
Input Voltage: | 10 to 16.5 Volts DC | 10.5 to 16.5 Volts DC |
Output Voltage: | 115 volts AC ±5% | 115 volts AC ±5% |
Output Frequency: | 60 Hz ± 1 Hz, | 60 Hz ± 1 Hz, |
| Modified Sinewave | Modified Sinewave |
Idle Current: | 0.090A | 0.090A |
Efficiency: | >90% | >90% |
Thermal Protection: | Proportional | Proportional |
| power reduction | power reduction |
Overload Protection: | Dual mode limiter | Dual mode limiter |
Dimensions: | 31/8” H x 12” W x 23/8” D | 31/8” H x 12” W x 31/8” D |
Weight: | 3.4 lbs. | 4.3 lbs. |
|
|
|
the inverter, so long as the
To summarize, for remote control:
1.Leave the
2.Install a SPST
NOTE: This switch cannot have a pilot light associated with it, as this will damage the inverter.
3.Run a pair of wires, AWG #16 or heavier, from (1) and (2) to the new switch terminals.
For a vehicle installation, it may be desirable to control the inverter with the ignition switch. That way there is less likelihood of inadver- tently leaving the inverter running overnight; removing the keys will turn it off. To do this, find a terminal thatÕs hot (+12 volts) only when the ignition is in ACCESSORIES or ON. In the fuse box, after the fuse that feeds the radio would be a good spot. Connect a #16 wire from this point to terminal (2). No connection to (1) should be made. Tape the
5 | 6 |
