ATTACHING EXTENSION CORD TO MOWER (FIGURE 5)
DO NOT connect the extension cord to power source until you have finished reading this manual and you are ready to start mowing.
1.The extension cord must be polarized and will only plug in one way, orient the wide slot with the wide blade in the switch housing.
2.Loop the extension cord and push the loop up through the hole in the switch housing.
3.Pull the extension cord on the side of the loop that is plugged into the switch housing and remove all the slack in this section of the extension cord.
4.Place the loop over the strain relief tab on the switch housing and pull the extension cord so the loop draws down around the strain relief tab as shown in the detail. Double check to see that you did not loosen the extension cord.
5
SWITCH USE (FIGURE 6)
Your mower is equipped with a special switch. To operate the switch, insert your finger into the opening (Figure 6) and push the lever out so that you can grasp it with your other hand. Pull the lever back to turn the unit on and hold it against the mower handle to keep it running. To turn the mower off, just release the lever. The spring loaded "SNAP ACTION" lever will quickly turn the mower off.
CAUTION: NEVER ATTEMPT TO OVERRIDE THE OPERATION OF THIS SWITCH.
6
EXTENSION CORD TO ELECTRICAL OUTLET (FIGURE 7)
1.Place most of the extension cord close to the electrical outlet, out of the path of the mower. Attach extension cord to mower.
2.Start in direction where extension cord side of mower is closest to the outlet. Begin mowing in the area closest to the outlet and mow in a back and forth manner. When you come to the end of a row being cut, release the power switch and wait for the blade to come to a complete stop. Pull the handle release lever and flip the handle to the opposite side of the mower. Release the handle lever and ensure the handle is secure. Pull power switch to
3.Avoid mowing in circles as cord will be harder to manage.
7
FLIP-OVER HANDLE FEATURE (FIGURE 8)
1.By pulling the handle release lever and flipping the handle to the opposite side of the mower, the cord remains on the same side of the mower and out of the way.
2.You must mow in a back and forth pattern to benefit from this feature.
8
RECOMMENDED APPROXIMATE CUTTING HEIGHT
The cutting height should be higher in hot weather or shade , and lower for the last mow before winter.
| COOL SEASON GRASSES |
| |
| TYPE | SHADE | SUN |
| CREEPING BENT GRASS | 2/3” | |
| VELVER BENT GRASS | 1/4” | 1/2” |
| ANNUAL BLUEGRASS | 1/2” | 1” |
| CANADA BLUEGRASS | 3” | 4” |
| KENTUCKY BLUEGRASS | 3” | |
| ROUGH BLUEGRASS | 1” | |
| SMOOTH BROMEGRASS | 3” | 4” |
| FINE RESUE | ||
| TALL FESCUE | 4” | |
| ANNUAL RYEGRASS | 2” | |
| WARM SEASON GRASSES |
| |
| TYPE | SHADE | SUN |
| BAHIA GRASS | 2” | 3” |
| BERMUDA GRASS | 1/2” | 1” |
| BUFFALO GRASS | ||
| CARPET GRASS | 1” | 2” |
| CENTIPEDE GRASS | 1” | 2” |
| ST. AUGUSTINE GRASS | 2” | 3” |
| ZOYSIA GRASS | 1/2” | 1” |
|
|
| |
NOTE: The cut height range for your mower is 1” - | |||
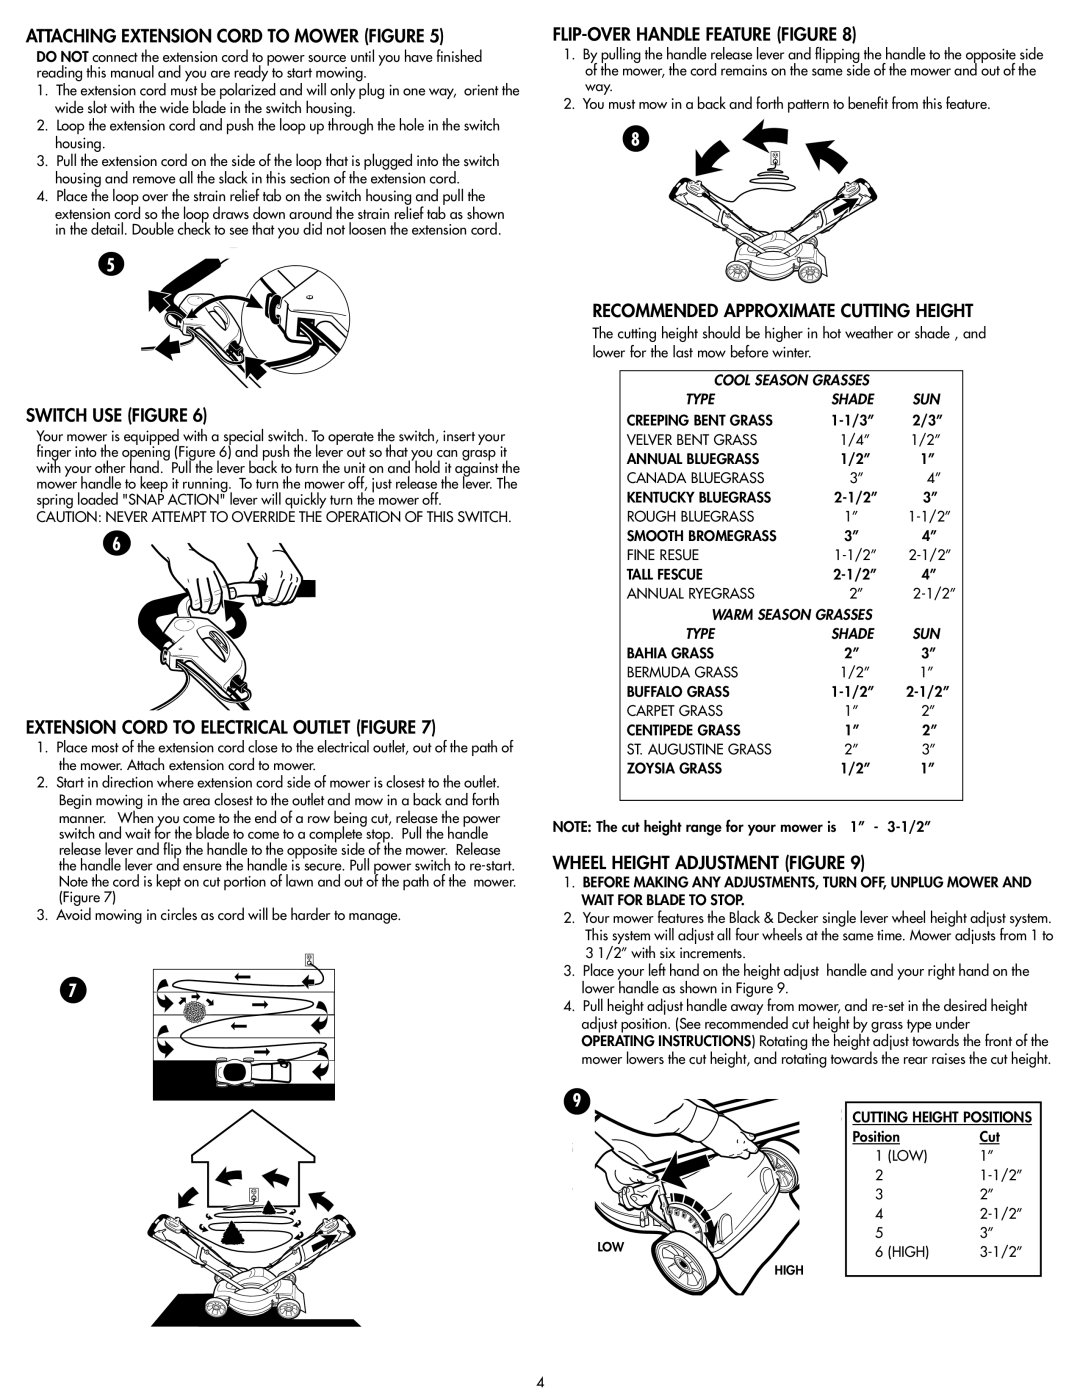
WHEEL HEIGHT ADJUSTMENT (FIGURE 9)
1.BEFORE MAKING ANY ADJUSTMENTS, TURN OFF, UNPLUG MOWER AND WAIT FOR BLADE TO STOP.
2.Your mower features the Black & Decker single lever wheel height adjust system. This system will adjust all four wheels at the same time. Mower adjusts from 1 to 3 1/2” with six increments.
3.Place your left hand on the height adjust handle and your right hand on the lower handle as shown in Figure 9.
4.Pull height adjust handle away from mower, and
9
LOW
HIGH
CUTTING HEIGHT POSITIONS
Position | Cut |
1 (LOW) | 1” |
2
32”
4
53”
6(HIGH)
4