If installing the Ethernet communication cable:
1Host computer can remain on.
Ethernet communication connector panel
Ethernet Power
connector supply connector
2 Plug the printer end of the Ethernet cable into the Ethernet 9 connector port on the printer (A). Make sure the connector snaps firmly in place.
3Plug the computer end of the Ethernet cable into the Ethernet port of the computer. Make sure the connector snaps firmly in place.
4After you have connected the printer, you must set the printer internal parameters for Ethernet operation. See “Ethernet terminology and setup” in the A776 Programming Guide.
Power supply cable
Caution: To avoid damage to the printer, connect the power supply cable last.
��� ��������� � ����
������� ����������� ������
������� �������
WARNING! Using this device without a grounded outlet is a safety hazard and voids the printer’s Warranty, Safety, FCC and CE Mark designation.
1Plug the power cord into the power supply.
2Route the cash drawer and power supply cables through the strain relief as shown below.
3Plug the power cord into the power supply, then plug the power supply into an outlet. The green light on the top cover will light up.
Cable routing
Prevent the printer from being accidentally unplugged by making sure the cables are routed as shown below.
Connector | Communication | Power | |
Cover | Connector | Supply | USB Cable |
(Closed) | (RS-232C 9-pin) | Cable | Strain Relief |
| (Route straight | (Straight | Power Supply |
| out back of | back) |
| Strain Relief |
| printer and | |
| | |
| tighten screws) | | |
USB
Cable
Cash Drawer
Cable
Back of Printer
USB | Power Supply | USB Cable |
Cable | Strain Relief | Strain Relief |
{Testing the printer
The test prints a complete list of printer settings (Diagnostic form) and partially cuts the paper. The test items listed depend on the printer model.
Instructions at the bottom of the printout describe how to enter the configuration menu and change the current settings of the printer.
Test Procedure
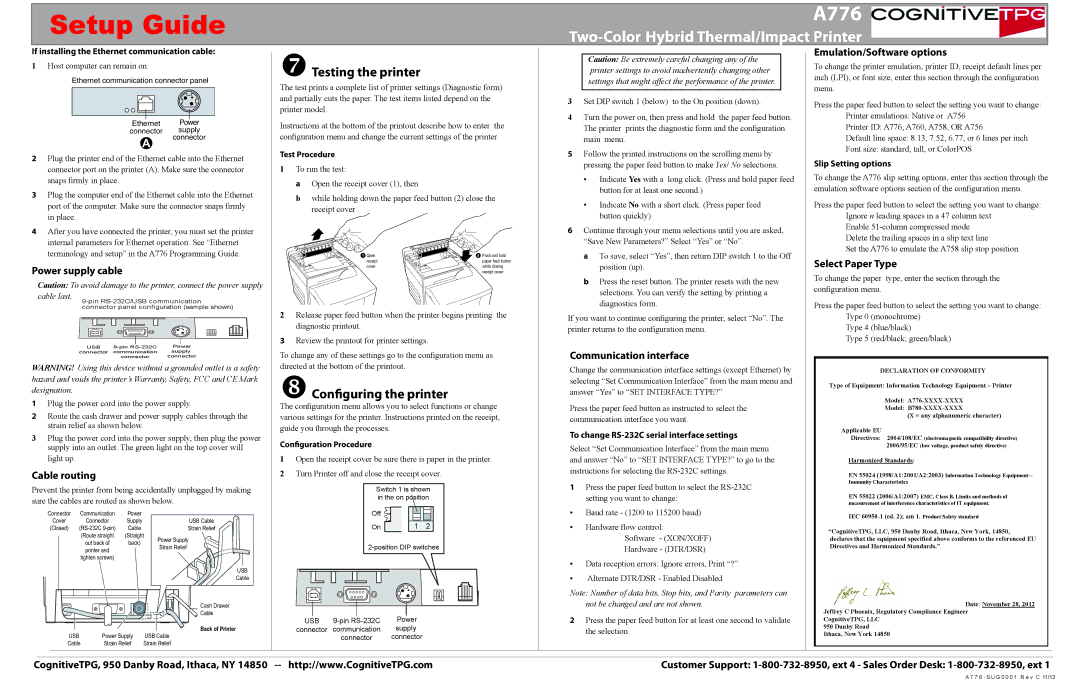
1To run the test:
a Open the receipt cover (1), then
b while holding down the paper feed button (2) close the receipt cover .
1 Open | 2 Push and hold |
receipt | paper feed button |
cover | while closing |
| receipt cover |
2Release paper feed button when the printer begins printing the diagnostic printout.
3Review the printout for printer settings.
To change any of these settings go to the configuration menu as directed at the bottom of the printout.
Configuring the printer
The configuration menu allows you to select functions or change various settings for the printer. Instructions printed on the receipt, guide you through the processes.
Configuration Procedure
1Open the receipt cover be sure there is paper in the printer.
2Turn Printer off and close the receipt cover.
������ �� ����� �� �� �� ��������
���������� ��� �������
| | | | | | | | | |
| | | | | | | | | |
| | | | | | | | | |
��� | | ����� ������� | ���� |
�������� | ������������� | ����� |
| | | | �������� | �������� |
Caution: Be extremely careful changing any of the printer settings to avoid inadvertently changing other settings that might affect the performance of the printer.
3Set DIP switch 1 (below) to the On position (down).
4Turn the power on, then press and hold the paper feed button.
The printer prints the diagnostic form and the configuration main menu.
5Follow the printed instructions on the scrolling menu by pressing the paper feed button to make Yes/ No selections.
•Indicate Yes with a long click. (Press and hold paper feed button for at least one second.)
•Indicate No with a short click. (Press paper feed button quickly)
6Continue through your menu selections until you are asked, “Save New Parameters?” Select “Yes” or “No”.
a To save, select “Yes”, then return DIP switch 1 to the Off position (up).
bPress the reset button. The printer resets with the new selections. You can verify the setting by printing a diagnostics form.
If you want to continue configuring the printer, select “No”. The printer returns to the configuration menu.
Communication interface
Change the communication interface settings (except Ethernet) by selecting “Set Communication Interface” from the main menu and answer “Yes” to “SET INTERFACE TYPE?”
Press the paper feed button as instructed to select the communication interface you want.
To change RS-232C serial interface settings
Select “Set Communication Interface” from the main menu and answer “No” to “SET INTERFACE TYPE?” to go to the instructions for selecting the RS-232C settings.
1Press the paper feed button to select the RS-232C setting you want to change:
•Baud rate - (1200 to 115200 baud)
•Hardware flow control:
Software - (XON/XOFF)
Hardware - (DTR/DSR)
•Data reception errors: Ignore errors, Print “?”
•Alternate DTR/DSR - Enabled Disabled
Note: Number of data bits, Stop bits, and Parity parameters can not be changed and are not shown.
2Press the paper feed button for at least one second to validate the selection.
Emulation/Software options
To change the printer emulation, printer ID, receipt default lines per inch (LPI), or font size, enter this section through the configuration menu.
Press the paper feed button to select the setting you want to change: Printer emulations: Native or A756
Printer ID: A776, A760, A758, OR A756
Default line space: 8.13, 7.52, 6.77, or 6 lines per inch
Font size: standard, tall, or ColorPOS
Slip Setting options
To change the A776 slip setting options, enter this section through the emulation software options section of the configuration menu.
Press the paper feed button to select the setting you want to change: Ignore n leading spaces in a 47 column text
Enable 51-column compressed mode Delete the trailing spaces in a slip text line
Set the A776 to emulate the A758 slip stop position
Select Paper Type
To change the paper type, enter the section through the configuration menu.
Press the paper feed button to select the setting you want to change: Type 0 (monochrome)
Type 4 (blue/black)
Type 5 (red/black; green/black)
DECLARATION OF CONFORMITY
Type of Equipment: Information Technology Equipment – Printer
Model: A776-XXXX-XXXX
Model: B780-XXXX-XXXX
(X = any alphanumeric character)
Applicable EU
Directives: 2004/108/EC (electromagnetic compatibility directive) 2006/95/EC (low voltage, product safety directive)
Harmonized Standards:
EN 55024 (1998/A1:2001/A2:2003) Information Technology Equipment – Immunity Characteristics
EN 55022 (2006/A1:2007) EMC, Class B, Limits and methods of measurement of interference characteristics of IT equipment.
IEC 60950-1 (ed. 2); am 1. Product Safety standard
“CognitiveTPG, LLC, 950 Danby Road, Ithaca, New York, 14850,
declares that the equipment specified above conforms to the referenced EU Directives and Harmonized Standards.”
Date: November 28, 2012
Jeffrey C Phoenix, Regulatory Compliance Engineer
CognitiveTPG, LLC
950 Danby Road
Ithaca, New York 14850
189-1300034 Rev C