When You Are Ready To Set Up Your Tent

–Select a level campsite clear of rocks, branches and other hard or sharp objects.

–Do not set up your tent under trees.

–For best results in windy conditions position the end of tent into the wind.

Eagle Rock9’6”x7’

Instructions apply to Part Number 9277C957

Main Tent Poles

Part No. 9277B953

Side Poles

Part No. 9277B952

Part No. 9277C950

Rainfly Pole

Rainfly


Part No. 9277C951


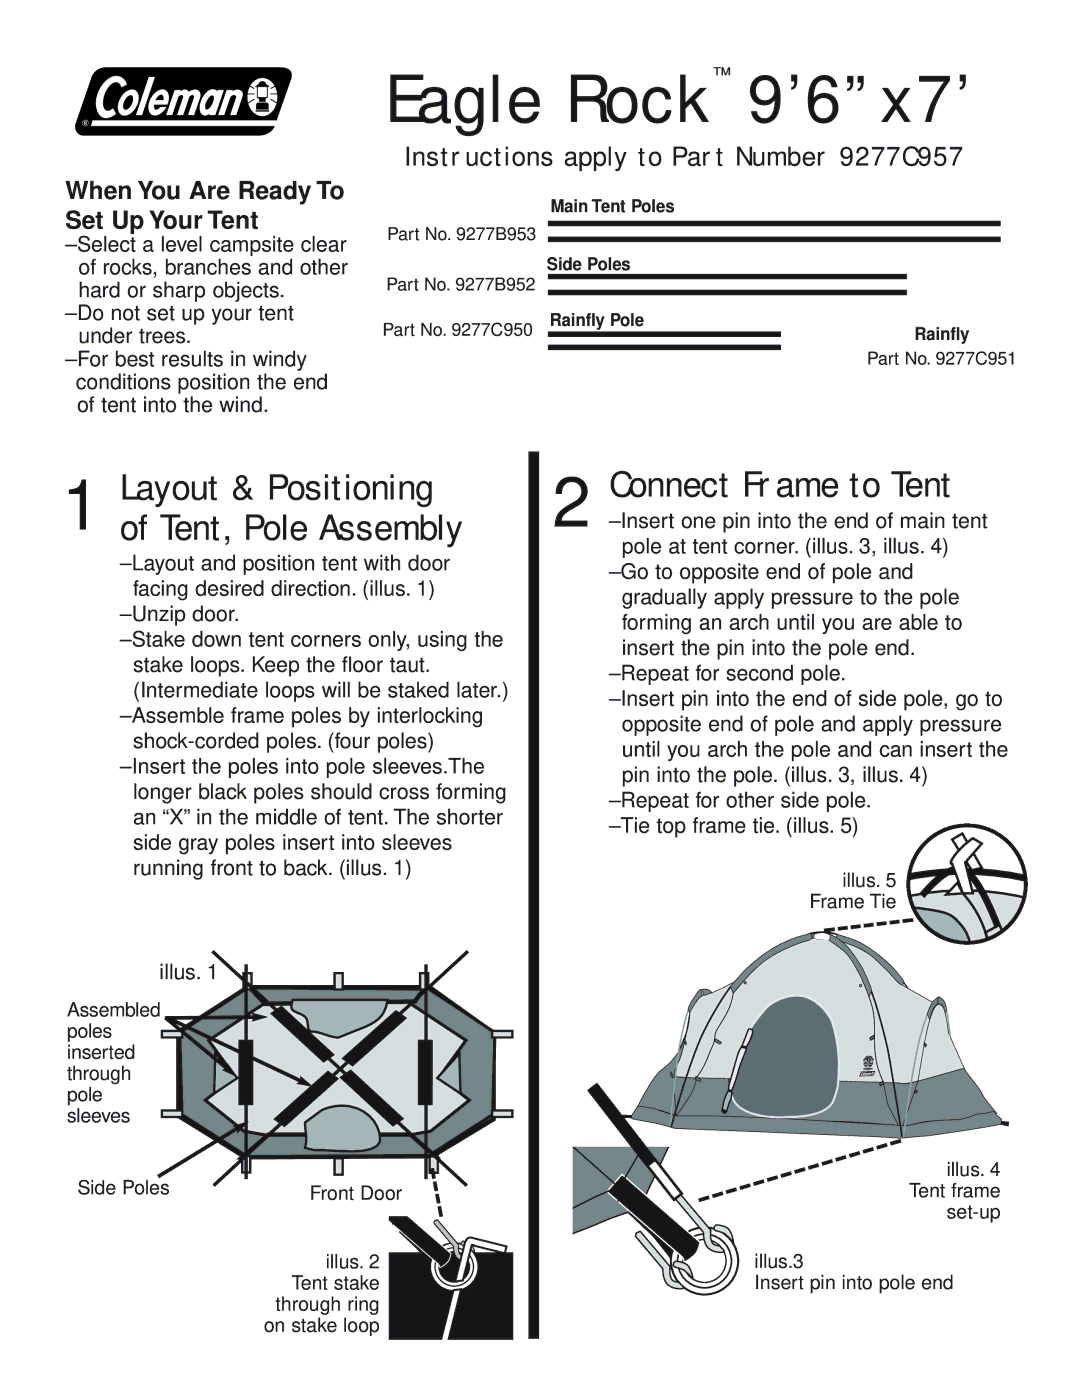
1 Layout & Positioning of Tent, Pole Assembly

–Layout and position tent with door facing desired direction. (illus. 1)

–Unzip door.

–Stake down tent corners only, using the stake loops. Keep the floor taut. (Intermediate loops will be staked later.)

–Assemble frame poles by interlocking shock-corded poles. (four poles)

–Insert the poles into pole sleeves.The longer black poles should cross forming an “X” in the middle of tent. The shorter side gray poles insert into sleeves running front to back. (illus. 1)

illus. 1

Assembled poles inserted through pole sleeves

Side Poles


Front Door


illus. 2


Tent stake


through ring


on stake loop


2 Connect Frame to Tent

–Insert one pin into the end of main tent pole at tent corner. (illus. 3, illus. 4)

–Go to opposite end of pole and gradually apply pressure to the pole forming an arch until you are able to insert the pin into the pole end.

–Repeat for second pole.

–Insert pin into the end of side pole, go to opposite end of pole and apply pressure until you arch the pole and can insert the pin into the pole. (illus. 3, illus. 4)

–Repeat for other side pole. –Tie top frame tie. (illus. 5)

illus. 5 Frame Tie

illus. 4 Tent frame set-up

illus.3

Insert pin into pole end

Page 1
Image 1
Coleman 96X7 manual Eagle Rock 9’6x7’, Connect Frame to Tent, Layout & Positioning of Tent, Pole Assembly