
9935 series specifications
The Coleman 9935 series stands out as a reliable choice for outdoor enthusiasts seeking durability and performance in their camping gear. Designed for versatility, this series comprises various tents, sleeping bags, and portable stoves, all embodying Coleman's commitment to quality and functionality.One of the primary features of the Coleman 9935 series is its user-friendly design. The tents come equipped with an innovative "WeatherTec" system, which includes patented welded floors and inverted seams to keep you dry during unexpected downpours. This waterproofing technology is a hallmark of Coleman products, ensuring that your camping experience remains comfortable regardless of the weather.
The 9935 series tents also boast easy setup and takedown processes. With features like continuous pole sleeves and Insta-Clip pole systems, they can be pitched quickly, allowing campers to set up their base without hassle. This efficiency makes them ideal for families or groups looking to maximize their time spent enjoying the outdoors rather than wrestling with complicated gear.
Breathability is another significant characteristic of the Coleman 9935 series. The tents come with large windows and ground vents that promote airflow, reducing condensation and enhancing comfort throughout the night. This feature is crucial when camping in varying weather conditions, providing a comfortable environment inside the tent.
For those looking to stay warm when the temperatures drop, the Coleman sleeping bags in the 9935 series utilize innovative insulation technologies. They incorporate Coleman's unique "thermo-lock" system, which prevents heat loss and keeps you cozy in chillier temperatures. Additionally, the sleeping bags are designed with durable materials that resist wear and tear, making them suitable for multiple seasons of use.
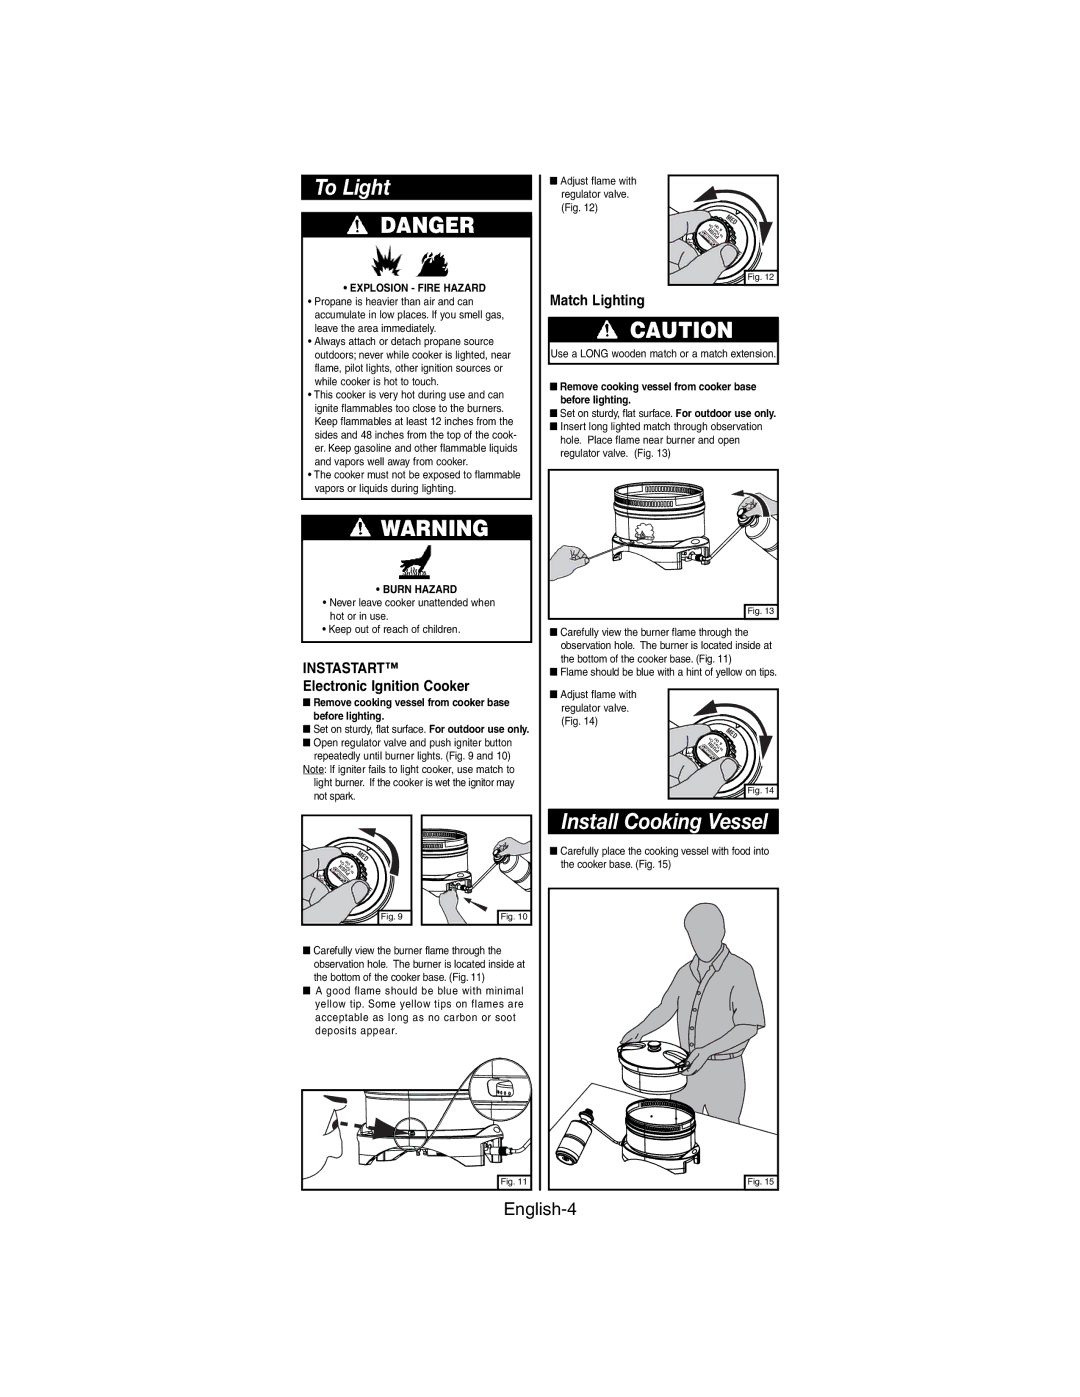
The Coleman 9935 series also includes efficient portable stoves that feature technology aimed at delivering high performance. With adjustable burners and an even heat distribution system, these stoves allow campers to prepare meals quickly and efficiently, whether in the backyard or deep in the wilderness.
Overall, the Coleman 9935 series combines cutting-edge technology, thoughtful design, and reliable performance. Its commitment to durability and ease of use makes it a go-to for outdoor lovers looking for dependable gear that enhances their camping experience. Whether you're setting off for a weekend getaway or embarking on an extended adventure, the Coleman 9935 series is equipped to meet your outdoor needs.