Grill Assembly (continued)
Assemble the Side Tables
1. Align the tabs on the Side |
| 2. Use firm pressure to push the | ||
Tables with the slots on the |
| Side Tables down and into | ||
side of the grill (Fig. 37). |
| place (Fig. 38). The joint | ||
|
|
| between the Side Tables | |
|
|
| and the Grill will be even. | |
|
|
|
|
|
Fig. 37 |
|
| Fig. 38 |
|
|
|
|
|
|
3.Engage the locks by firmly pushing the tabs into the slots (Fig. 39). Be sure to engage two locks on each side table.
Fig. 39
20# LP Cylinder Installation
NOTE: Your 9998 Series grill is set up from the factory to use a 20# refillable LP cylinder. You may purchase a 20# LP cylinder from the store where you bought your grill, or from your local propane dealer.
![]() WARNING
WARNING
This procedure MUST be performed OUTDOORS only! Be sure the L.P. cylinder valve is closed. Attach to the grill. Read and follow the directions on the cylinder.
20# LP Cylinder Installation (continued)
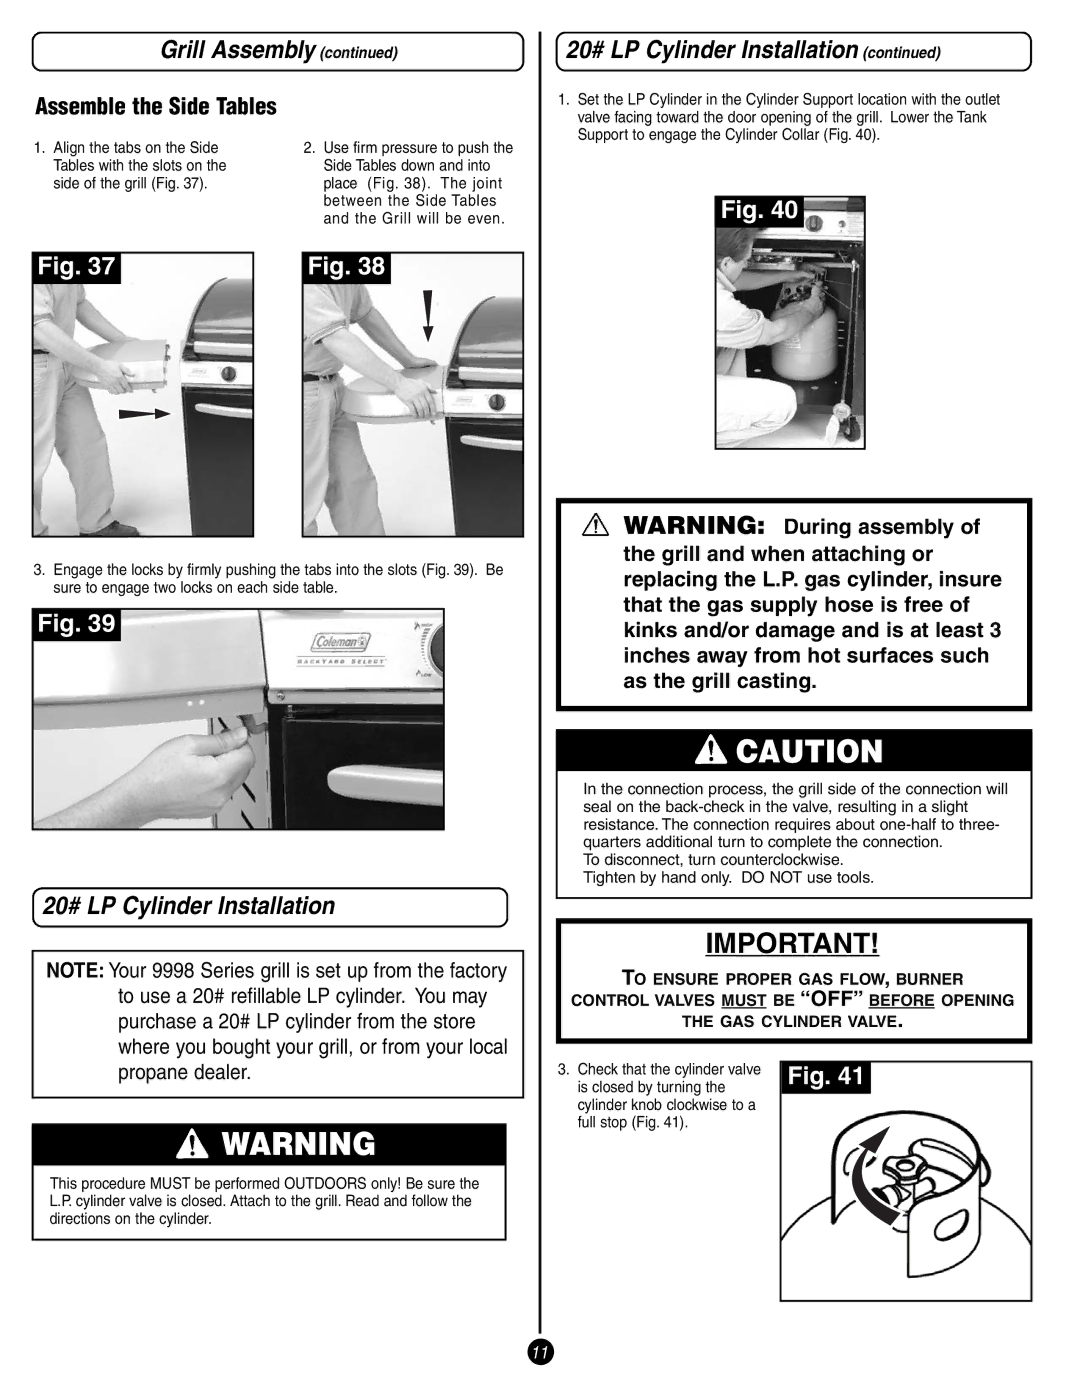
1.Set the LP Cylinder in the Cylinder Support location with the outlet valve facing toward the door opening of the grill. Lower the Tank Support to engage the Cylinder Collar (Fig. 40).
Fig. 40
WARNING: During assembly of the grill and when attaching or replacing the L.P. gas cylinder, insure that the gas supply hose is free of kinks and/or damage and is at least 3 inches away from hot surfaces such as the grill casting.
![]() CAUTION
CAUTION
In the connection process, the grill side of the connection will seal on the
To disconnect, turn counterclockwise. Tighten by hand only. DO NOT use tools.
IMPORTANT!
TO ENSURE PROPER GAS FLOW, BURNER
CONTROL VALVES MUST BE “OFF” BEFORE OPENING
THE GAS CYLINDER VALVE.
3. Check that the cylinder valve | Fig. 41 |
|
is closed by turning the |
|
|
cylinder knob clockwise to a |
|
|
full stop (Fig. 41). |
|
|
|
|
|
11