Installation Guide
www.powerleap.com • www.friendtech.com
Installation
Installing the
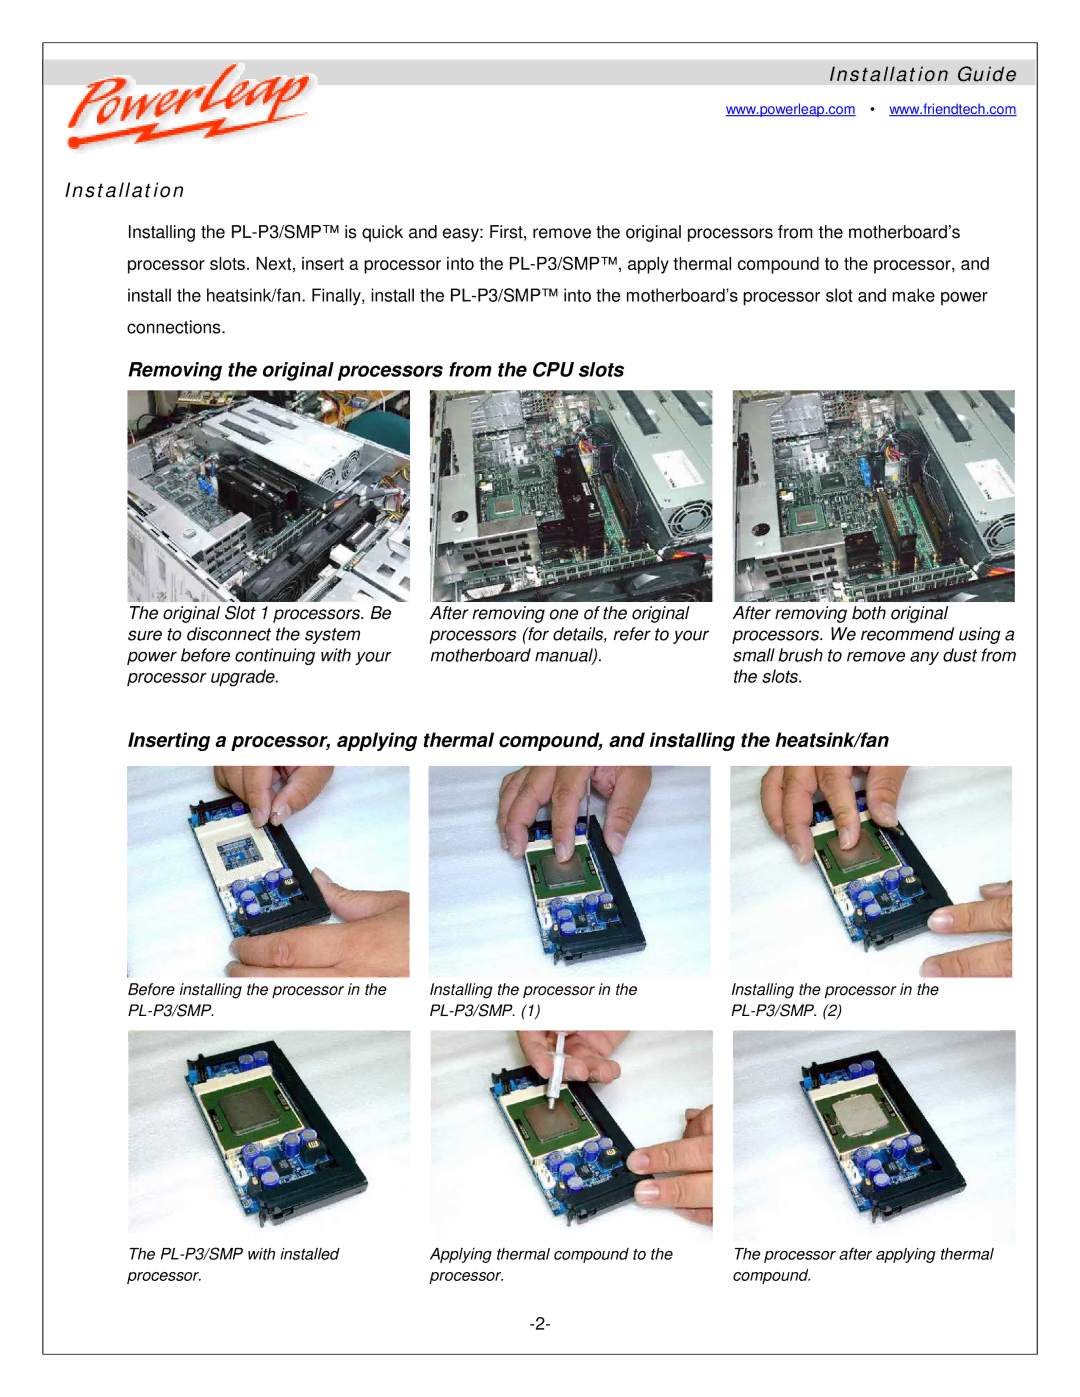
Removing the original processors from the CPU slots
The original Slot 1 processors. Be sure to disconnect the system power before continuing with your processor upgrade.
After removing one of the original processors (for details, refer to your motherboard manual).
After removing both original processors. We recommend using a small brush to remove any dust from the slots.
Inserting a processor, applying thermal compound, and installing the heatsink/fan
Before installing the processor in the
Installing the processor in the
Installing the processor in the
The | Applying thermal compound to the |
processor. | processor. |
The processor after applying thermal compound.