Continuous Flow Icemaker Service Manual
INSTALLATION AND SHAFT SEAL REPLACEMENT 500
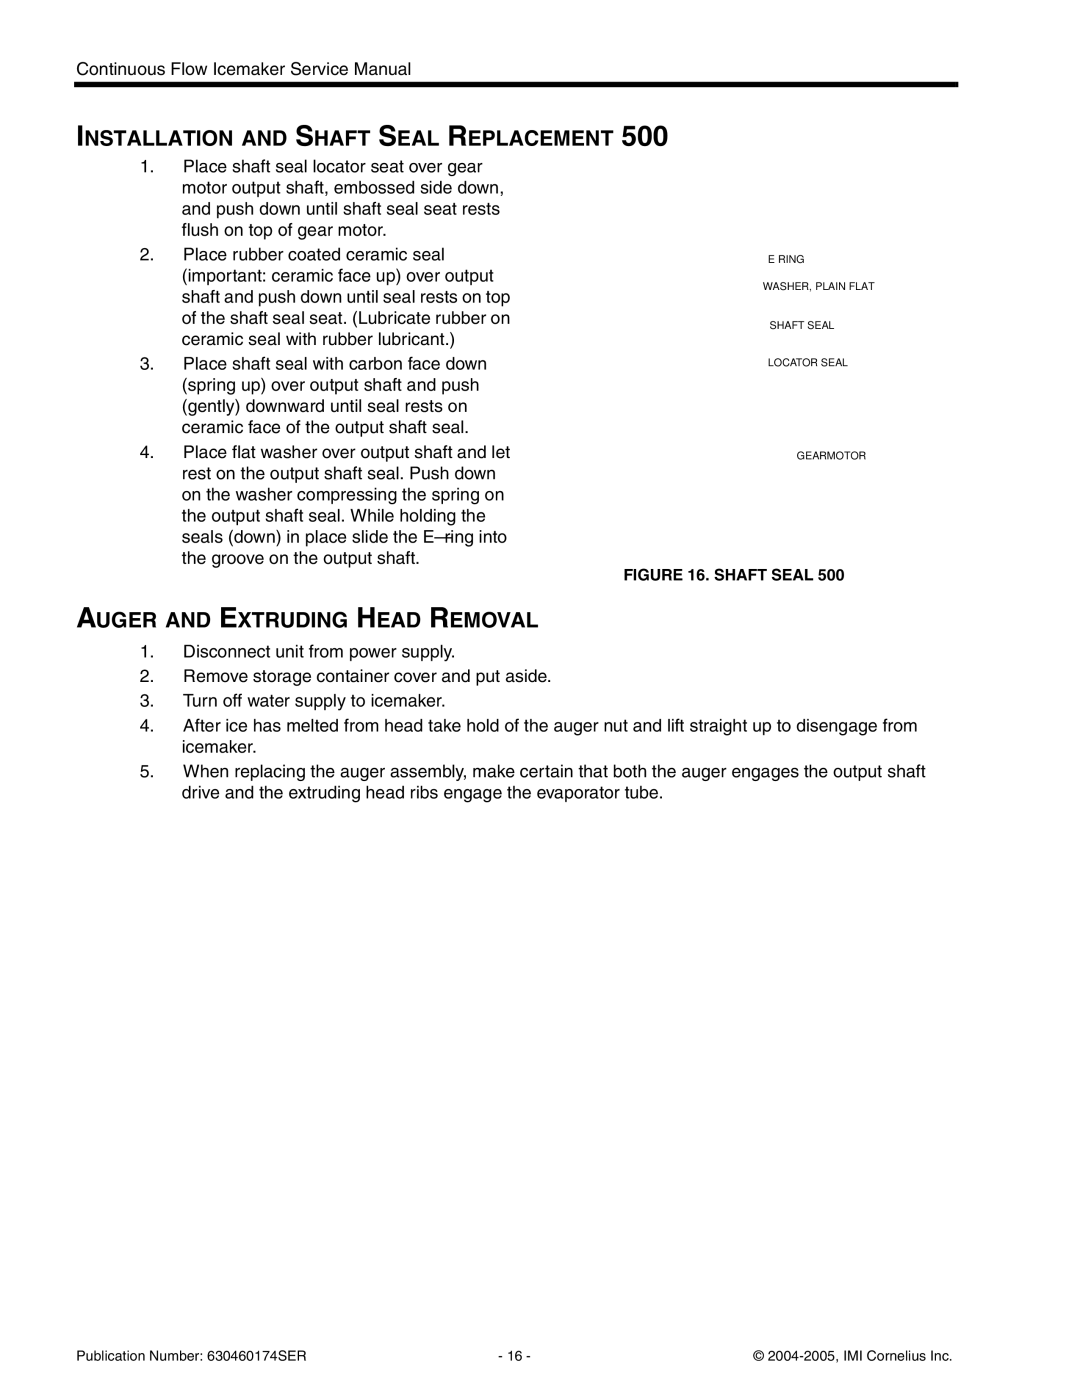
1.Place shaft seal locator seat over gear motor output shaft, embossed side down, and push down until shaft seal seat rests flush on top of gear motor.
2.Place rubber coated ceramic seal (important: ceramic face up) over output shaft and push down until seal rests on top of the shaft seal seat. (Lubricate rubber on ceramic seal with rubber lubricant.)
3.Place shaft seal with carbon face down (spring up) over output shaft and push (gently) downward until seal rests on ceramic face of the output shaft seal.
4.Place flat washer over output shaft and let rest on the output shaft seal. Push down on the washer compressing the spring on the output shaft seal. While holding the seals (down) in place slide the
WASHER, PLAIN FLAT
SHAFT SEAL
LOCATOR SEAL
GEARMOTOR
FIGURE 16. SHAFT SEAL 500
AUGER AND EXTRUDING HEAD REMOVAL
1.Disconnect unit from power supply.
2.Remove storage container cover and put aside.
3.Turn off water supply to icemaker.
4.After ice has melted from head take hold of the auger nut and lift straight up to disengage from icemaker.
5.When replacing the auger assembly, make certain that both the auger engages the output shaft drive and the extruding head ribs engage the evaporator tube.
Publication Number: 630460174SER | - 16 - | © |