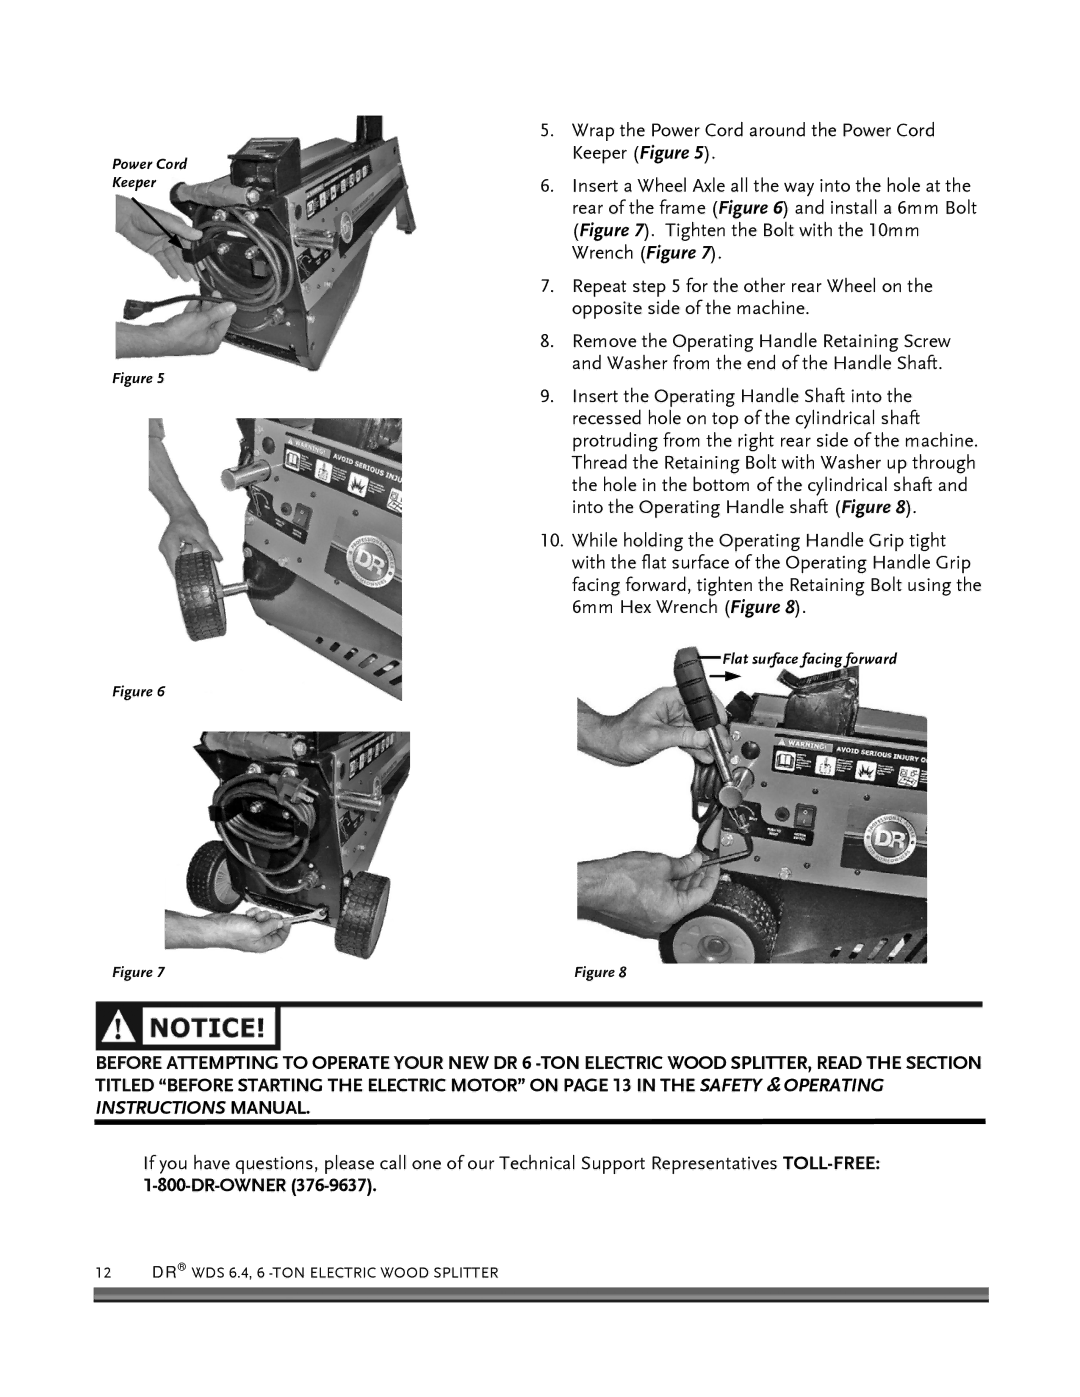
Power Cord Keeper
Figure 5
Figure 6
Figure 7
5.Wrap the Power Cord around the Power Cord Keeper (Figure 5).
6.Insert a Wheel Axle all the way into the hole at the rear of the frame (Figure 6) and install a 6mm Bolt (Figure 7). Tighten the Bolt with the 10mm Wrench (Figure 7).
7.Repeat step 5 for the other rear Wheel on the opposite side of the machine.
8.Remove the Operating Handle Retaining Screw and Washer from the end of the Handle Shaft.
9.Insert the Operating Handle Shaft into the recessed hole on top of the cylindrical shaft protruding from the right rear side of the machine. Thread the Retaining Bolt with Washer up through the hole in the bottom of the cylindrical shaft and into the Operating Handle shaft (Figure 8).
10.While holding the Operating Handle Grip tight with the flat surface of the Operating Handle Grip facing forward, tighten the Retaining Bolt using the 6mm Hex Wrench (Figure 8).
Flat surface facing forward
Figure 8
BEFORE ATTEMPTING TO OPERATE YOUR NEW DR 6
If you have questions, please call one of our Technical Support Representatives
1-800-DR-OWNER (376-9637).
12 DR® WDS 6.4, 6