4. Attach the Wheels
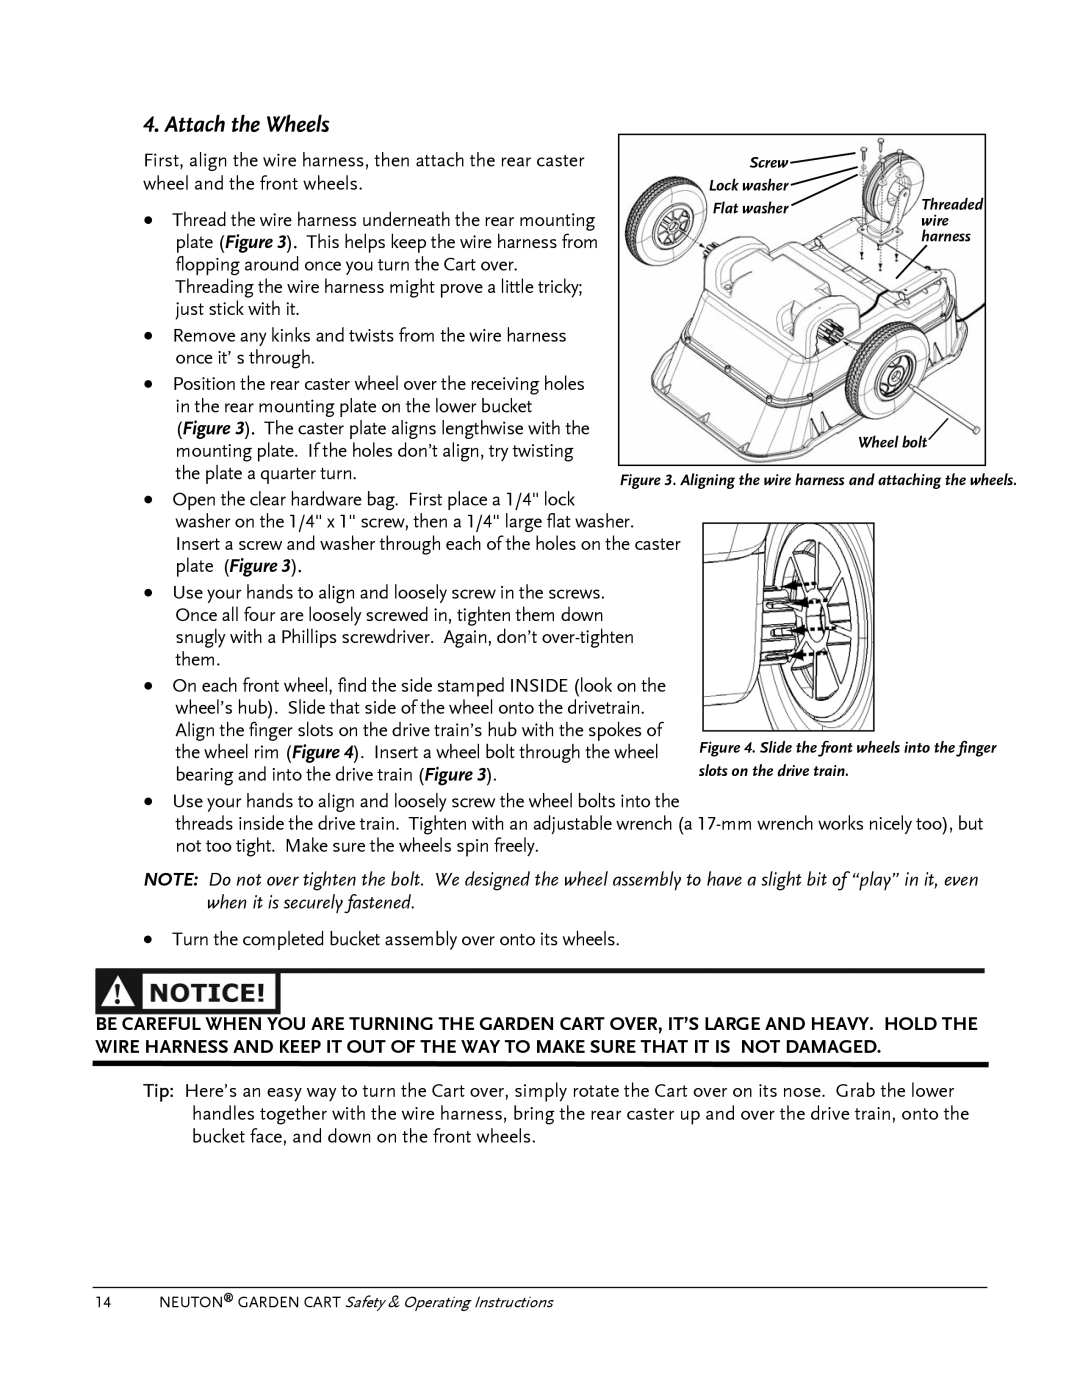
First, align the wire harness, then attach the rear caster | Screw |
|
wheel and the front wheels. | Lock washer |
|
• Thread the wire harness underneath the rear mounting | Flat washer | Threaded |
| wire | |
plate (Figure 3). This helps keep the wire harness from |
| harness |
flopping around once you turn the Cart over. |
|
|
Threading the wire harness might prove a little tricky; |
|
|
just stick with it. |
|
|
• Remove any kinks and twists from the wire harness |
|
|
once it’ s through. |
|
|
• Position the rear caster wheel over the receiving holes |
|
|
in the rear mounting plate on the lower bucket |
|
|
| (Figure 3). The caster plate aligns lengthwise with the |
| Wheel bolt | |||
| mounting plate. If the holes don’t align, try twisting |
| ||||
|
|
|
|
| ||
| the plate a quarter turn. |
|
|
|
| |
• | Figure 3. Aligning the wire harness and attaching the wheels. | |||||
Open the clear hardware bag. First place a 1/4" lock | ||||||
|
|
|
| |||
| washer on the 1/4" x 1" screw, then a 1/4" large flat washer. |
|
|
| ||
|
|
|
| |||
| Insert a screw and washer through each of the holes on the caster |
|
|
| ||
| plate (Figure 3). |
|
|
|
| |
•Use your hands to align and loosely screw in the screws. Once all four are loosely screwed in, tighten them down snugly with a Phillips screwdriver. Again, don’t
•On each front wheel, find the side stamped INSIDE (look on the wheel’s hub). Slide that side of the wheel onto the drivetrain. Align the finger slots on the drive train’s hub with the spokes of the wheel rim (Figure 4). Insert a wheel bolt through the wheel bearing and into the drive train (Figure 3).
Figure 4. Slide the front wheels into the finger slots on the drive train.
•Use your hands to align and loosely screw the wheel bolts into the
threads inside the drive train. Tighten with an adjustable wrench (a
NOTE: Do not over tighten the bolt. We designed the wheel assembly to have a slight bit of “play” in it, even when it is securely fastened.
•Turn the completed bucket assembly over onto its wheels.
BE CAREFUL WHEN YOU ARE TURNING THE GARDEN CART OVER, IT’S LARGE AND HEAVY. HOLD THE WIRE HARNESS AND KEEP IT OUT OF THE WAY TO MAKE SURE THAT IT IS NOT DAMAGED.
Tip: Here’s an easy way to turn the Cart over, simply rotate the Cart over on its nose. Grab the lower handles together with the wire harness, bring the rear caster up and over the drive train, onto the bucket face, and down on the front wheels.