CLEAN DECK &
CHECK / REPLACE MOWER BLADES
Service Intervah 25 hours or as required.
WARNING
For your personal safety, do not handle the sharp mower blades with bare hands. Careless or improper handling of blades may result in serious
injury.
WARNING
For your personal safety, blade mounting capscrews must each be installed with two spring washers or a hex washer and spring washer, then securely tightened. Torque blade mounting nut to 80 - 90 ft. Ibs. (108 - 122 Nm).
1.Remove mower deck (see "Mower Deck Removal" in the OPERATION section).
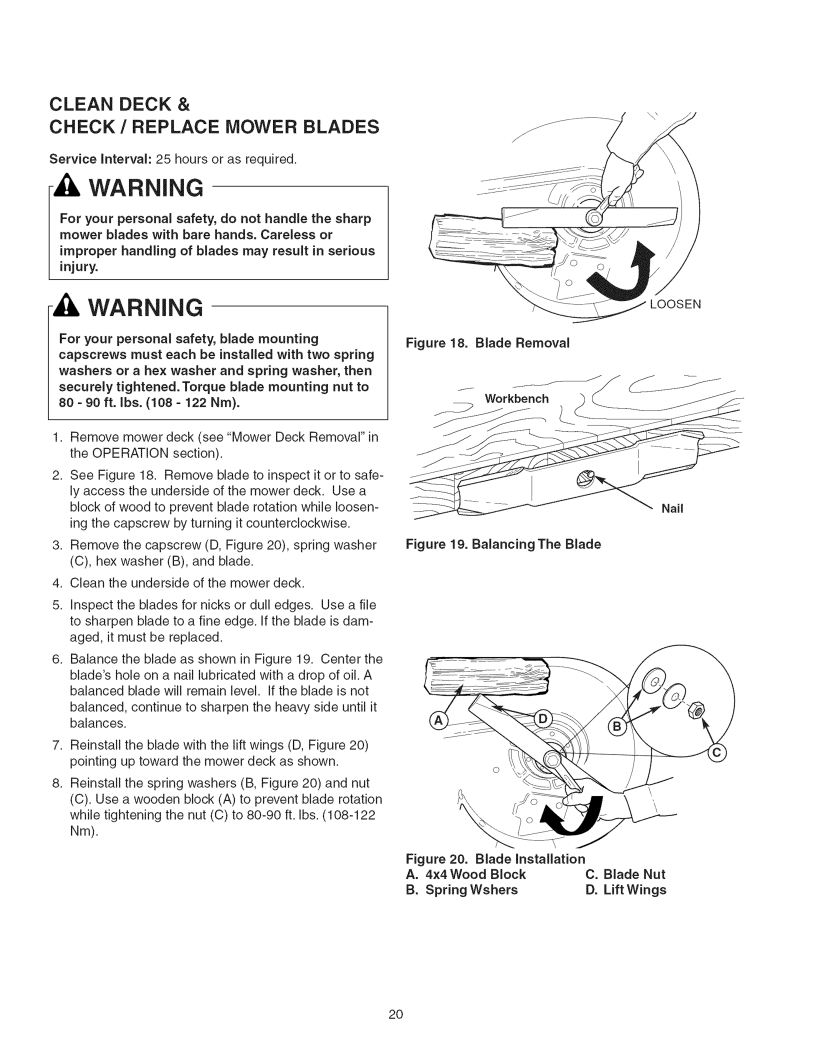
2.See Figure 18. Remove blade to inspect it or to safe- ly access the underside of the mower deck. Use a block of wood to prevent blade rotation while loosen- ing the capscrew by turning it counterclockwise.
3.Remove the capscrew (D, Figure 20), spring washer (C), hex washer (B), and blade.
4.Clean the underside of the mower deck.
5.Inspect the blades for nicks or dull edges. Use a file to sharpen blade to a fine edge. If the blade is dam- aged, it must be replaced.
6.Balance the blade as shown in Figure 19. Center the
blade'shole on a nail lubricated with a drop of oil. A balanced blade will remain level. If the blade is not
balanced, continue to sharpen the heavy side until it balances.
7.Reinstall the blade with the lift wings (D, Figure 20) pointing up toward the mower deck as shown.
8.Reinstall the spring washers (B, Figure 20) and nut
(C). Use a wooden block (A) to prevent blade rotation while tightening the nut (C) to
Figure 18. Blade Removal
Workbench
C
Nail
Figure 19. Balancing The Blade
Figure | 20. | Blade installation |
| |
A. | 4x4 | Wood Block | C. Blade Nut | |
B. | Spring | Wshers | D. Lift Wings | |
2O
