INSTALLING EXTENSION WINGS (FIG. E)
To avoid injury or possible damage to the tool, support long work pieces by installing the extension wings to extend the work support surface.
When using extension and stop block on the right side, hold down clamp must also be in right side. Using hold down clamp on the left side during this operation can cause
INSTALLING THE STOP BLOCK (FIG. E):
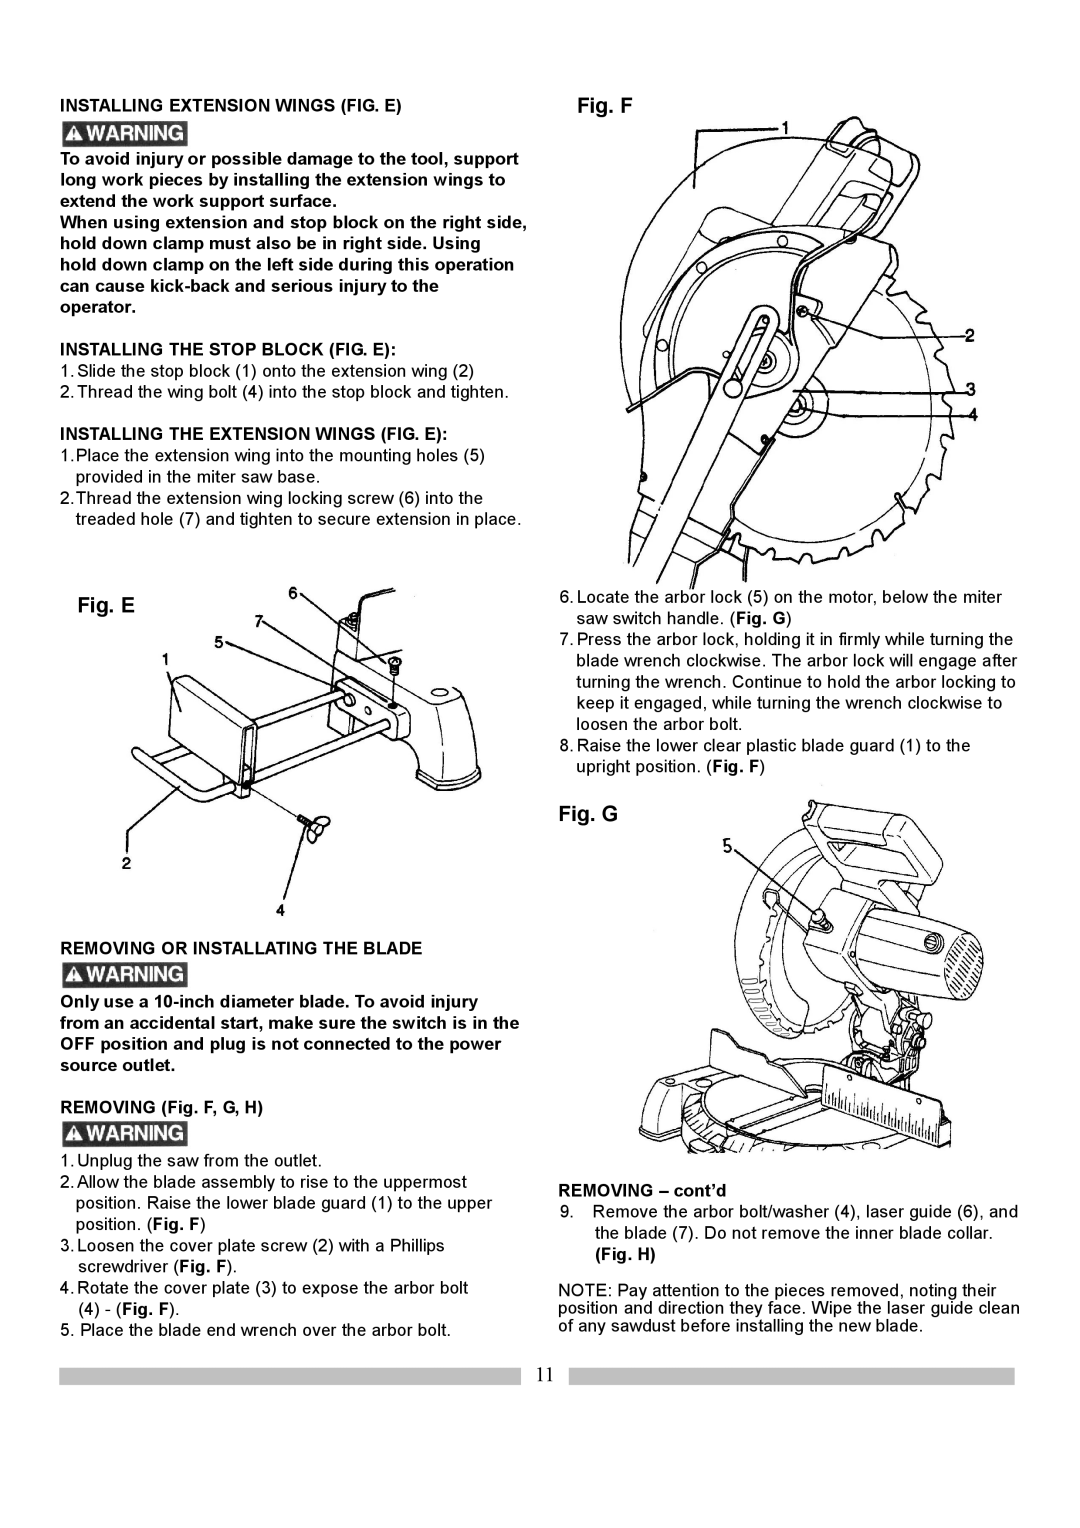
1.Slide the stop block (1) onto the extension wing (2)
2.Thread the wing bolt (4) into the stop block and tighten.
INSTALLING THE EXTENSION WINGS (FIG. E):
1.Place the extension wing into the mounting holes (5) provided in the miter saw base.
2.Thread the extension wing locking screw (6) into the treaded hole (7) and tighten to secure extension in place.
Fig. E
REMOVING OR INSTALLATING THE BLADE
Only use a
REMOVING (Fig. F, G, H)
1.Unplug the saw from the outlet.
2.Allow the blade assembly to rise to the uppermost position. Raise the lower blade guard (1) to the upper position. (Fig. F)
3.Loosen the cover plate screw (2) with a Phillips screwdriver (Fig. F).
4.Rotate the cover plate (3) to expose the arbor bolt
(4)- (Fig. F).
5.Place the blade end wrench over the arbor bolt.
Fig. F
6.Locate the arbor lock (5) on the motor, below the miter saw switch handle. (Fig. G)
7.Press the arbor lock, holding it in firmly while turning the blade wrench clockwise. The arbor lock will engage after turning the wrench. Continue to hold the arbor locking to keep it engaged, while turning the wrench clockwise to loosen the arbor bolt.
8.Raise the lower clear plastic blade guard (1) to the upright position. (Fig. F)
Fig. G
REMOVING – cont’d
9.Remove the arbor bolt/washer (4), laser guide (6), and the blade (7). Do not remove the inner blade collar.
(Fig. H)
NOTE: Pay attention to the pieces removed, noting their position and direction they face. Wipe the laser guide clean of any sawdust before installing the new blade.
11
