Installing Blade (Fig. H, I, J)

Unplug the miter saw before changing/installing the blade.

I.Install a I 0 in. blade with a 5/8 in. arbor, making sure the rotation arrow on the blade matches the

clockwise rotation arrow on the upper guard and the blade teeth are pointing downward.

2.Place the outer blade collar (8) against the blade and on the arbor. Thread the arbor bolt (6) onto the arbor

(Fig. J) in a counterclockwise direction.

IMPORTANT: Make sure the flats of the blade collars are engaged with the flats on the arbor shaft.

3.Place the blade wrench on the arbor bolt.

4.Press the arbor lock (5), holding it in firmly while turning the blade counterclockwise. When arbor lock engages, continue to press it in while tightening the arbor bolt securely.

5.Rotate the cover plate (3) back to its original position until the slot in the cover plate engages with the cover plate screw (2). While holding the lower blade guard, tighten the screw with a Phillips screwdriver. (Fig. H) NOTE: The lower blade guard must be raised to the upright position to access the cover plate screw.

6.Lower the blade guard (1) and verify that the operation of the guard does not bind or stick. (Fig. H)

7.Be sure the arbor lock is released so the blade turns freely.

[A wARN.'JGI

To avoid injury, never use the saw without the cover plate secure in place. It keeps the arbor bolt from falling out if it accidentally loosens, and helps prevent the spinning blade from coming off the saw.

Make sure the collars are clean and properly arranged. Lower the blade into the lower table and check for any contact with the base or the miter table by spinning the blade manually.

[A WAR.ING

For your own safety, never connect the plug to power source outlet until all the adjustment steps are complete and you have read and understood the safety and operational instructions.

THE LASER GUIDE (FIG. K)

[A WARNING

Make the ON/OFF switch childproof. Insert a padlock, or chain with padlock, through the holes

(2)in the trigger switch, locking the tool's switch, preventing children and other unqualified users

from turning the machine on.

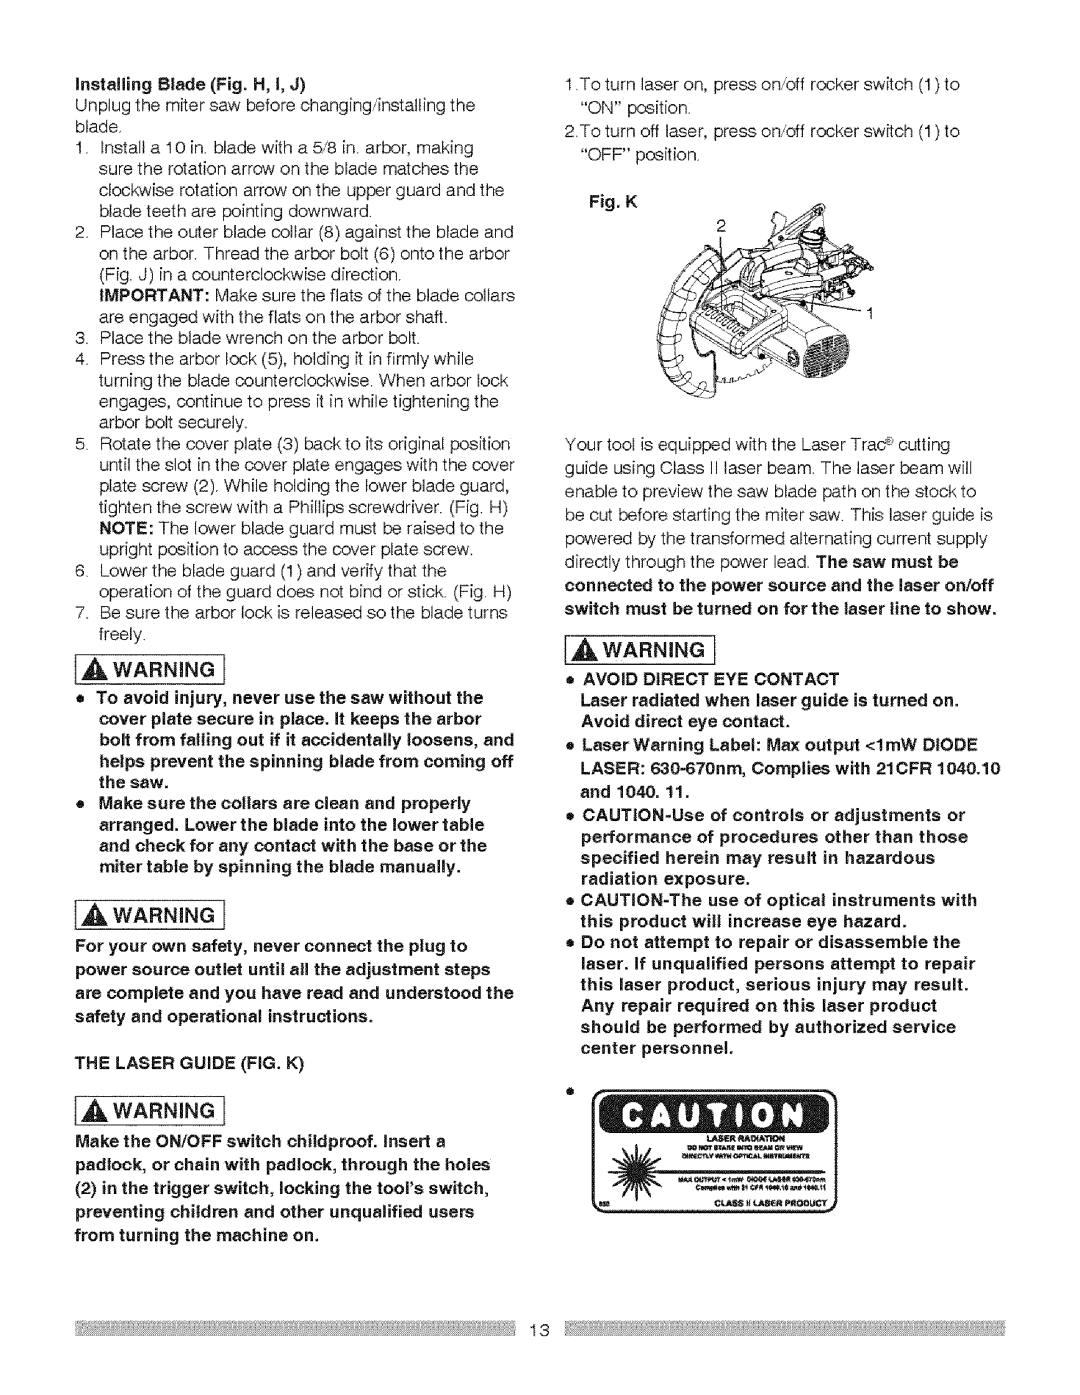
1 .To turn laser on, press on/off rocker switch (1) to "ON" position:

2.To turn off laser, press on/off rocker switch (1) to "OFF" position.

Fig. K

Your tool is equipped with the Laser Trad _ cutting guide using Class II laser beam. The laser beam will enable to preview the saw blade path on the stock to be cut before starting the miter saw. This laser guide is powered by the transformed alternating current supply directly through the power lead. The saw must be connected to the power source and the laser on/off switch must be turned on for the laser line to show.

[A WARNING]

AVOID DIRECT EYE CONTACT

Laser radiated when laser guide is turned on. Avoid direct eye contact.

Laser Warning Label: Max output <lmW DIODE

LASER: 630-670nm, Complies with 21CFR 1040.10 and 1040. 11.

CAUTION-Use of controls or adjustments or performance of procedures other than those specified herein may result in hazardous radiation exposure.

®CAUTiON-The use of optical instruments with this product will increase eye hazard.

=Do not attempt to repair or disassemble the laser. If unqualified persons attempt to repair this laser product, serious injury may result. Any repair required on this laser product should be performed by authorized service center personnel.

13

Page 13
Image 13
Craftsman 137.21237 operating instructions Laser Guide FIG. K, From turning the machine on, Avoid Direct EYE Contact

137.21237 specifications

The Craftsman 137.21237 table saw is a versatile and robust woodworking tool that caters to both amateur and professional woodworkers. Renowned for its reliability and precision, this table saw has made a mark in the DIY community and among seasoned craftspeople alike.

One of the standout features of the Craftsman 137.21237 is its powerful motor. With a 15-amp motor, it provides ample power to tackle a variety of cutting tasks. This motor facilitates smooth cuts through hardwoods and thick materials, ensuring that users experience consistent performance without lag. The saw comes equipped with a 10-inch blade that spins at impressive RPMs, allowing for clean, efficient cuts across different types of wood and plywood.

Another key characteristic of this table saw is its durable construction. The table surface is made of cast iron, providing a stable base that minimizes vibrations during operation. This stability is crucial for achieving accuracy in cuts, especially for intricate projects that require precise measurements. The table itself measures a generous size, allowing for larger workpieces to be cut with ease.

The Craftsman 137.21237 also boasts an advanced rip fence system. The fence is designed for quick adjustments, enabling users to make straight, consistent cuts at various widths. The easy locking mechanism ensures that your settings remain in place while cutting, enhancing safety and accuracy.

Safety is a paramount concern with the Craftsman 137.21237. It features an integrated blade guard, which provides protection against accidental contact with the blade. Additionally, the saw includes riving knife technology, which helps prevent kickback by keeping the wood aligned during cuts. This safety technology is crucial for woodworkers looking to minimize risk while operating powerful equipment.

Portability is another important aspect of the Craftsman 137.21237. Despite its sturdy build, the saw is designed with user convenience in mind. It includes onboard storage for accessories and additional parts, as well as a foldable stand, making it easy to transport and store when not in use.

In summary, the Craftsman 137.21237 table saw combines power, durability, and precision. With its strong 15-amp motor, robust cast iron construction, advanced safety features, and user-friendly design, it stands out as a reliable choice for anyone engaged in woodworking projects. Whether you're building furniture, crafting cabinetry, or undertaking home improvement tasks, this table saw provides the functionality and performance that can enhance your woodworking experience.