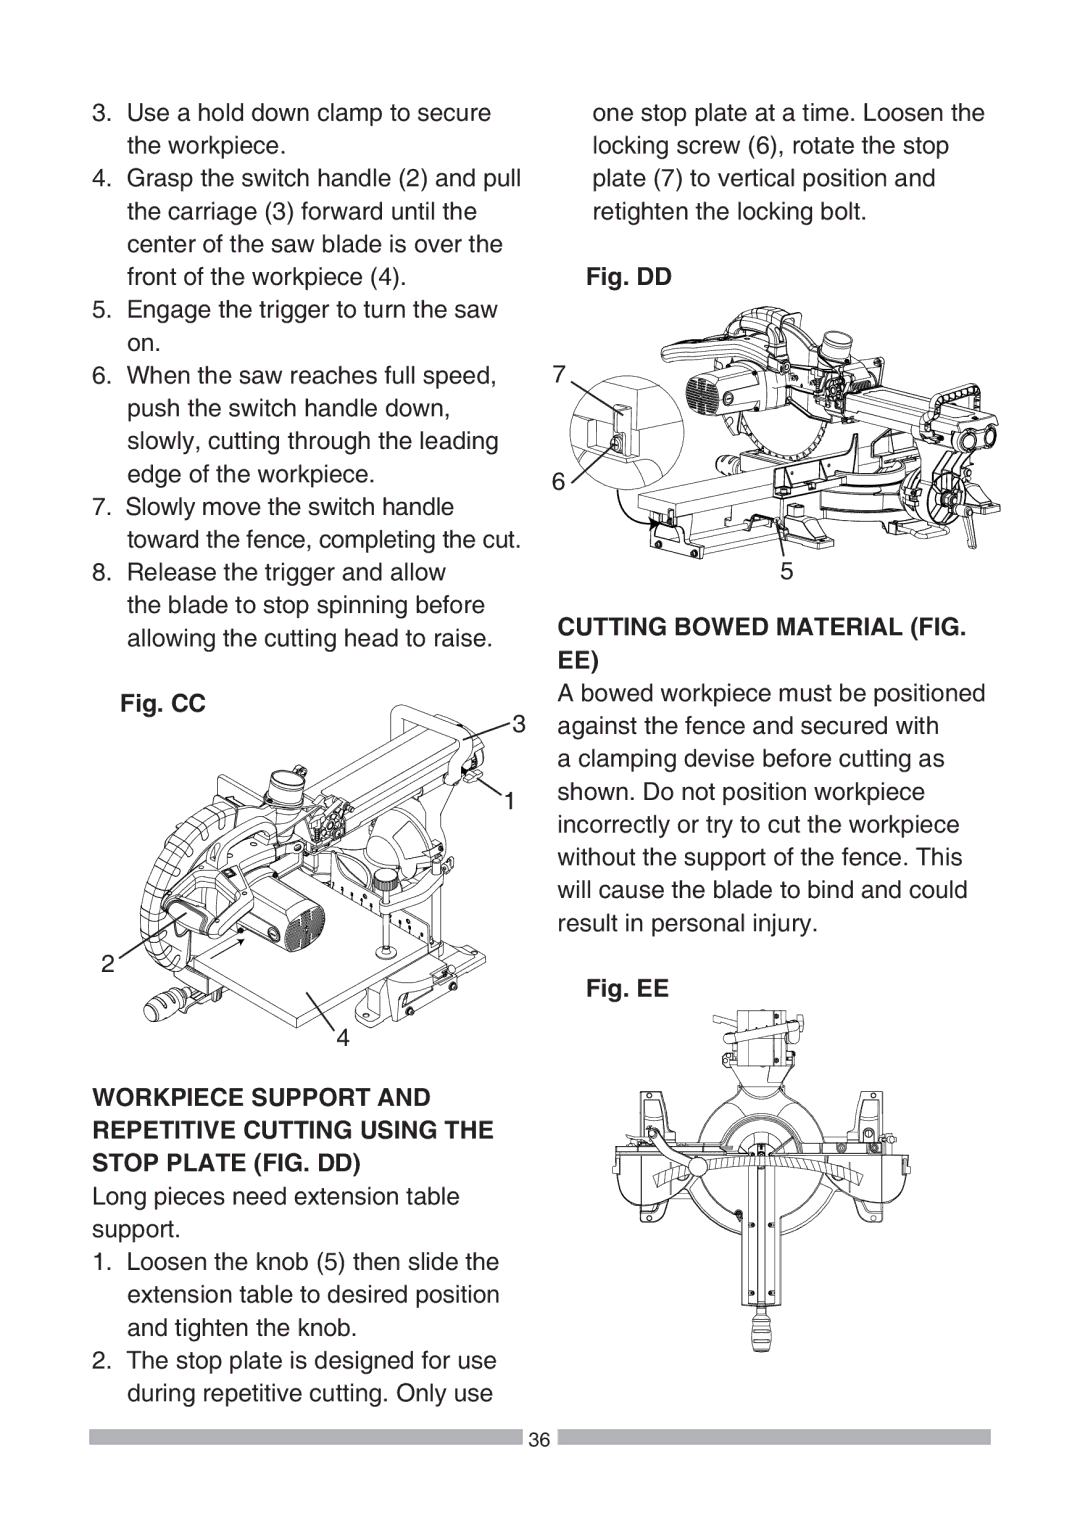
3.Use a hold down clamp to secure the workpiece.
4.Grasp the switch handle (2) and pull the carriage (3) forward until the center of the saw blade is over the front of the workpiece (4).
5.Engage the trigger to turn the saw on.
6.When the saw reaches full speed, push the switch handle down, slowly, cutting through the leading edge of the workpiece.
7.Slowly move the switch handle toward the fence, completing the cut.
8.Release the trigger and allow the blade to stop spinning before allowing the cutting head to raise.
one stop plate at a time. Loosen the locking screw (6), rotate the stop plate (7) to vertical position and retighten the locking bolt.
Fig. DD
7
6
5
CUTTING BOWED MATERIAL (FIG. EE)
Fig. CC
2
4
WORKPIECE SUPPORT AND REPETITIVE CUTTING USING THE STOP PLATE (FIG. DD)
Long pieces need extension table support.
1.Loosen the knob (5) then slide the extension table to desired position and tighten the knob.
2.The stop plate is designed for use during repetitive cutting. Only use
A bowed workpiece must be positioned
3against the fence and secured with a clamping devise before cutting as
1 shown. Do not position workpiece incorrectly or try to cut the workpiece
without the support of the fence. This will cause the blade to bind and could result in personal injury.
Fig. EE
![]() 36
36 ![]()
