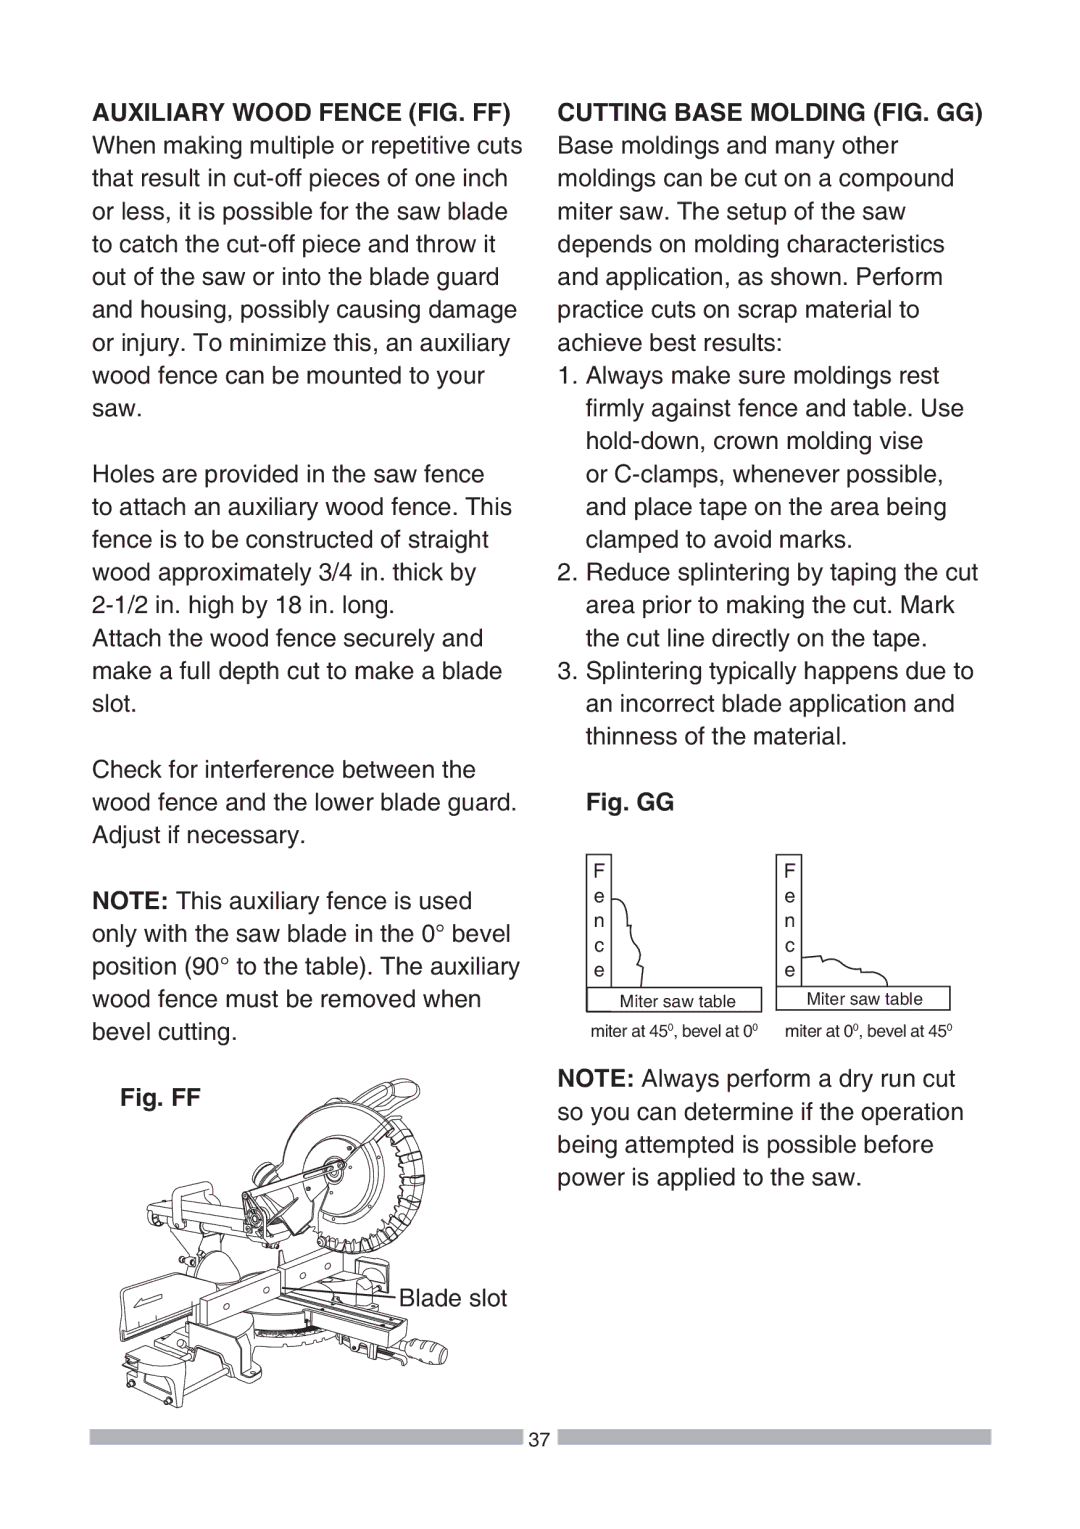
AUXILIARY WOOD FENCE (FIG. FF)
When making multiple or repetitive cuts that result in
Holes are provided in the saw fence to attach an auxiliary wood fence. This fence is to be constructed of straight wood approximately 3/4 in. thick by
Attach the wood fence securely and make a full depth cut to make a blade slot.
Check for interference between the wood fence and the lower blade guard. Adjust if necessary.
NOTE: This auxiliary fence is used only with the saw blade in the 0° bevel position (90° to the table). The auxiliary wood fence must be removed when bevel cutting.
Fig. FF
![]() Blade slot
Blade slot
CUTTING BASE MOLDING (FIG. GG)
Base moldings and many other moldings can be cut on a compound miter saw. The setup of the saw depends on molding characteristics and application, as shown. Perform practice cuts on scrap material to achieve best results:
1.Always make sure moldings rest firmly against fence and table. Use
or
2.Reduce splintering by taping the cut area prior to making the cut. Mark the cut line directly on the tape.
3.Splintering typically happens due to an incorrect blade application and thinness of the material.
Fig. GG
F | F |
e | e |
n | n |
c | c |
e | e |
Miter saw table | Miter saw table |
miter at 450, bevel at 00 | miter at 00, bevel at 450 |
NOTE: Always perform a dry run cut so you can determine if the operation being attempted is possible before power is applied to the saw.
![]() 37
37 ![]()
