POWER SOURCE
Band saw requires a 115 or 230 volt, 60 Hz power source. Band saw is shipped with motor and controls prewired for 115 volt operation. Line cord does not
have plug. A 115 volt, 20/30A
The motor is designed for operation on the voltage and frequency specified. Normal loads will be handled safe- ly on voltages not more than 10% above or below the specified voltage.
Running the unit on voltages which are not within
the range may cause overheating and motor
GROUNDING INSTRUCTIONS
WARNING: Improper connection of equipment grounding conductor can result in the risk of electrical shock. Equipment should be grounded while in use to protect operator from electrical shock.
Check with a qualified electrician if grounding instruc- tions are not understood or if in doubt as to whether the tool is properly grounded.
Green (or green and yellow) conductor in cord is the grounding wire. If repair or replacement of the electric cord or plug is necessary, do not connect the green (or green and yellow) wire to a live terminal.
Many cover plate screws, water pipes and outlet boxes are not properly grounded. To ensure proper ground, grounding means must be tested by a qualified electrician.
To use the band saw with a 230V power supply: WARNING: All electrical connections must be performed by a qualified electrician.
•Have a qualified electrician attach a 230 volt, 20/30A
•Open cover (Figure 17, Key No. 8) by removing eight pan head screws.
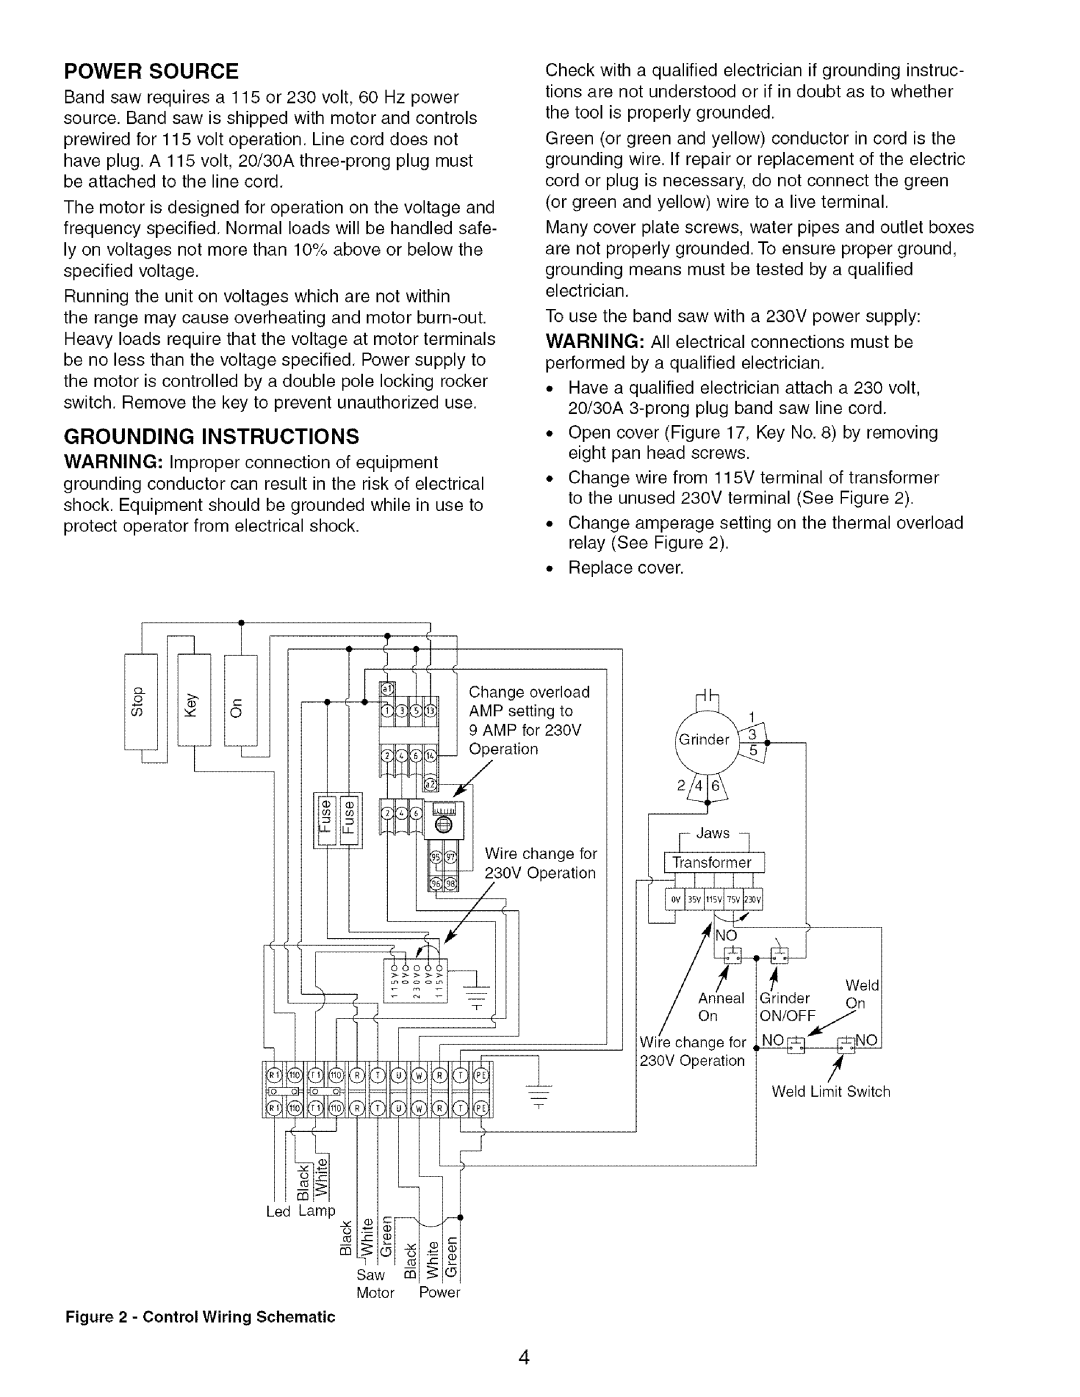
•Change wire from 115V terminal of transformer to the unused 230V terminal (See Figure 2).
•Change amperage setting on the thermal overload relay (See Figure 2).
•Replace cover.
Change overload AMP setting to
9 AMP for 230V Operation
Wire change for 230V Operation
On
Wir/e change for
230V Operation
Weld Limit Switch
Led Lamp
Saw co
Motor Power
Figure 2 - Control Wiring Schematic
4