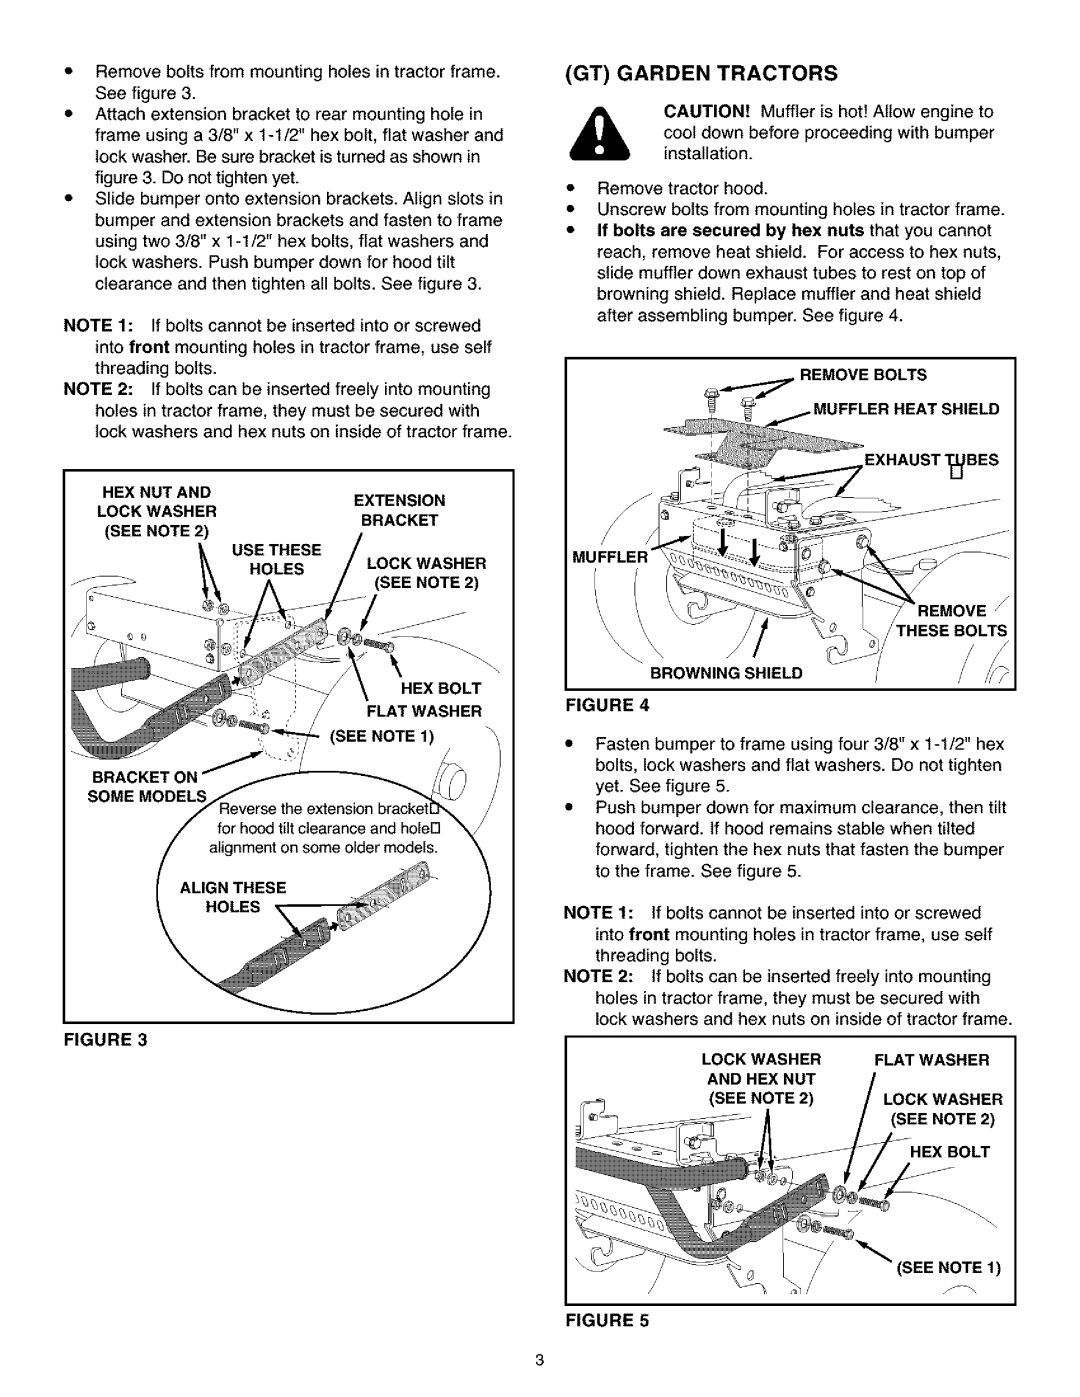
•Remove bolts from mounting holes in tractor frame. See figure 3.
•Attach extension bracket to rear mounting hole in frame using a 3/8" x
figure 3. Do not tighten yet.
•Slide bumper onto extension brackets. Align slots in bumper and extension brackets and fasten to frame using two 3/8" x
NOTE 1: If bolts cannot be inserted into or screwed into front mounting holes in tractor frame, use self threading bolts.
NOTE 2: If bolts can be inserted freely into mounting
holes in tractor frame, they must be secured with lock washers and hex nuts on inside of tractor frame.
HEX NUTAND |
| EXTENSION |
LOCK WASHER |
| |
| BRACKET | |
(SEE NOTE 2) |
| |
|
| |
| USE THESE | WASHER |
| HOLES | |
| (SEE NOTE 2) | |
|
|
HEXBOLT
FLAT WASHER
BRACKET ON
SOME MODELS
FIGURE 3
(GT) GARDEN TRACTORS
CAUTION! Muffler is hofl Allow engine to
cool down before proceeding with bumper installation.
Remove tractor hood.
Unscrew bolts from mounting holes in tractor frame. If bolts are secured by hex nuts that you cannot reach, remove heat shield. For access to hex nuts, slide muffler down exhaust tubes to rest on top of browning shield. Replace muffler and heat shield after assembling bumper. See figure 4.
, REMOVE BOLTS
IFFLER HEAT SHIELD
EXHAUSTT_BES
MUFFLER"
/
rHESE BOLTS
BROWNING SHIELD
FIGURE 4
Fasten bumper to frame using four 3/8" x
Push bumper down for maximum clearance, then tilt hood forward. If hood remains stable when tilted
forward, tighten the hex nuts that fasten the bumper to the frame. See figure 5.
NOTE 1: If bolts cannot be inserted into or screwed into front mounting holes in tractor frame, use self threading bolts.
NOTE 2: If bolts can be inserted freely into mounting
holes in tractor frame, they must be secured with lock washers and hex nuts on inside of tractor frame.
LOCK WASHER | FLAT WASHER |
AND HEXNUT |
|
(SEE NOTE 2) | LOCK WASHER |
| (SEE NOTE2) |
| HEX BOLT |
(SEE NOTE 1)
FIGURE 5