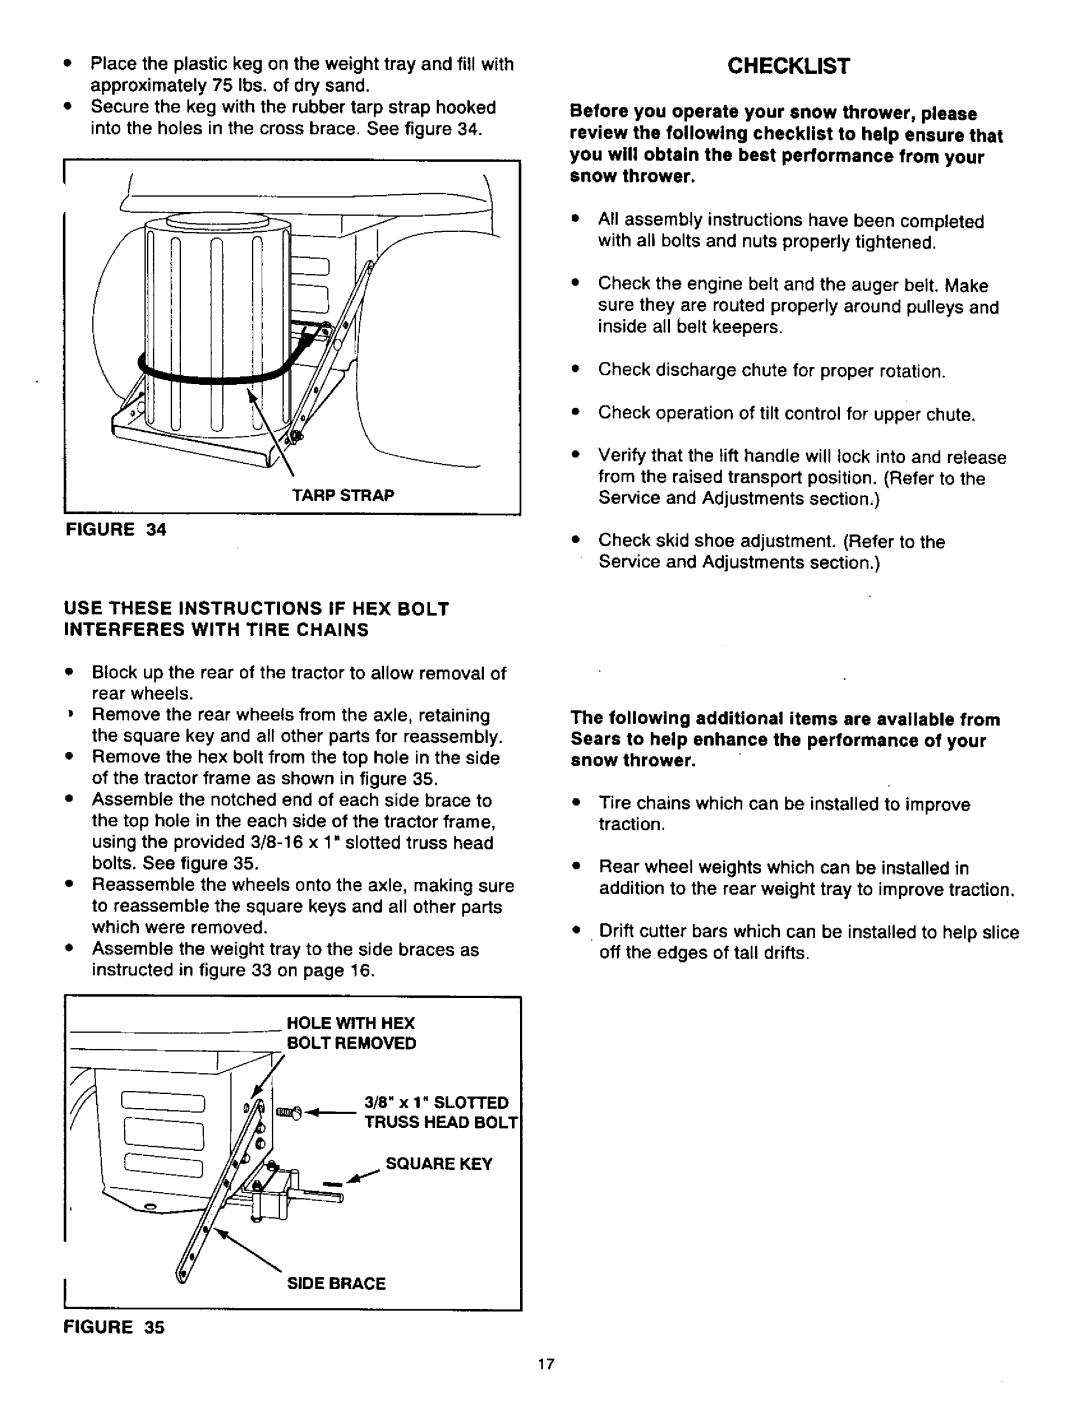
•Placethe plastic keg on the weight tray and fill with approximately 75 Ibs. of dry sand.
•Secure the keg with the rubber tarp strap hooked into the holes in the cross brace. See figure 34.
!
TARP STRAP
FIGURE 34
USE THESE INSTRUCTIONS IF HEX BOLT INTERFERES WITH TIRE CHAINS
•Block up the rear of the tractor to allow removal of rear wheels.
Remove the rear wheels from the axle, retaining the square key and all other parts for reassembly.
•Remove the hex bolt from the top hole in the side of the tractor frame as shown in figure 35.
•Assemble the notched end of each side brace to the top hole in the each side of the tractor frame, using the provided
•Reassemble the wheels onto the axle, making sure
to reassemble the square keys and all other parts which were removed.
•Assemble the weight tray to the side braces as instructed in figure 33 on page 16.
HOLE WITH HEX
BOLT REMOVED
TRUSS HEAD BOLT
_..,___ 3/8" x 1" SLOTTED
.._ SQUARE KEY
'_"_ SIDE BRACE
FIGURE 35
CHECKLIST
Before you operate your snow thrower, please review the following checklist to help ensure that
you will obtain the best performance from your snow thrower.
•All assembly instructions have been completed with all bolts and nuts properly tightened.
•Check the engine belt and the auger belt. Make sure they are routed properly around pulleys and inside all belt keepers.
•Check discharge chute for proper rotation.
•Check operation of tilt control for upper chute.
•Verify that the lift handle will lock into and release from the raised transport position. (Refer to the Service and Adjustments section,)
•Check skid shoe adjustment. (Refer to the Service and Adjustments section.)
The following additional items are available from
Sears to help enhance the performance of your snow thrower.
•Tire chains which can be installed to improve traction.
•Rear wheel weights which can be installed in addition to the rear weight tray to improve traction.
•Drift cutter bars which can be installed to help slice off the edges of tall drifts.
17
