NOTE:Fuelstabilizeris an acceptablealternativein minimizingtheformationof fuelgumdepositsduring storageAddstabilizerto. gasolinein fueltankorstor- agecontainerAlwaysfollowthe. mixratiofoundon stabilizercontainer.Runengineat least10 minutes afteraddingstabilizerto allowthestabilizerto reach thecarburetorDonotdrainthegastankandcarbure.- torif usingfuelstabilizer.
•Drainall theoilfromthecrankcase(thisshouldbe doneaftertheenginehasbeenoperatedandisstill warm)andrefillthecrankcasewithfreshoil.
•Ifyouhavedrainedthefueltank,protecttheinside of theengineasfollows.Removesparkplug,pour
approximately1/2ounce(approximatelyonetable- spoon)of engineoil intocylinderandcrankslowly to distributeoil. Replacesparkplug.
OTHER
•Do not store gasoline from one season to another.
•Replace your gasoline can if your can starts to rust. Rust and/or dirt in your gasoline will cause problems.
•Store unit in a clean, dry area. Do not store next to corrosive materials, such as fertilizer.
NOTE: If storing in an unventilated or metal storage shed, be certain to rustproof the equipment by coating with a light oil or silicone.
SERVICE & ADJUSTMENT
WARNING: ALWAYS STOP ENGINE AND DISCONNECT SPARK PLUG WIRE AND
,_ MOVE IT AWAY FROM SPARK PLUG BEFORE PERFORMING ANY ADJUST- MENTS OR REPAIRS.
REMOVINGTHEFLAILSCREEN
If the discharge area becomes clogged, remove the flail screen and clean area as follows.
•Stop the engine, make certain the
plug wire from the spark plug before unclogging the chute.
•Loosen the two hand knobs on each side of the chute deflector. Lift the chute deflector up, and tie it out of the way.
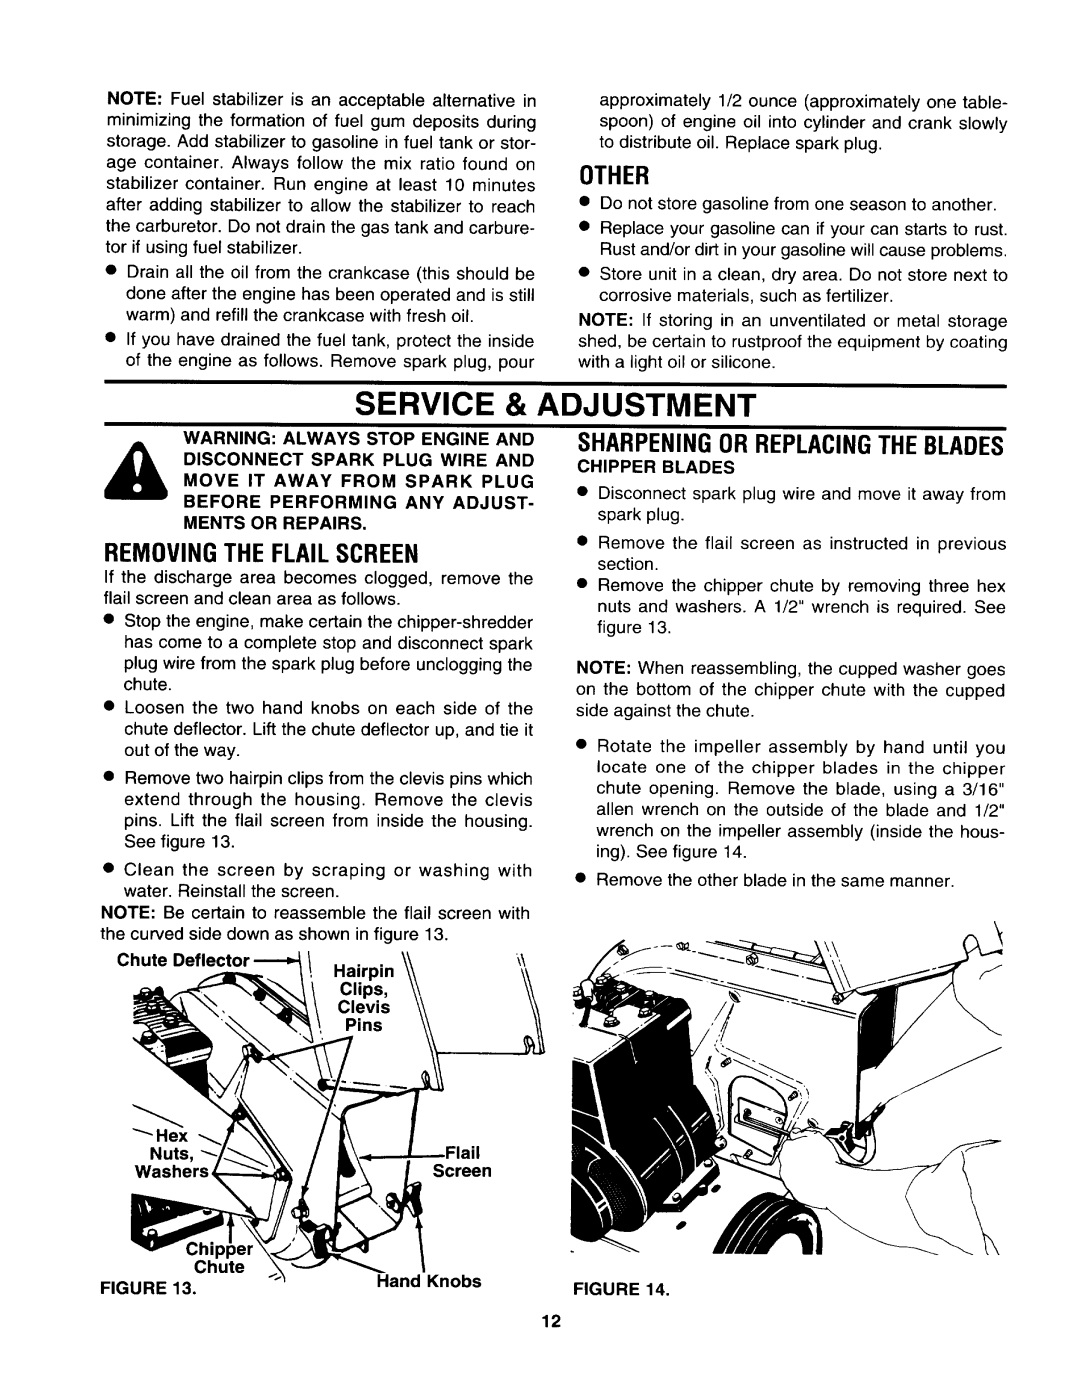
•Remove two hairpin clips from the clevis pins which extend through the housing. Remove the clevis pins. Lift the flail screen from inside the housing. See figure 13.
•Clean the screen by scraping or washing with water. Reinstall the screen.
NOTE: Be certain to reassemble the flail screen with the curved side down as shown in figure 13.
Chute Deflq | ./ Hairpin | \\ |
| Clips, |
|
| Clevis |
|
| Pins |
|
SHARPENINGOR REPLACINGTHE BLADES
CHIPPER BLADES
•Disconnect spark plug 'wire and move it away from spark plug.
•Remove the flail screen as instructed in previous section.
•Remove the chipper chute by removing three hex nuts and washers. A 1/2" wrench is required. See figure 13.
NOTE: When reassembling, the cupped washer goes on the bottom of the chipper chute with the cupped side against the chute.
•Rotate the impeller assembly by hand until you locate one of the chipper blades in the chipper chute opening. Remove the blade, using a 3/16" allen wrench on the outside of the blade and 1/2" wrench on the impeller assembly (inside the hous- ing). See figure 14.
•Remove the other blade in the same manner.
Hex
Nuts,
WashersScreen
Chute | Hand Knobs |
| |
FIGURE 13. | FIGURE 14. | ||
|
12