
917.275283 specifications
The Craftsman 917.275283 is a premium lawn tractor designed for homeowners seeking a reliable and efficient machine for maintaining their lawns. Built with a robust structure and advanced engineering, this lawn tractor offers a perfect blend of performance, comfort, and user-friendly features.At the heart of the Craftsman 917.275283 is a powerful 24 HP Briggs & Stratton engine that ensures ample power for mowing, mulching, and hauling tasks. This engine is coupled with a hydrostatic transmission, providing smooth and effortless speed control while driving on various terrains. Operators can easily adjust their speed without the need for shifting gears, making it an ideal choice for those looking for convenience during their mowing sessions.
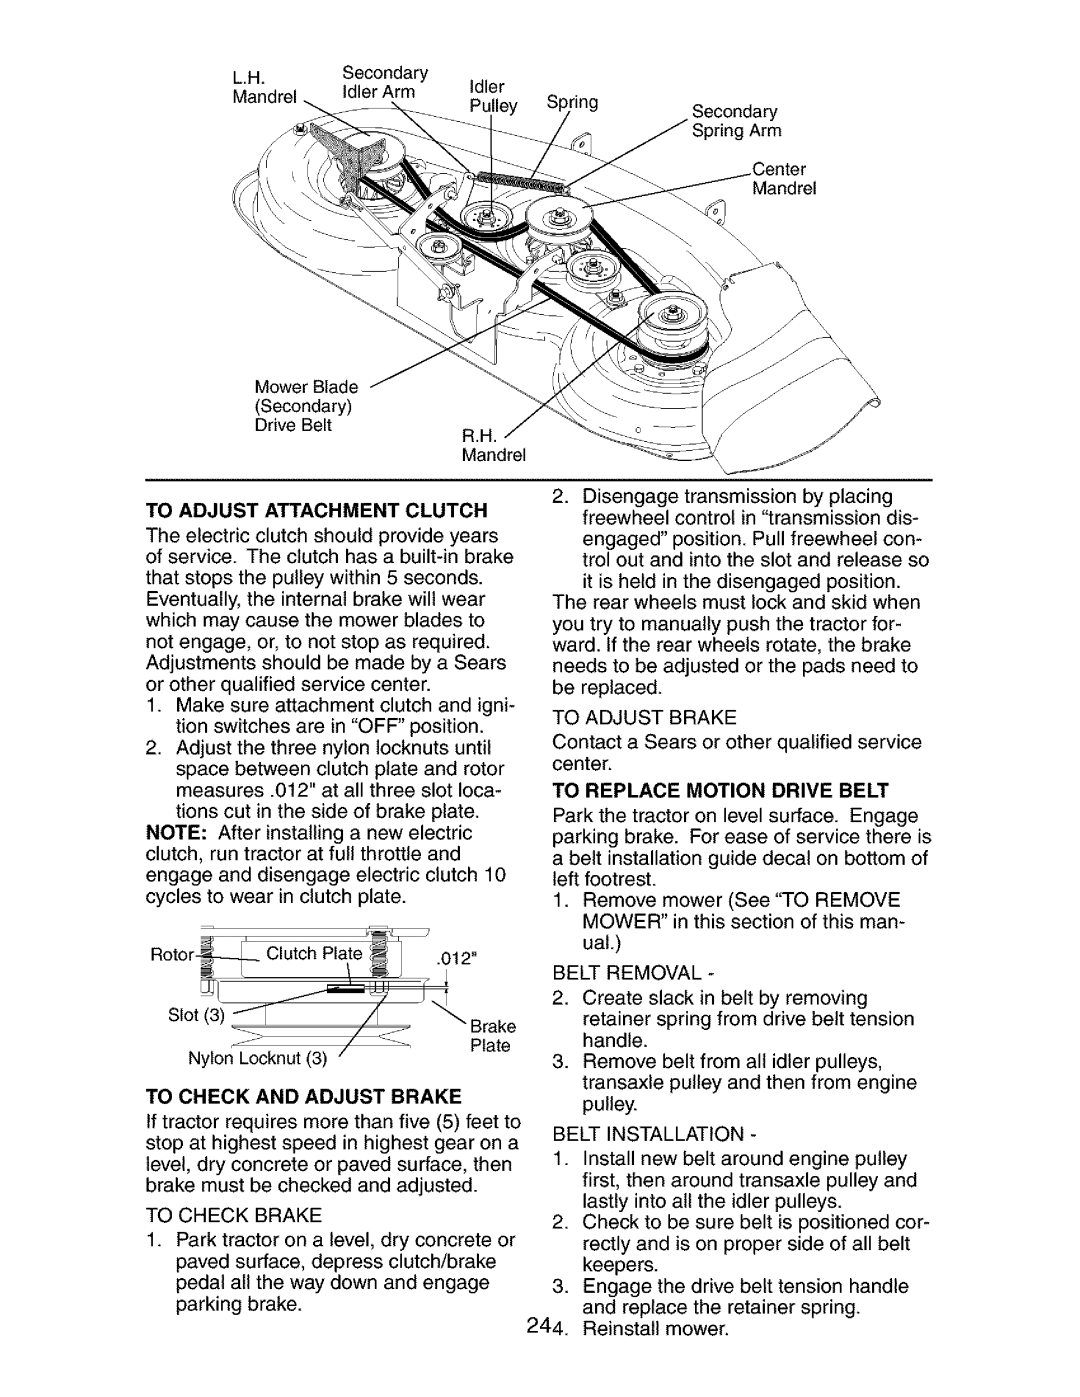
One of the standout features of this lawn tractor is its 42-inch cutting deck. This deck is designed to provide a wide cutting path, effectively reducing the number of passes needed to cover a lawn. The cutting height is adjustable, allowing users to customize the grass height according to their preference, resulting in a healthier and more aesthetically pleasing lawn. Additionally, the deck is crafted for easy cleaning, ensuring that maintenance is straightforward.
The Craftsman 917.275283 also incorporates advanced technology for enhanced mowing precision. The onboard SmartCut technology automatically adjusts the engine speed based on the grass thickness, allowing for optimal cutting efficiency. This feature not only improves performance but also extends engine life by reducing strain during operation.
Comfort is a key aspect of any lawn care equipment, and Craftsman does not disappoint. The tractor features an ergonomic seat with ample padding, ensuring a comfortable ride even during extended mowing sessions. The easy-to-reach controls are designed to prevent fatigue, allowing users to focus on their mowing tasks.
Safety features are also integrated into the design of the Craftsman 917.275283. The tractor comes equipped with a safety key, ensuring that the engine cannot be started while in gear. This is a critical feature that provides peace of mind, especially for those with children or pets nearby.
In summary, the Craftsman 917.275283 stands out in the market of lawn tractors with its powerful engine, user-friendly hydrostatic transmission, and advanced cutting technologies. Coupled with a comfortable design and essential safety features, this machine is tailored to meet the needs of homeowners looking to achieve a perfectly manicured lawn with ease and efficiency.