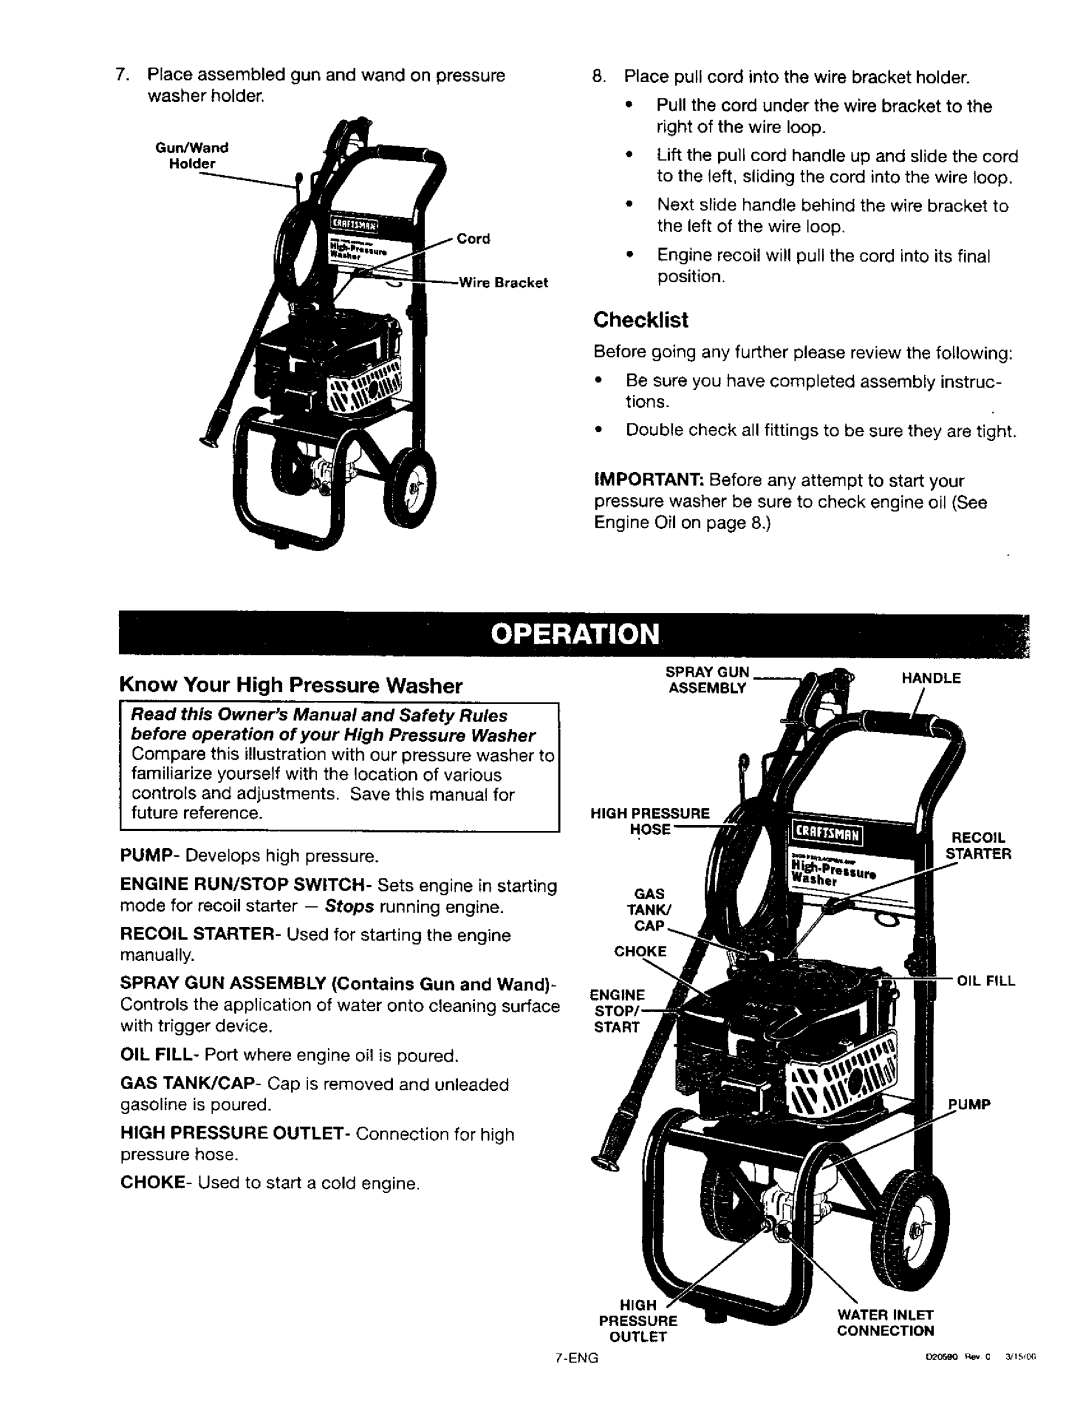
7, | Place assembled gun and wand on pressure | , | Place pull cord into the | wire bracket holder. |
| ||
| washer holder. |
| ,, | Pull the cord under | the wire bracket | to the | |
|
|
|
| right of the wire loop. |
|
| |
| Gun/Wand |
| • | Lift the pull cord handle up and slide | the | cord | |
| Holder |
|
| to the left, sliding the cord into the wire loop. | |||
|
|
|
| ||||
|
|
| • | Next slide handle behind the wire bracket | to | ||
|
|
|
| the left of the wire loop. |
|
| |
|
|
| • | Engine recoil will pull the cord into its final | |||
| Bracket |
|
| position. |
|
|
|
|
|
|
|
|
|
| |
Checklist
Before going any further please review the following:
• Be sure you have completed assembly instruc- tions.
• Double check all fittings to be sure they are tight.
IMPORTANT: Before any attempt to start your pressure washer be sure to check engine oil (See Engine Oil on page 8.)
Know Your High Pressure Washer
SPRAY GUN i | HANDLE |
ASSEMBLY |
|
Read this Owner's Manual and Safety Rules before operation of your High Pressure Washer
Compare this illustration with our pressure washer to
familiarize yourself with the location of various controls and adjustments. Save this manual for future reference.
PUMP- Develops high pressure.
ENGINE RUN/STOP SWITCH- Sets engine in starting mode for recoil starter
RECOIL STARTER- Used for starting the engine
manually.
SPRAY GUN ASSEMBLY (Contains Gun and Wand)- Controls the application of water onto cleaning surface with trigger device.
OIL FILL- Port where engine oil is poured,
GAS TANK/CAP- Cap is removed and unleaded gasoline is poured.
HIGH PRESSURE OUTLET- Connection for high
pressure hose.
HIGH PRESSURE
RECOIL
STARTER
GAS
TANK/
CHOKE
OIL FILL
ENGINE
START
IMP
CHOKE- Used to start a cold engine.
HIGH
WATER INLET
PRESSURE
OUTLET
CONNECTION
