SERVICE AND ADJUSTMENTS
Unit cycles automatically when power is on. When doing Maintenance, you may be exposed to voltage sources, compressed air or moving parts. Personal injuries can occur. Before per-
forming any Maintenance or repair, unplug the compressor and bleed off all air pressure.
ALL MAINTENANCE AND REPAIR OPERATIONS NOT LISTED MUST BE PERFORMED BY TRAINED SERVICE TECHNICIAN.
![]() Before servicing:
Before servicing:
Unplug or disconnect electrical supply to the air compressor.
Bleed tank of pressure
Allow the air compressor to cool.
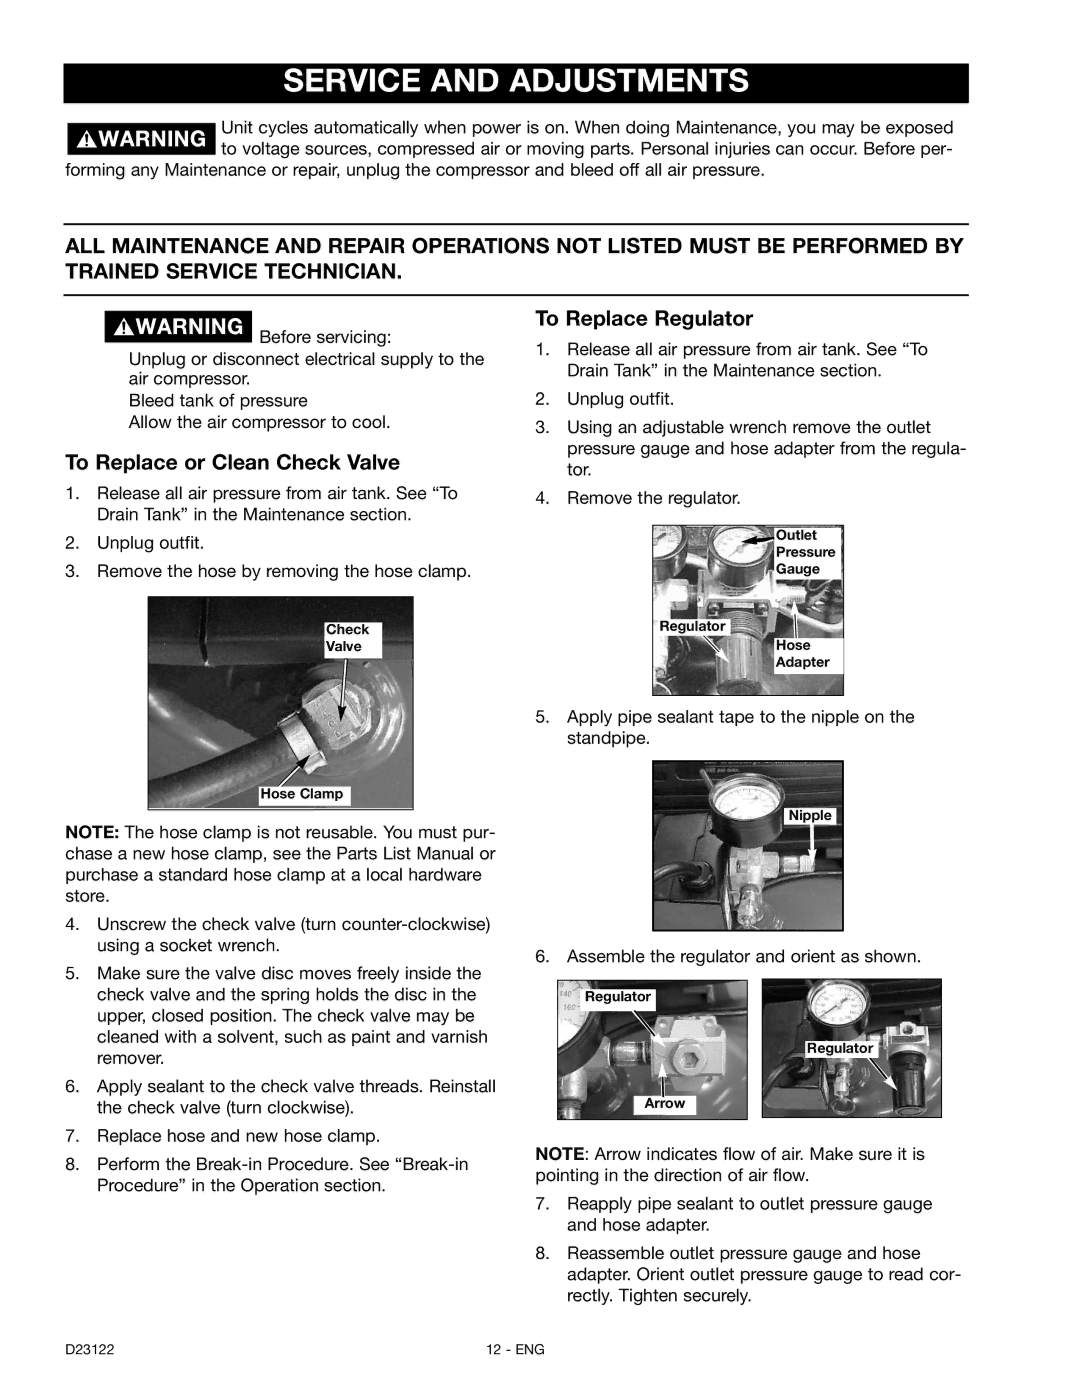
To Replace or Clean Check Valve
1.Release all air pressure from air tank. See “To Drain Tank” in the Maintenance section.
2.Unplug outfit.
3.Remove the hose by removing the hose clamp.
Check
Valve
Hose Clamp
NOTE: The hose clamp is not reusable. You must pur- chase a new hose clamp, see the Parts List Manual or purchase a standard hose clamp at a local hardware store.
4.Unscrew the check valve (turn
5.Make sure the valve disc moves freely inside the check valve and the spring holds the disc in the upper, closed position. The check valve may be cleaned with a solvent, such as paint and varnish remover.
6.Apply sealant to the check valve threads. Reinstall the check valve (turn clockwise).
7.Replace hose and new hose clamp.
8.Perform the
To Replace Regulator
1.Release all air pressure from air tank. See “To Drain Tank” in the Maintenance section.
2.Unplug outfit.
3.Using an adjustable wrench remove the outlet pressure gauge and hose adapter from the regula- tor.
4.Remove the regulator.
Outlet
Pressure
Gauge
Regulator
Hose
Adapter
5.Apply pipe sealant tape to the nipple on the standpipe.
Nipple
6. Assemble the regulator and orient as shown.
Regulator
Regulator
Arrow
NOTE: Arrow indicates flow of air. Make sure it is pointing in the direction of air flow.
7.Reapply pipe sealant to outlet pressure gauge and hose adapter.
8.Reassemble outlet pressure gauge and hose adapter. Orient outlet pressure gauge to read cor- rectly. Tighten securely.
D23122 | 12 - ENG |