REMOVING BITS
See Figure 7.
•Lock switch trigger or your drill by placing the direction of rotation selector in center position. See Figure 2.
•Loosen the chuck jaws from drill bit.
•To loosen: grasp and hold the collar of the chuck with one hand, while rotating chuck body with your other hand. Note: Rotate chuck body in the direction of the arrow marked UNLOCK to loosen chuck jaws.
•Do not use a wrench to tighten or loosen the chuck jaws.
•Remove drill bit from chuck jaws.
ADJUSTABLE TORQUE CLUTCH
See Figure 9.
Your drill is equipped with an adjustable torque clutch for driving different types of screws into different materials. The proper setting depends on the type of material and the size of screw you are using.
TO ADJUST TORQUE
•Identify the twenty four torque indicator settings located on the front of your drill. See Figure 9.
•Rotate adjusting ring to the desired setting.
•1 - 4 For driving small screws.
•5 - 8 For driving screws into soft material.
•9 - 12 For driving screws into soft and hard materials.
•13 - 16 For driving screws in hard wood.
•17 - 20 For driving large screws.
•21 - 41,11For heavy drilling.
TO DECREASE
TORQUE ADJUSTING
RING
TO INCREASE
TORQUE
Fig. 9
_i WARNING: Always wear safety goggles or safety glasses with side shields when operating
tools. Failure to do so could result in objects being thrown into your eyes, resulting in possible serious injury.
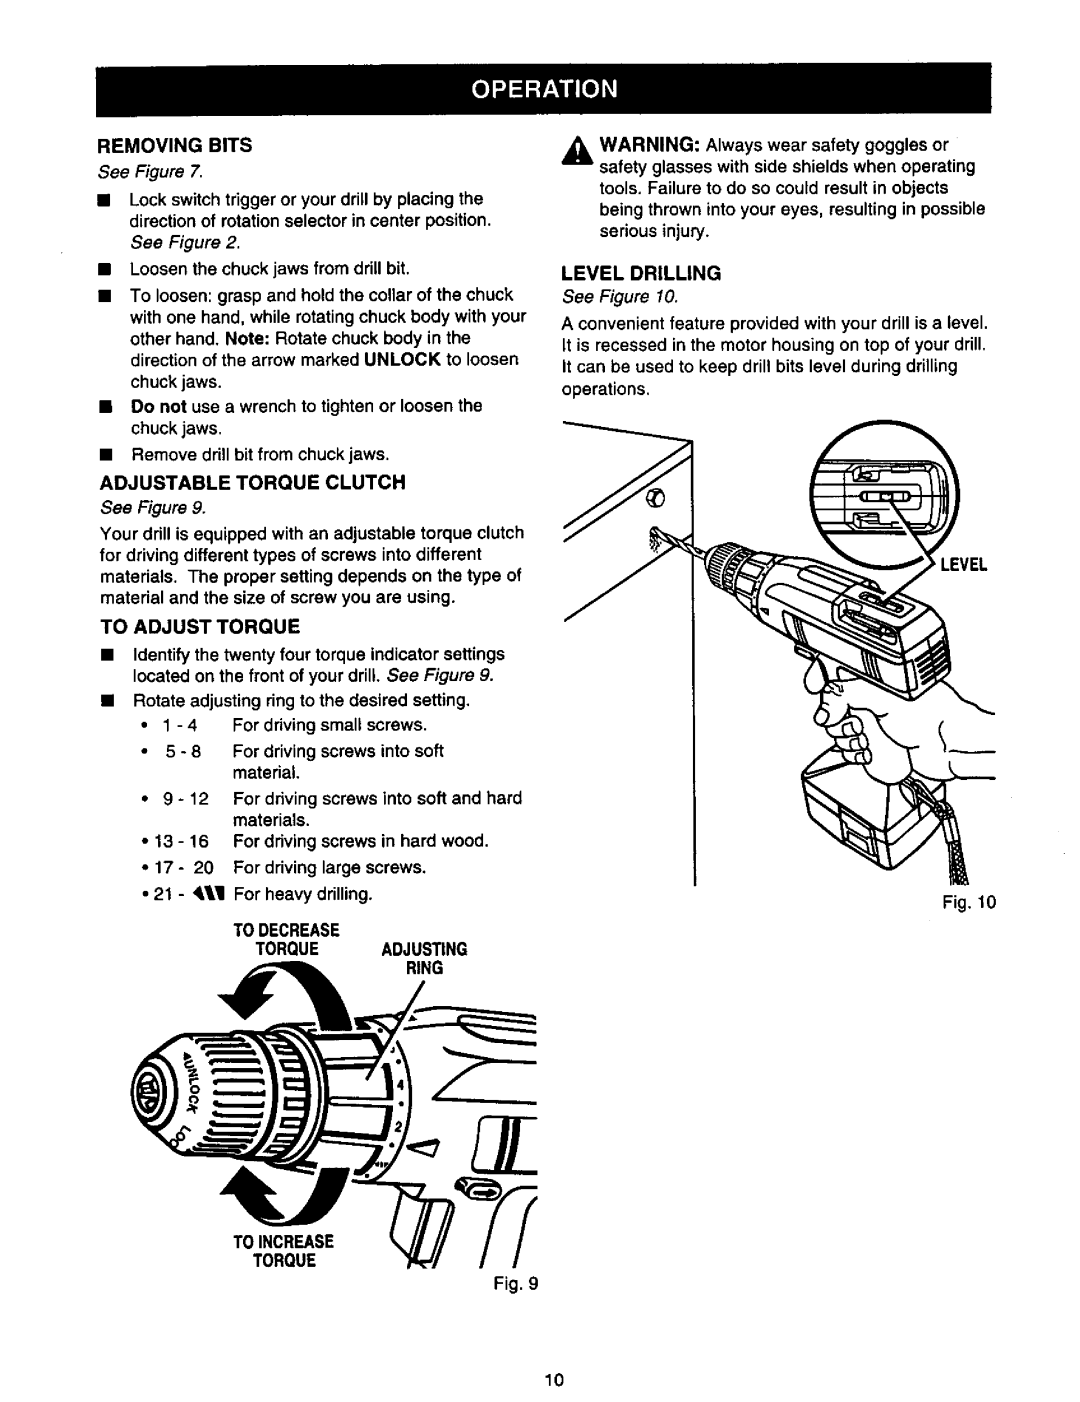
LEVEL DRILLING
See Figure 10.
A convenient feature provided with your drill is a level. It is recessed in the motor housing on top of your drill. it can be used to keep drill bits level during drilling operations.
_LEVEL
Fig. t0
10