
BFX-220H specifications
The Crate Amplifiers BFX-220H is a model that stands out in the world of amplifiers, catering to musicians who demand both versatility and powerful sound. With a robust design and a host of cutting-edge features, the BFX-220H is engineered to deliver exceptional audio performance in various settings, whether on stage or in the studio.One of the most notable features of the BFX-220H is its dual-channel configuration. This allows musicians to switch between clean and overdriven tones seamlessly, providing the flexibility needed for different musical genres. The clean channel offers a pristine sound, perfect for those who appreciate clarity and precision, while the overdrive channel delivers a rich, textured tone ideal for rock and heavier genres.
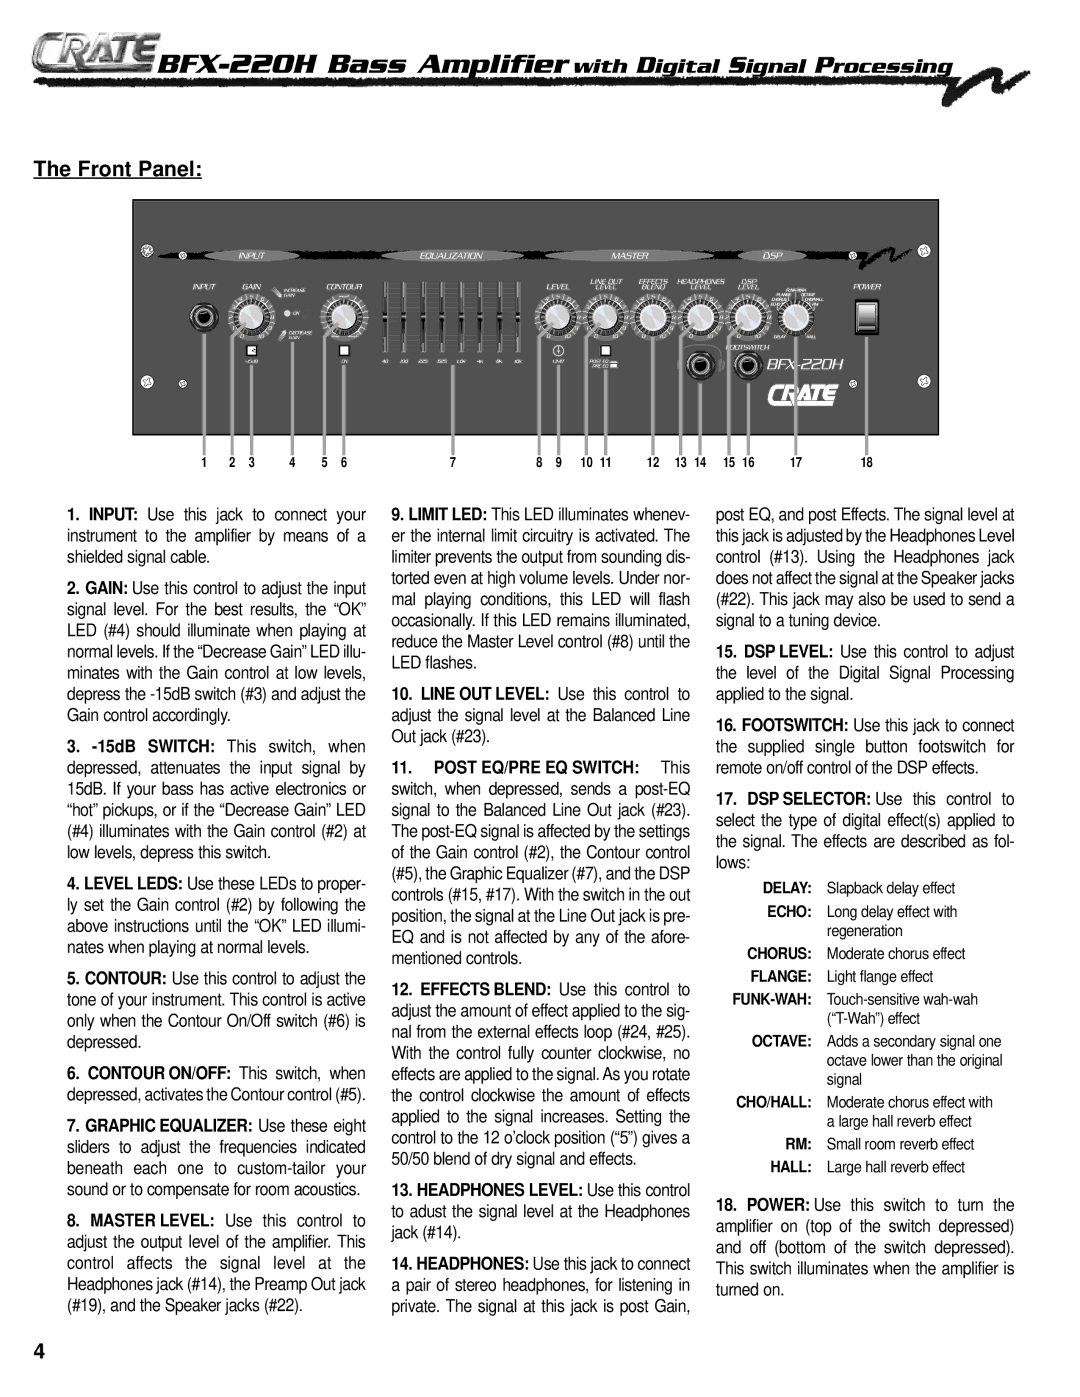
The integrated DSP effects are another highlight of the BFX-220H. With multiple effects, including reverb, delay, and modulation, this amplifier allows musicians to add depth and dimension to their sound without the need for external pedals. By offering a plethora of presets and adjustable parameters, users can fine-tune effects to suit their individual playing styles.
Power is also a significant aspect of the BFX-220H. With 220 watts of RMS power, this amplifier is equipped to fill large venues, ensuring that the sound can reach every corner of the audience. The custom-designed speaker works in tandem with the amp, providing a rich bass response and clear highs, making it suitable for various music styles.
The BFX-220H features a sturdy, road-ready chassis that ensures durability during transport and use. Additionally, it offers a user-friendly interface with intuitive controls, making it accessible for both seasoned professionals and aspiring musicians. Its built-in tuner is an added convenience, allowing quick adjustments on the fly.
Connectivity options are plentiful with the BFX-220H. It includes multiple input and output options, enabling integration with other instruments and devices, enhancing its versatility. One can easily connect external speakers or recording equipment, making it ideal for live performances and studio work alike.
In summary, the Crate Amplifiers BFX-220H stands out with its dual-channel design, integrated DSP effects, powerful output, durable construction, and comprehensive connectivity options. It is a reliable choice for musicians seeking an amplifier that meets their diverse needs while delivering impressive sound quality and performance.