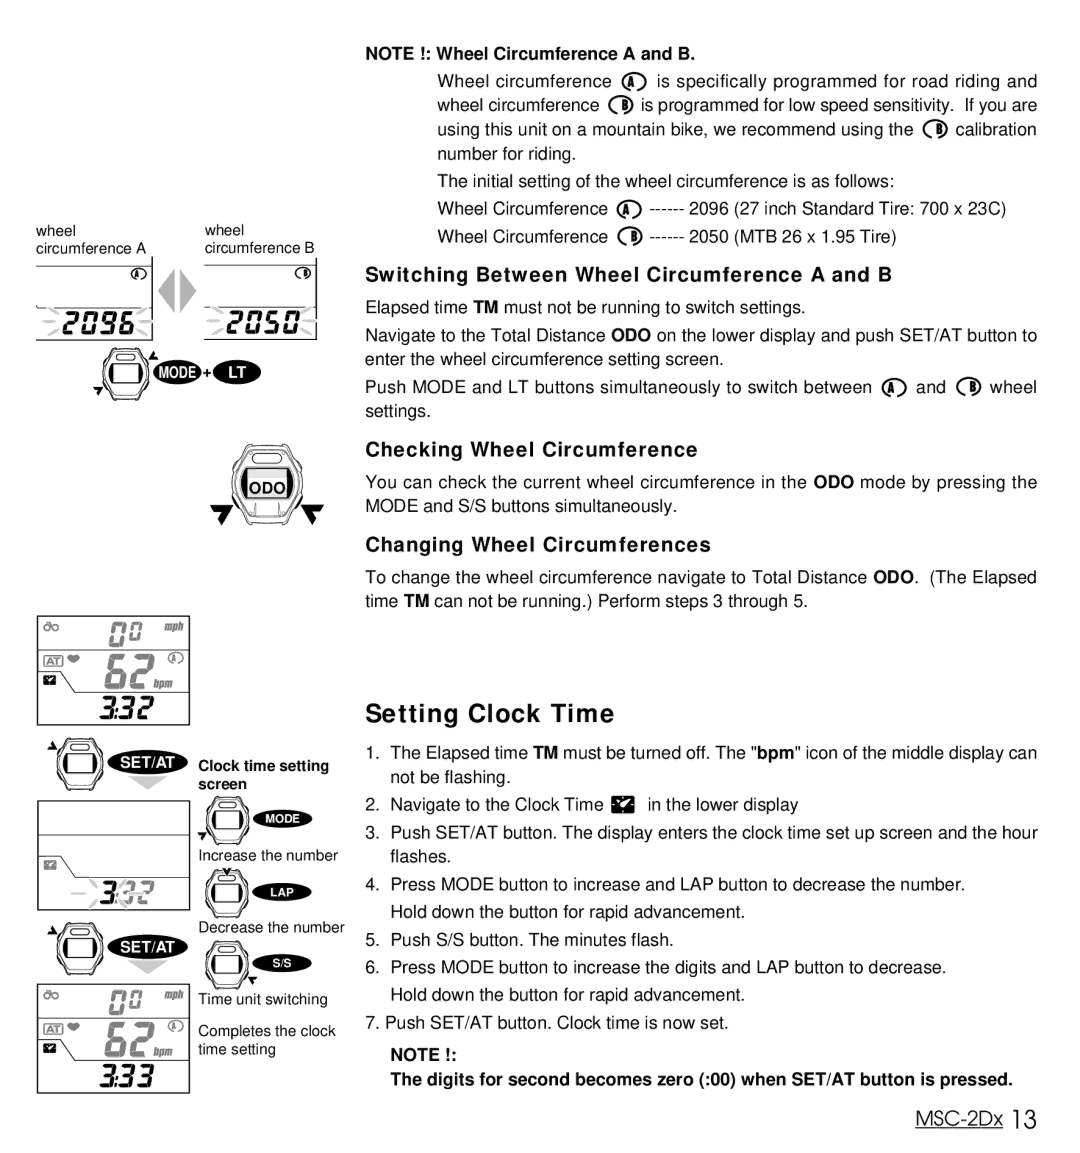
wheel | wheel |
circumference A | circumference B |
MODE + LT
NOTE !: Wheel Circumference A and B. |
| |
Wheel circumference | is specifically programmed for road riding and | |
wheel circumference | is programmed for low speed sensitivity. If you are | |
using this unit on a mountain bike, we recommend using the | calibration | |
number for riding.
The initial setting of the wheel circumference is as follows:
Wheel Circumference | (27 inch Standard Tire: 700 x 23C) | |
Wheel Circumference | (MTB 26 x 1.95 Tire) |
Switching Between Wheel Circumference A and B
Elapsed time TM must not be running to switch settings.
Navigate to the Total Distance ODO on the lower display and push SET/AT button to enter the wheel circumference setting screen.
Push MODE and LT buttons simultaneously to switch between ![]() and
and ![]() wheel settings.
wheel settings.
ODO
Checking Wheel Circumference
You can check the current wheel circumference in the ODO mode by pressing the MODE and S/S buttons simultaneously.
SET/AT
SET/AT
Clock time setting screen
MODE
Increase the number
LAP
Decrease the number
S/S
Time unit switching
Completes the clock time setting
Changing Wheel Circumferences
To change the wheel circumference navigate to Total Distance ODO. (The Elapsed time TM can not be running.) Perform steps 3 through 5.
Setting Clock Time
1.The Elapsed time TM must be turned off. The "bpm" icon of the middle display can not be flashing.
2.Navigate to the Clock Time ![]() in the lower display
in the lower display
3.Push SET/AT button. The display enters the clock time set up screen and the hour flashes.
4.Press MODE button to increase and LAP button to decrease the number. Hold down the button for rapid advancement.
5.Push S/S button. The minutes flash.
6.Press MODE button to increase the digits and LAP button to decrease. Hold down the button for rapid advancement.
7.Push SET/AT button. Clock time is now set.
NOTE !:
The digits for second becomes zero (:00) when SET/AT button is pressed.
