![]() VTX350H
VTX350H
The Front Panel:
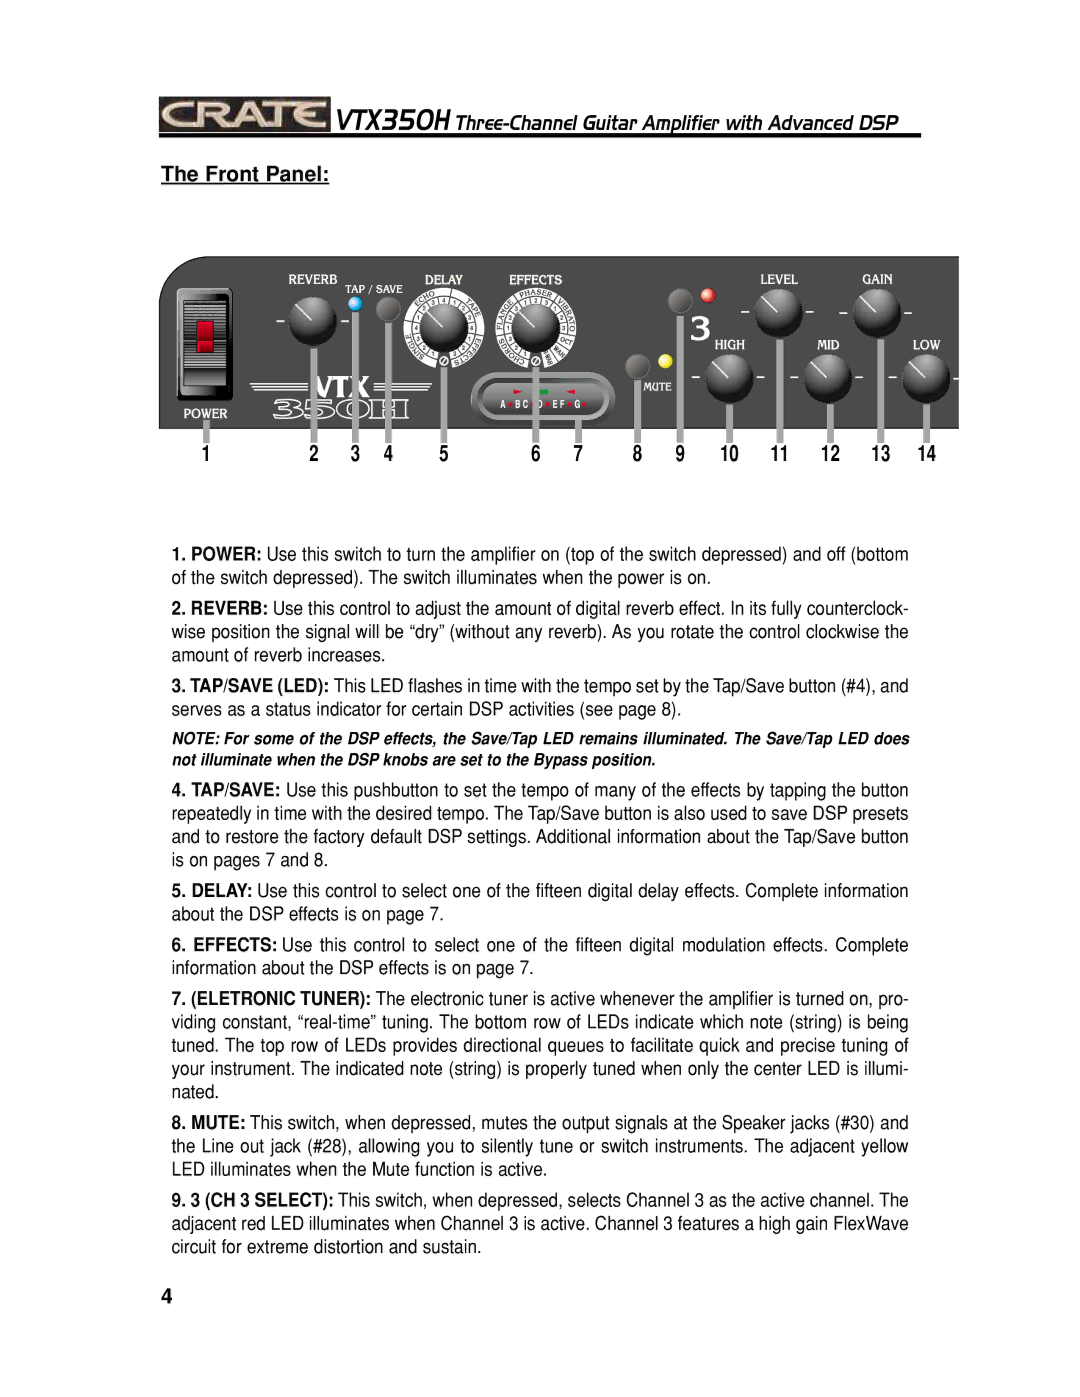
1 | 2 | 3 | 4 | 5 | 6 | 7 | 8 | 9 | 10 | 11 | 12 | 13 | 14 |
1.POWER: Use this switch to turn the amplifier on (top of the switch depressed) and off (bottom of the switch depressed). The switch illuminates when the power is on.
2.REVERB: Use this control to adjust the amount of digital reverb effect. In its fully counterclock- wise position the signal will be “dry” (without any reverb). As you rotate the control clockwise the amount of reverb increases.
3.TAP/SAVE (LED): This LED flashes in time with the tempo set by the Tap/Save button (#4), and serves as a status indicator for certain DSP activities (see page 8).
NOTE: For some of the DSP effects, the Save/Tap LED remains illuminated. The Save/Tap LED does not illuminate when the DSP knobs are set to the Bypass position.
4.TAP/SAVE: Use this pushbutton to set the tempo of many of the effects by tapping the button repeatedly in time with the desired tempo. The Tap/Save button is also used to save DSP presets and to restore the factory default DSP settings. Additional information about the Tap/Save button is on pages 7 and 8.
5.DELAY: Use this control to select one of the fifteen digital delay effects. Complete information about the DSP effects is on page 7.
6.EFFECTS: Use this control to select one of the fifteen digital modulation effects. Complete information about the DSP effects is on page 7.
7.(ELETRONIC TUNER): The electronic tuner is active whenever the amplifier is turned on, pro- viding constant,
8.MUTE: This switch, when depressed, mutes the output signals at the Speaker jacks (#30) and the Line out jack (#28), allowing you to silently tune or switch instruments. The adjacent yellow LED illuminates when the Mute function is active.
9.3 (CH 3 SELECT): This switch, when depressed, selects Channel 3 as the active channel. The adjacent red LED illuminates when Channel 3 is active. Channel 3 features a high gain FlexWave circuit for extreme distortion and sustain.
4
