
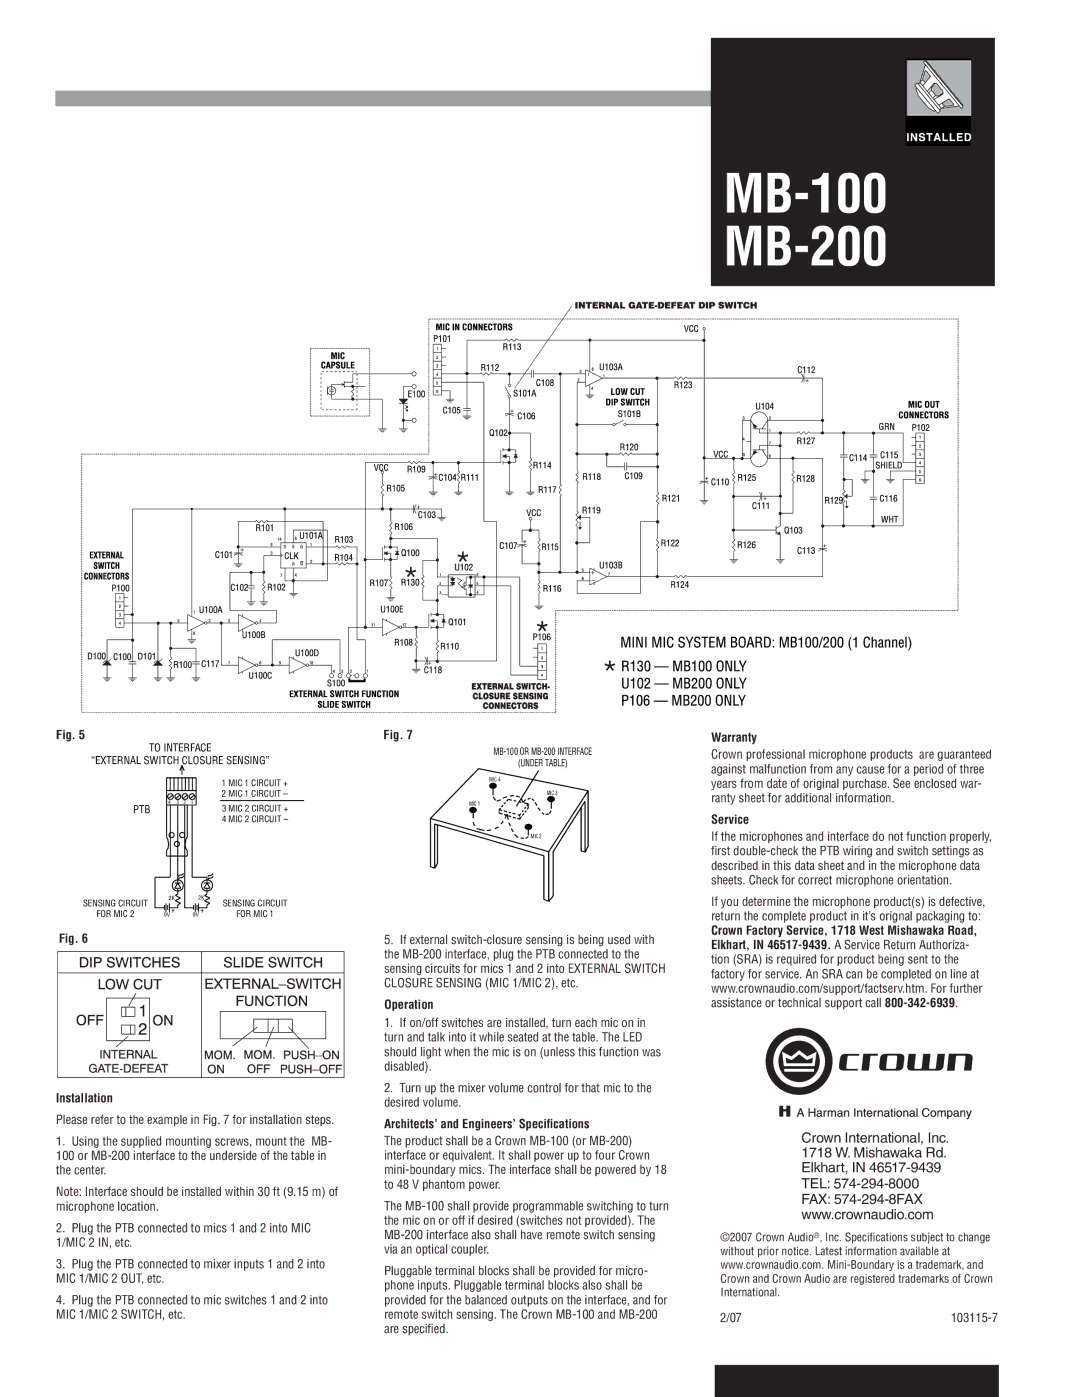
MB-100, MB-200 specifications
Crown Audio, a reputable brand in the audio amplification industry, has garnered attention for its reliable and powerful amplifiers. Among its popular products are the MB-100 and MB-200 models, two lightweight and versatile amplifiers designed for diverse applications, such as live sound reinforcement, installations, and touring. Both models incorporate advanced technologies and features that enhance their performance, reliability, and user-friendliness.The Crown MB-100 is a compact, low-impedance power amplifier with a power output of 100 watts per channel at 4 ohms. This model is ideal for smaller venues or situations where space is a constraint. It is engineered for ease of use, featuring an intuitive interface with LED indicators for signal and clipping, allowing users to monitor performance at a glance. The MB-100 also offers a wide range of inputs, including balanced XLR connectors, which ensure compatibility with various audio sources.
On the other hand, the Crown MB-200 doubles the power output to 200 watts per channel at 4 ohms, making it suitable for larger venues and more demanding applications. With its robust construction, the MB-200 ensures durability even in the most challenging environments. This model is equally user-friendly, featuring a similar interface to the MB-100, but with enhanced connectivity options, such as multiple input formats and output options for broader compatibility with passive and active loudspeakers.
Both amplifiers are built using Crown's proprietary technology, including the SmartAmp technology that optimizes performance and guarantees reliability. They come equipped with comprehensive protection features such as short-circuit, thermal overload, and signal limiting, which safeguard the amplifiers and connected speakers. Additionally, the amplifiers utilize a Class D design, offering high efficiency and minimizing heat generation. This makes them suitable for prolonged use in live settings without the need for extensive cooling systems.
In summary, the Crown MB-100 and MB-200 amplifiers stand out for their power, compact design, and advanced features. They deliver excellent sound quality while offering exceptional durability and reliability. These amplifiers cater to the needs of audio professionals and enthusiasts alike, ensuring that live performances and installations produce superior audio experiences. Whether you are looking for a lightweight solution for a small gig or a more powerful amplifier for extensive sound reinforcement, the Crown MB-100 and MB-200 are excellent choices that exemplify Crown's commitment to quality and innovation in audio technology.