4. Assembly Instructions
Remove all contents from packaging and make sure all parts are present before attempting to assemble. Part numbers reference the tables on pages 4 and 5. Remove Grill Grate (Part C) and Flame Tamer (Part B) from inside the grill.
Step 1:
Left Up Tube Assembly
•Attach Left Up Tube Assembly (Part M) to the Cart
Leg Assembly (Part J) with 4 Screws (Part N) as shown.
Step 2:
Wheel Assembly
•Attach Wheel (Part G) to Cart Leg Assembly (Part J) with Axle Bolt (Part H) and Axle Bolt
Hex Nut (Part I) as shown. Repeat for opposite side wheel.
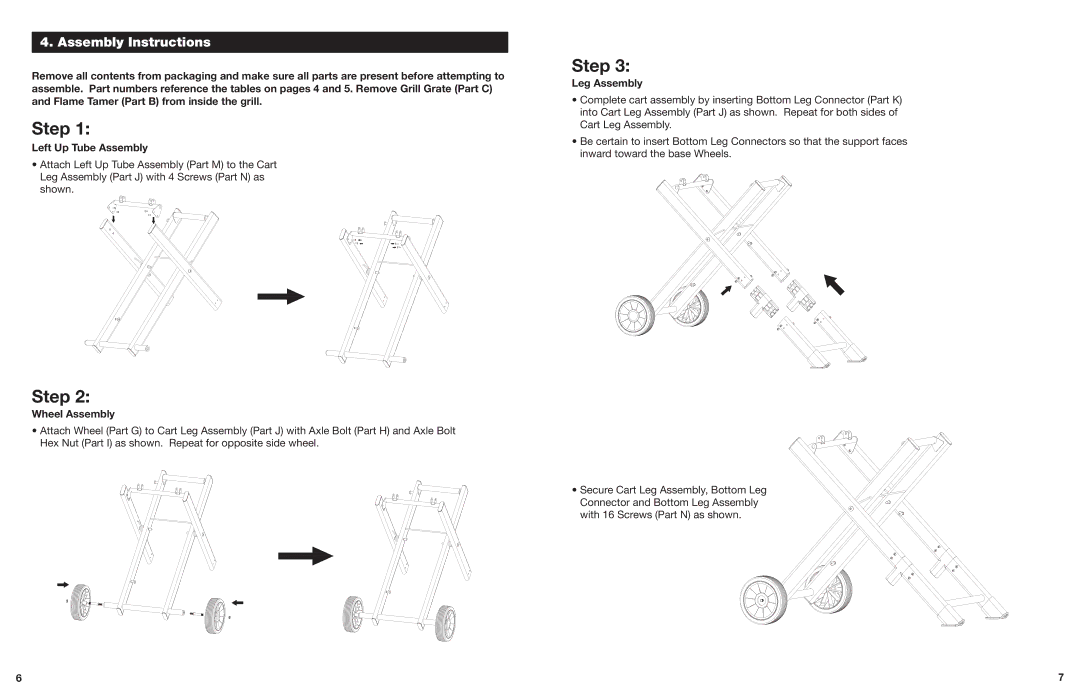
Step 3:
Leg Assembly
•Complete cart assembly by inserting Bottom Leg Connector (Part K) into Cart Leg Assembly (Part J) as shown. Repeat for both sides of Cart Leg Assembly.
•Be certain to insert Bottom Leg Connectors so that the support faces inward toward the base Wheels.
•Secure Cart Leg Assembly, Bottom Leg
Connector and Bottom Leg Assembly with 16 Screws (Part N) as shown.
6 | 7 |