Assembly
![]()
![]()
![]()
![]()
![]()
![]()
![]()
![]() : To prevent accidental operation, turn off tool and remove battery before making any adjustments or removing or installing attachments or accessories. Failure to do this could result in serious personal injury.
: To prevent accidental operation, turn off tool and remove battery before making any adjustments or removing or installing attachments or accessories. Failure to do this could result in serious personal injury.
Attaching the Side Handle
•A three position auxiliary handle (5) is furnished with your grinder and can be screwed into either side of the grinder housing as well as into the top.
![]()
![]()
![]()
![]()
![]()
![]()
![]()
![]() : This handle SHOULD BE USED AT ALL TIMES to maintain complete control of the tool. Always make sure the handle is tight.
: This handle SHOULD BE USED AT ALL TIMES to maintain complete control of the tool. Always make sure the handle is tight.
Accessories
It is important to choose the correct guards, backing pads and flanges to use with grinder accessories. See pages 13 and 14 for information on choosing the correct accessories.
![]()
![]()
![]()
![]()
![]()
![]()
![]()
![]() : Accessories must be rated for at least the speed recommended on the tool warning label. Wheels and other accessories running over their rated accessory speed may fly apart and cause injury. Threaded accessories must have a 5/8
: Accessories must be rated for at least the speed recommended on the tool warning label. Wheels and other accessories running over their rated accessory speed may fly apart and cause injury. Threaded accessories must have a 5/8
Mounting Guard
MOUNTING AND REMOVING GUARD
![]()
![]()
![]()
![]()
![]()
![]()
![]()
![]() : Turn off tool and remove battery before making any adjustments or
: Turn off tool and remove battery before making any adjustments or
removing or installing attachments or accessories.
![]()
![]()
![]()
![]()
![]()
![]()
![]()
![]() : Guards must be used with all grinding wheels, sanding flap discs,
: Guards must be used with all grinding wheels, sanding flap discs,
wire brushes,
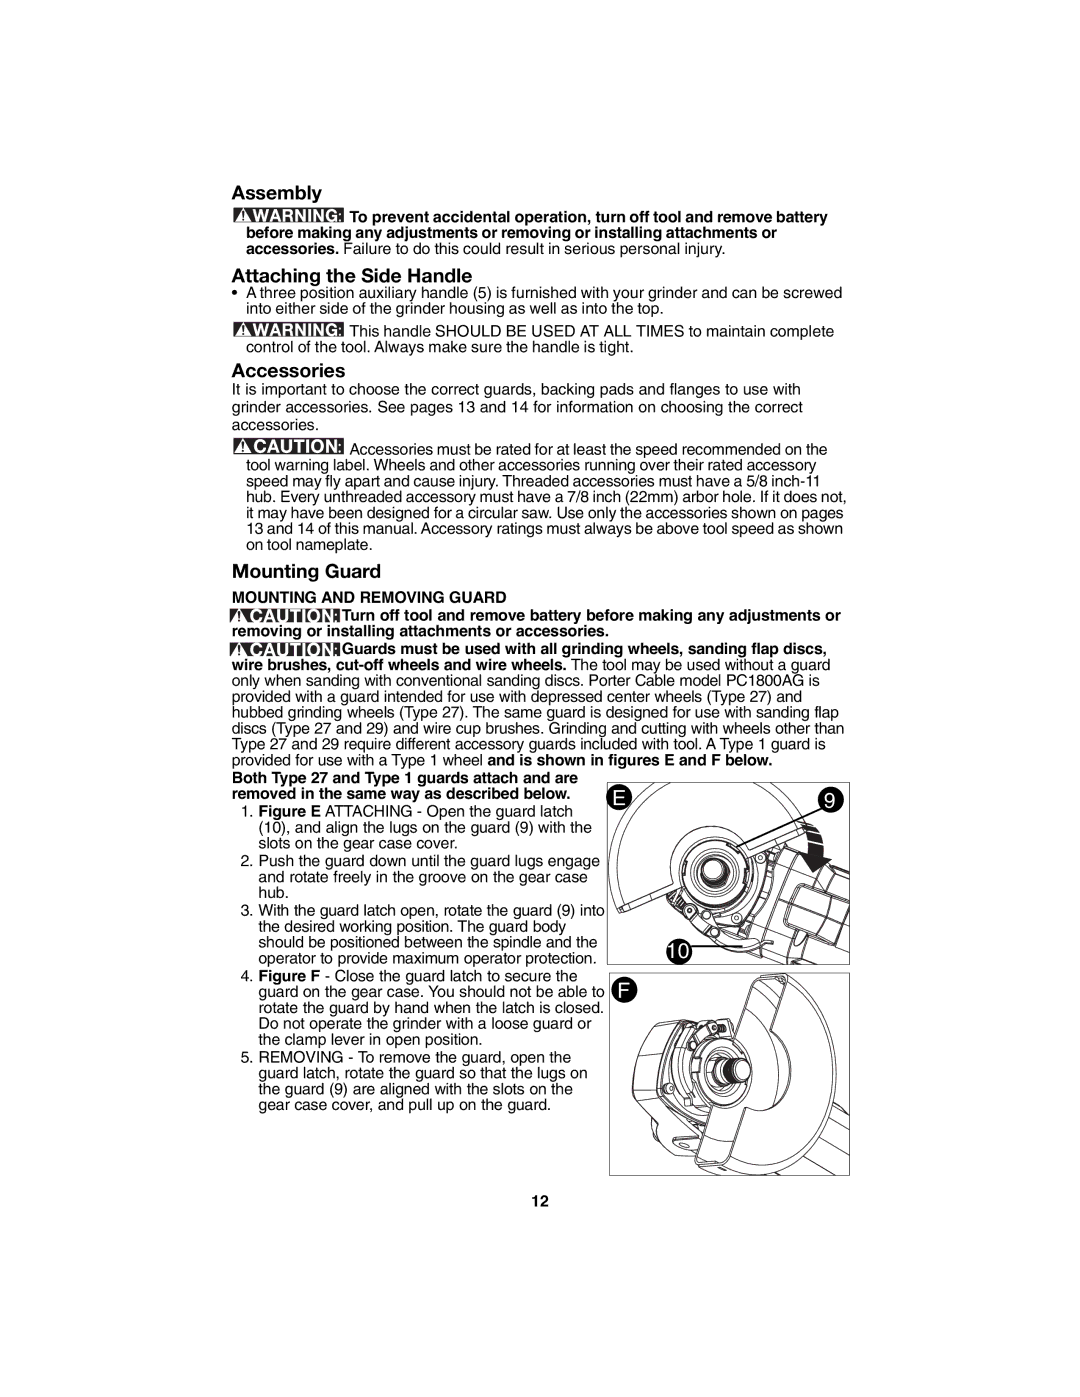
Both Type 27 and Type 1 guards attach and are removed in the same way as described below.
1.Figure E ATTACHING - Open the guard latch (10), and align the lugs on the guard (9) with the slots on the gear case cover.
2.Push the guard down until the guard lugs engage and rotate freely in the groove on the gear case hub.
3.With the guard latch open, rotate the guard (9) into the desired working position. The guard body should be positioned between the spindle and the operator to provide maximum operator protection.
4.Figure F - Close the guard latch to secure the guard on the gear case. You should not be able to rotate the guard by hand when the latch is closed. Do not operate the grinder with a loose guard or the clamp lever in open position.
5.REMOVING - To remove the guard, open the guard latch, rotate the guard so that the lugs on the guard (9) are aligned with the slots on the gear case cover, and pull up on the guard.
E9
10
F
12
