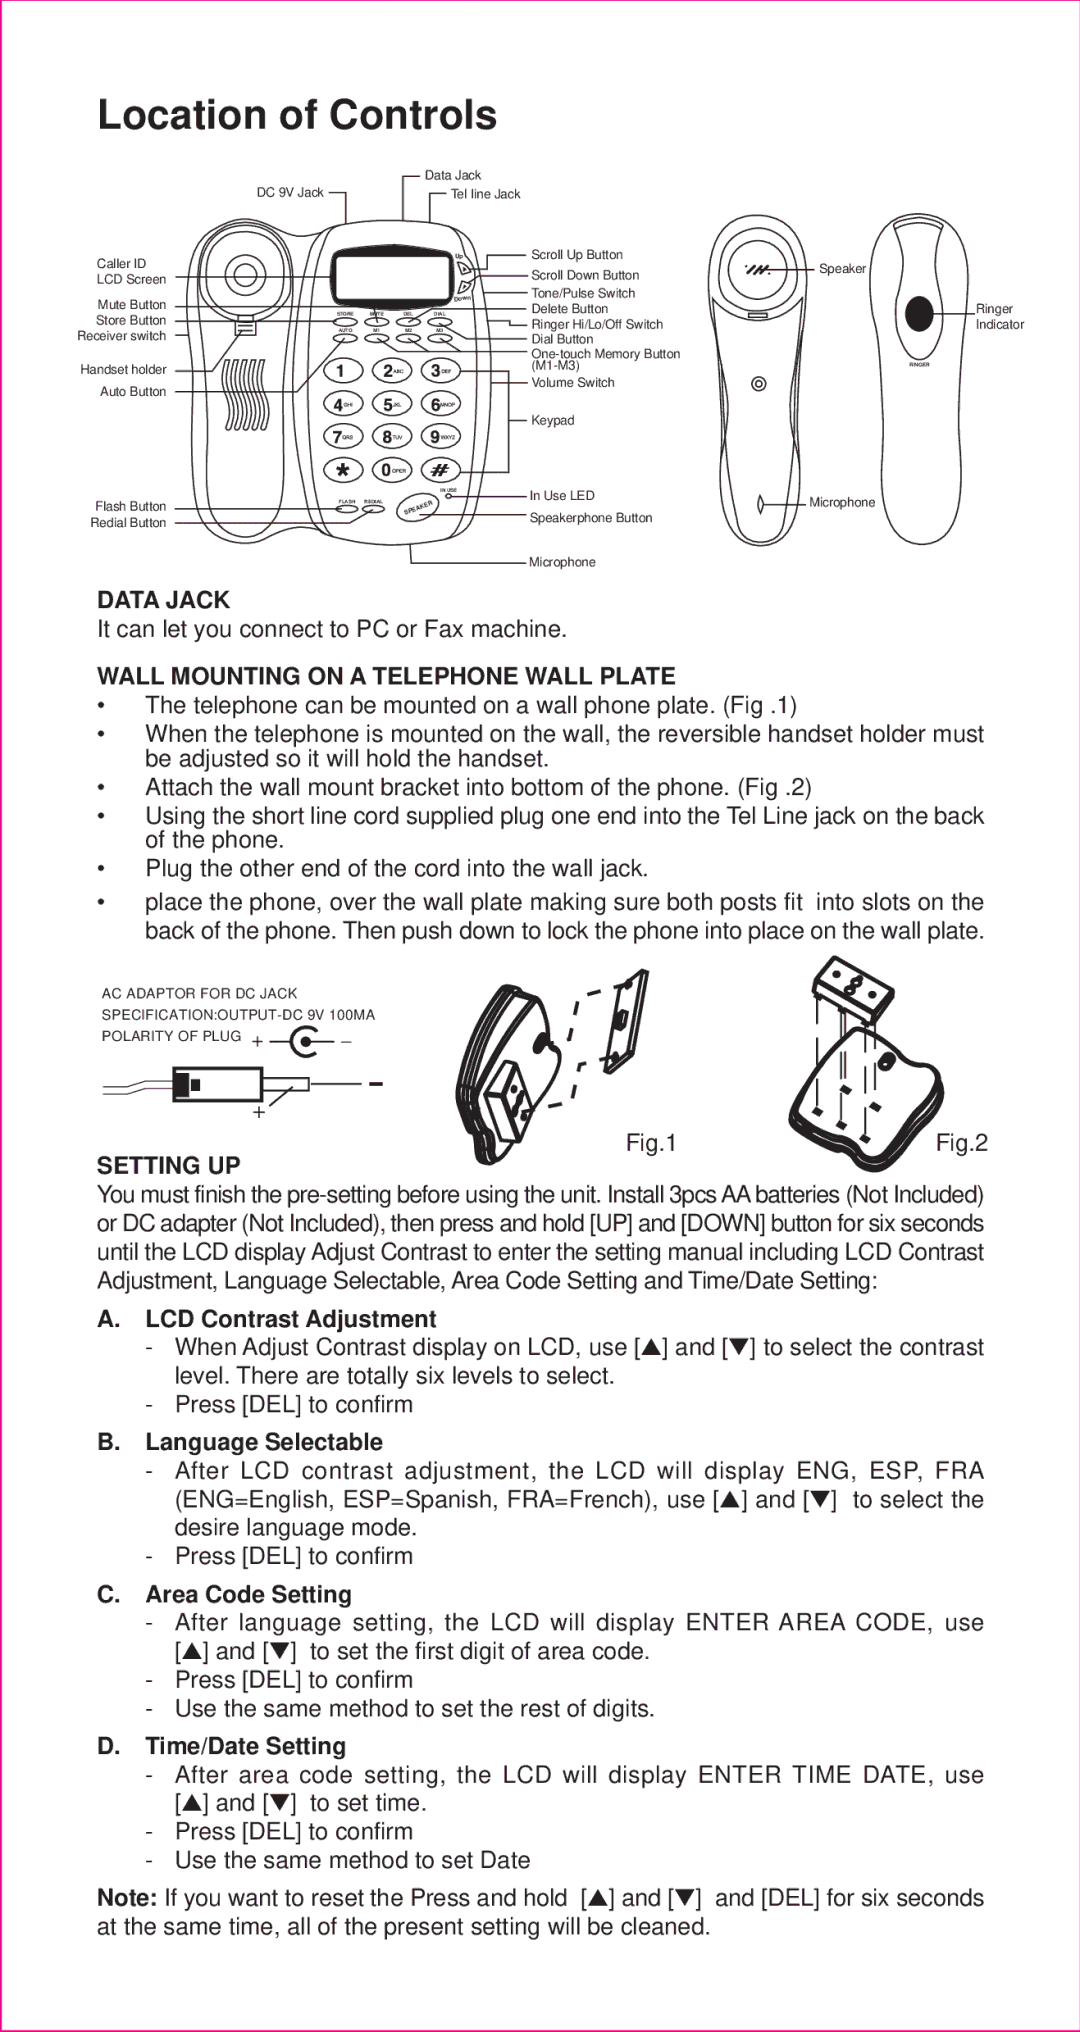
Location of Controls
Caller ID LCD Screen
Mute Button Store Button Receiver switch
Handset holder
Auto Button
Flash Button Redial Button
|
|
| Data Jack |
|
DC 9V Jack |
|
| Tel Iine Jack |
|
|
|
| Up | Scroll Up Button |
|
|
|
| Scroll Down Button |
|
|
| Down | Tone/Pulse Switch |
STORE | MUTE | DEL | DIAL | Delete Button |
AUTO | M1 | M2 | M3 | Ringer Hi/Lo/Off Switch |
|
|
|
| Dial Button |
|
|
|
| |
|
|
|
| |
|
|
|
| Volume Switch |
|
|
|
| Keypad |
|
|
| IN USE | In Use LED |
FLASH | REDIAL |
|
| |
|
| SPEAKER | Speakerphone Button | |
|
|
|
| |
Speaker
Ringer
Indicator
RINGER
![]() Microphone
Microphone
![]() Microphone
Microphone
DATA JACK
It can let you connect to PC or Fax machine.
WALL MOUNTING ON A TELEPHONE WALL PLATE
•The telephone can be mounted on a wall phone plate. (Fig .1)
•When the telephone is mounted on the wall, the reversible handset holder must be adjusted so it will hold the handset.
•Attach the wall mount bracket into bottom of the phone. (Fig .2)
•Using the short line cord supplied plug one end into the Tel Line jack on the back of the phone.
•Plug the other end of the cord into the wall jack.
•place the phone, over the wall plate making sure both posts fit into slots on the back of the phone. Then push down to lock the phone into place on the wall plate.
AC ADAPTOR FOR DC JACK |
|
|
| ||
POLARITY OF PLUG + | – |
|
+ |
|
|
SETTING UP | Fig.1 | Fig.2 |
|
| |
You must finish the
A.LCD Contrast Adjustment
-When Adjust Contrast display on LCD, use [▲] and [▼] to select the contrast level. There are totally six levels to select.
-Press [DEL] to confirm
B.Language Selectable
-After LCD contrast adjustment, the LCD will display ENG, ESP, FRA (ENG=English, ESP=Spanish, FRA=French), use [▲] and [▼] to select the desire language mode.
-Press [DEL] to confirm
C.Area Code Setting
-After language setting, the LCD will display ENTER AREA CODE, use [▲] and [▼] to set the first digit of area code.
-Press [DEL] to confirm
-Use the same method to set the rest of digits.
D.Time/Date Setting
-After area code setting, the LCD will display ENTER TIME DATE, use [▲] and [▼] to set time.
-Press [DEL] to confirm
-Use the same method to set Date
Note: If you want to reset the Press and hold [▲] and [▼] and [DEL] for six seconds at the same time, all of the present setting will be cleaned.