Attach pedals
If desired, the CycleOps Pro Series indoor cycle can accommodate any standard pedals to personalize the fit, feel and ride. Install using the pedal manufacturer’s specifications. Improper installation can result in damage to the crank. Damage caused by improper pedal installation is not covered under warranty.
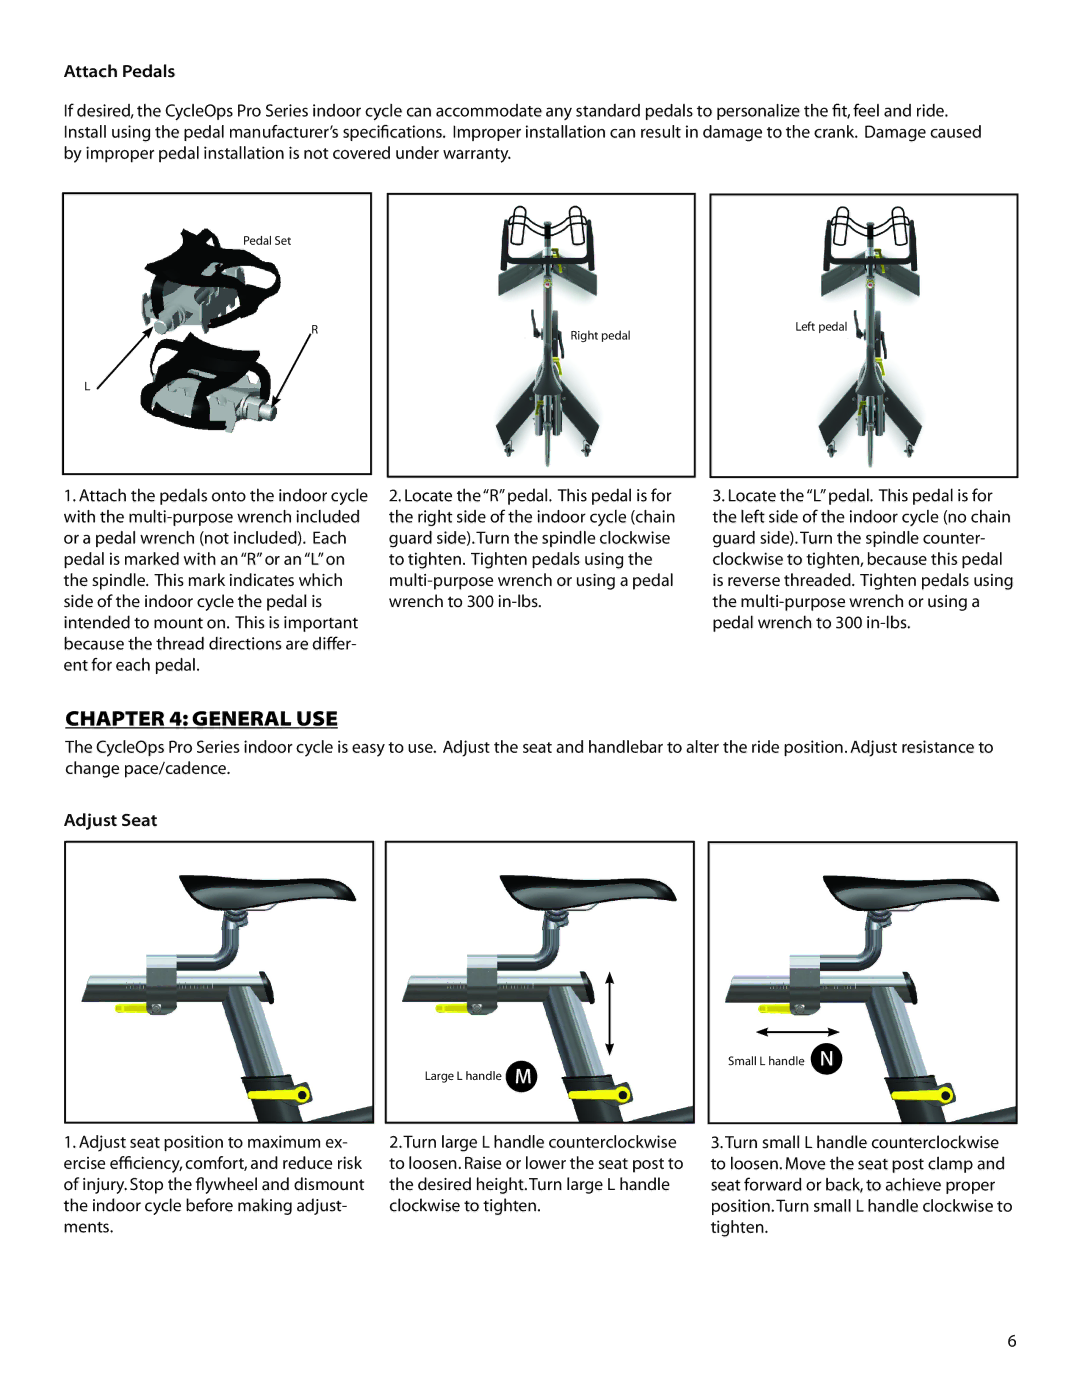
Pedal Set
R
Right pedal
Left pedal
L
1.Attach the pedals onto the indoor cycle with the
2.Locate the “R” pedal. This pedal is for the right side of the indoor cycle (chain guard side). Turn the spindle clockwise to tighten. Tighten pedals using the
3.Locate the “L” pedal. This pedal is for the left side of the indoor cycle (no chain guard side). Turn the spindle counter- clockwise to tighten, because this pedal is reverse threaded. Tighten pedals using the
CHAPTER 4: gEnERAl UsE
The CycleOps Pro Series indoor cycle is easy to use. Adjust the seat and handlebar to alter the ride position. Adjust resistance to change pace/cadence.
Adjust Seat
Large L handle M
Small L handle N
1.Adjust seat position to maximum ex- ercise efficiency, comfort, and reduce risk of injury. Stop the flywheel and dismount the indoor cycle before making adjust- ments.
2.Turn large L handle counterclockwise to loosen. Raise or lower the seat post to the desired height. Turn large L handle clockwise to tighten.
3.Turn small L handle counterclockwise to loosen. Move the seat post clamp and seat forward or back, to achieve proper position. Turn small L handle clockwise to tighten.
6