Hardware Mounting
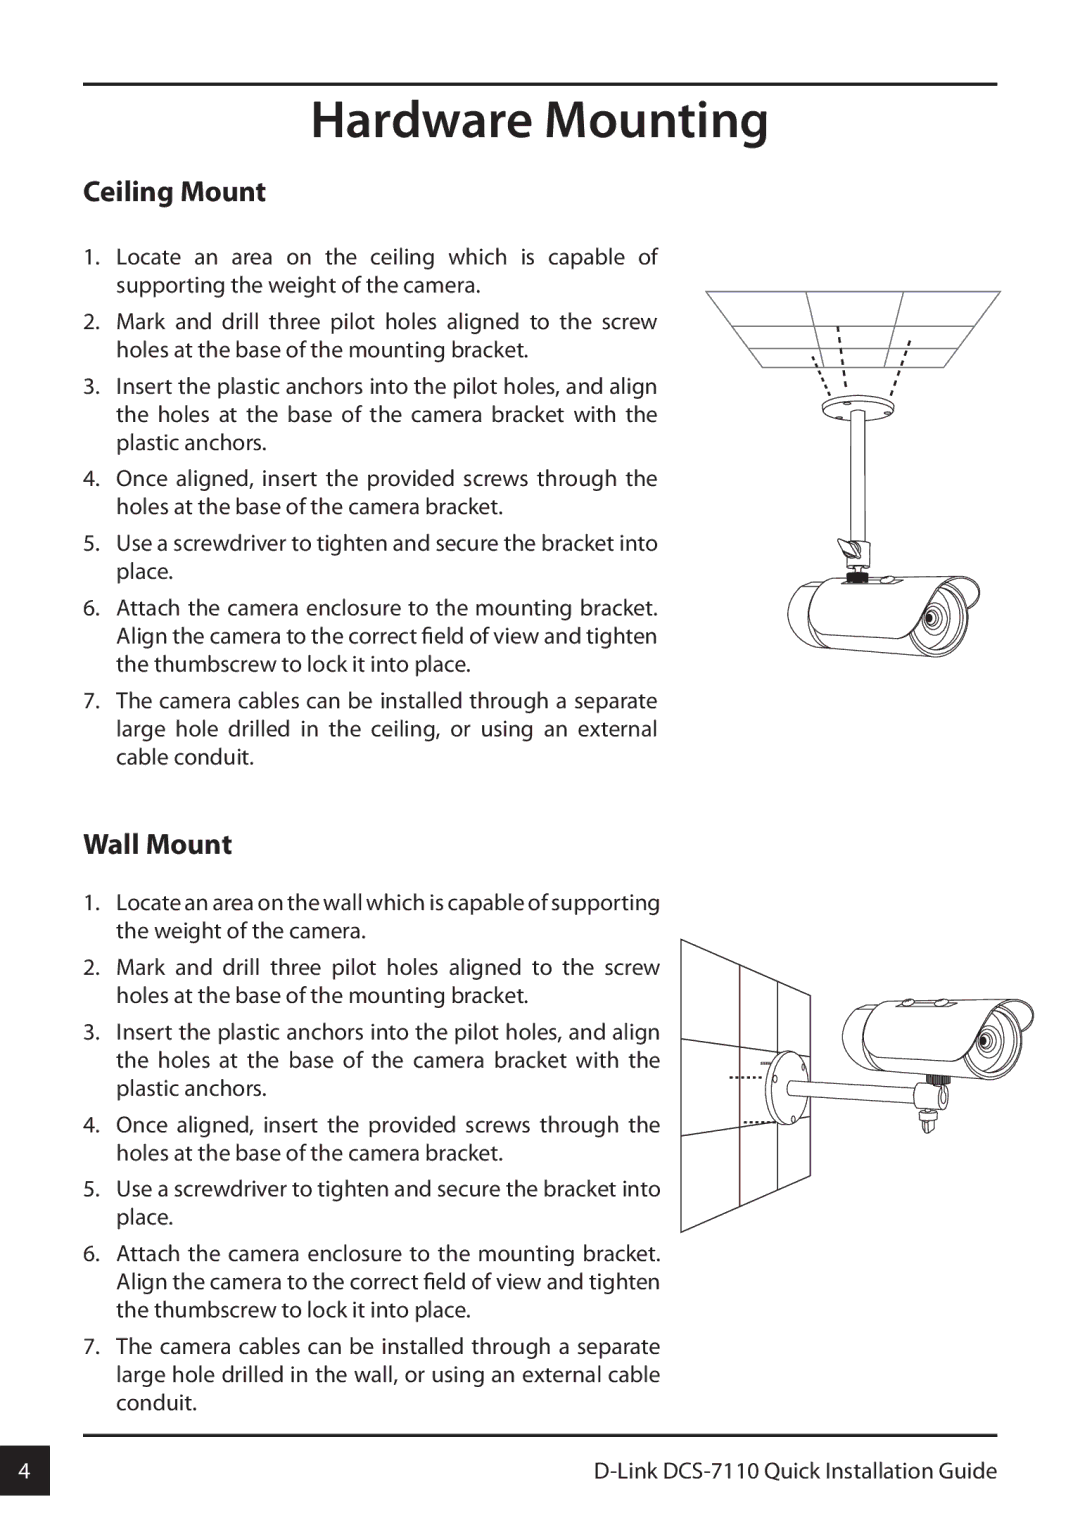
Ceiling Mount
1.Locate an area on the ceiling which is capable of supporting the weight of the camera.
2.Mark and drill three pilot holes aligned to the screw holes at the base of the mounting bracket.
3. Insert the plastic anchors into the pilot holes, and align the holes at the base of the camera bracket with the plastic anchors.
4.Once aligned, insert the provided screws through the holes at the base of the camera bracket.
5. Use a screwdriver to tighten and secure the bracket into place.
6.Attach the camera enclosure to the mounting bracket. Align the camera to the correct field of view and tighten the thumbscrew to lock it into place.
7.The camera cables can be installed through a separate large hole drilled in the ceiling, or using an external cable conduit.
Wall Mount
1.Locate an area on the wall which is capable of supporting the weight of the camera.
2.Mark and drill three pilot holes aligned to the screw
holes at the base of the mounting bracket.
3. Insert the plastic anchors into the pilot holes, and align the holes at the base of the camera bracket with the plastic anchors.
4. Once aligned, insert the provided screws through the holes at the base of the camera bracket.
5.Use a screwdriver to tighten and secure the bracket into place.
6.Attach the camera enclosure to the mounting bracket. Align the camera to the correct field of view and tighten the thumbscrew to lock it into place.
7.The camera cables can be installed through a separate large hole drilled in the wall, or using an external cable conduit.
4 | |
|
|