Connecting The DP-300U To Your Network
First, insert one end of a
![]() The USB Port is designed only for direct connection to USB Printer. No other USB devices will be recognized.
The USB Port is designed only for direct connection to USB Printer. No other USB devices will be recognized.
Next, make sure that the Printer is turned OFF.
Using the USB cable or printer cable, connect one end of the cable to the USB or parallel port of the
Turn ON the printer.
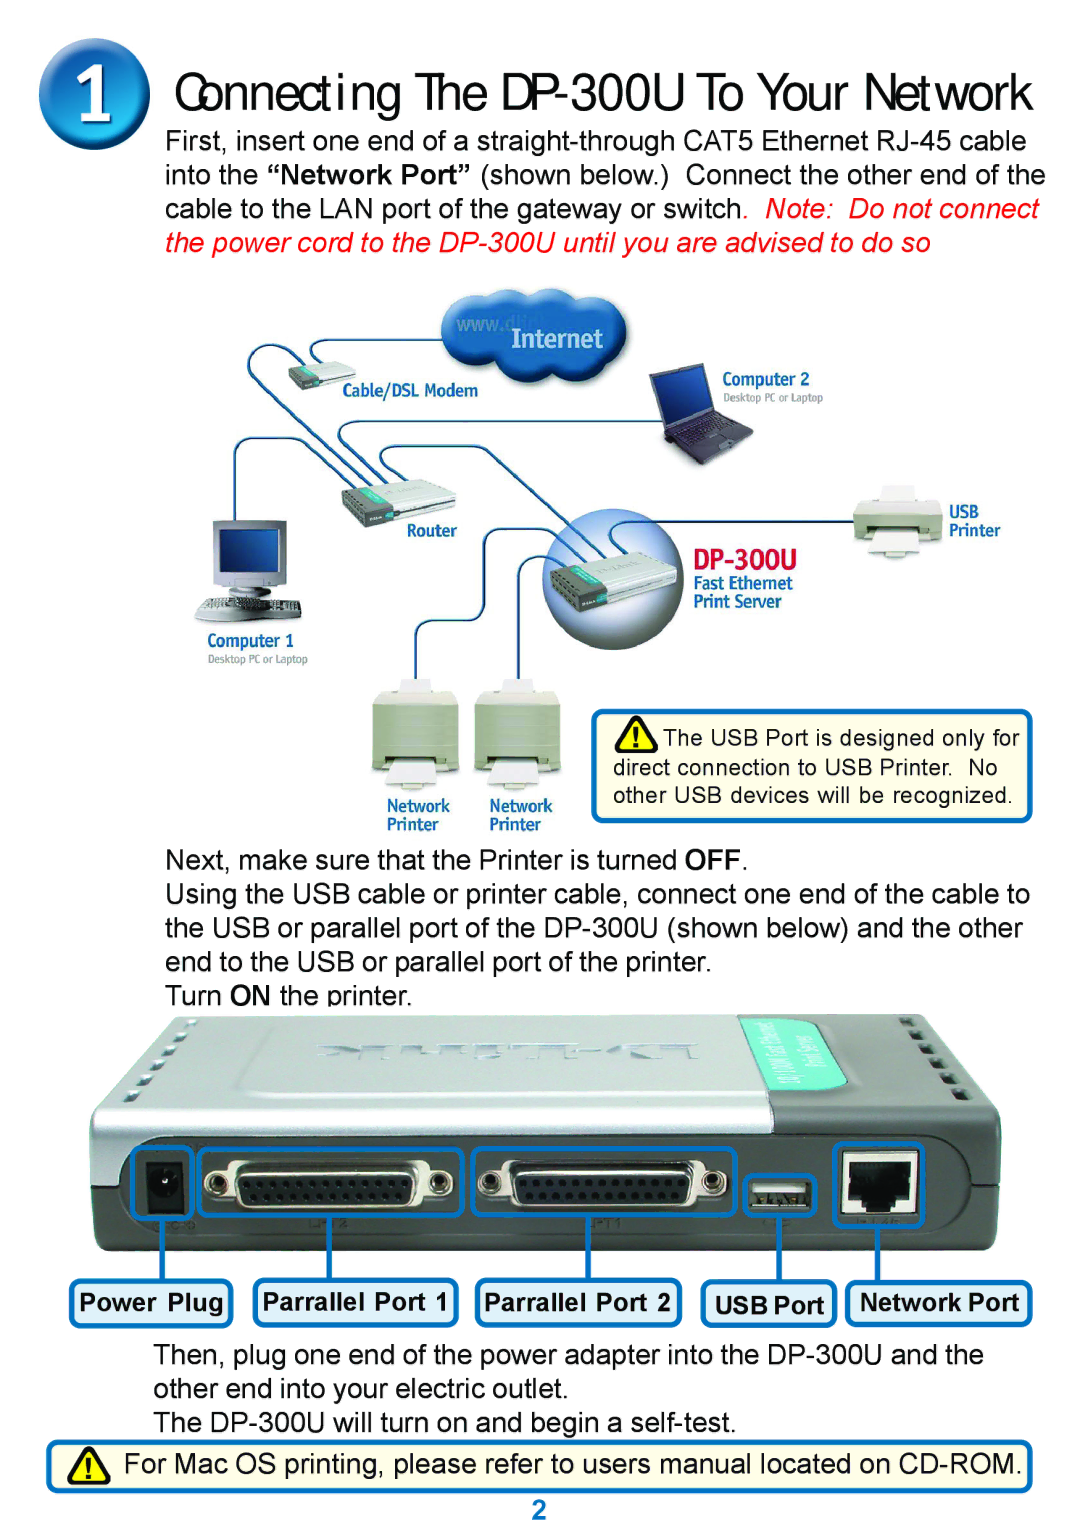
Power Plug Parrallel Port 1 Parrallel Port 2 USB Port Network Port
Then, plug one end of the power adapter into the
The
![]() For Mac OS printing, please refer to users manual located on
For Mac OS printing, please refer to users manual located on
2