OB36, OB52, OBS36, OBS52, OBSB162
13.2
13.3
Installation Instructions Epicure Outdoor Grill
Table of Contents
Important Information About Safety Instructions
Safety Symbols and Labels
General Safety Precautions
Important Safety Instructions
OB52
Product Dimensions
OB36
Overall
Number Width Height
Electrical Requirements
Gas and Electric Power Requirements
Location Planning General
Enclosed Cabinet Installations with a LP Cylinder
OB36, OBS36, OB52 and OBS52 Cutout Dimensions Side View
OBSB162 Cutout Dimensions Side View
Location Planning Enclosed Cabinets
Cutout Dimensions Top View
OBSB162
Location Planning Cart Installations
Example of Grill Cart Location
Preparing for Installation
Parts List
Models OB36, OBS36, OB52 and OBS52
Models OB52, OBS52 and OBSB162
Installation Instructions
Cabinet Installation
Cart Installation
OB36 or
OB52 or
Optional Side Shelf Installation
Connecting the Gas
Gas Connection Natural Gas
Gas Connection LP Gas Cylinder Hose
Gas Connection Whole House LP Gas
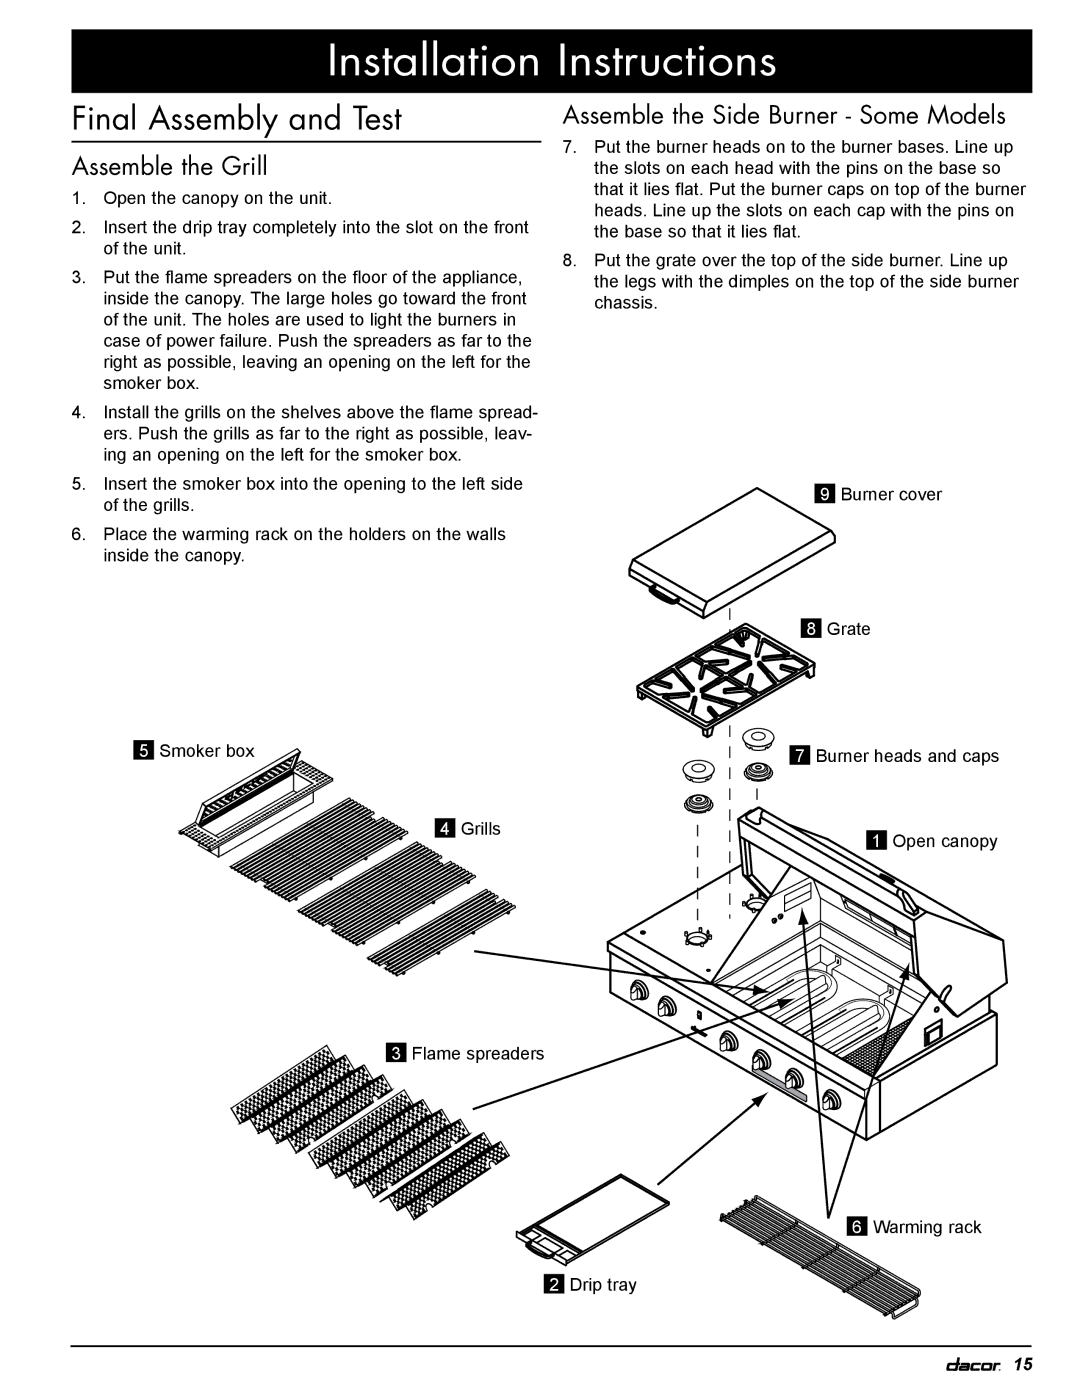
Assemble the Side Burner Some Models
Final Assembly and Test
Assemble the Grill
Power Connection Cart Models
LP Cylinder Installation Some Models
Leak Testing
Power Connection Cabinet Installations
Installation Checklist
Verifying Proper Operation
Lighting Instructions
Wiring Diagrams
Wiring Diagram OBS52
Page
Page
Page
Ta b l e o f C o n t e n t s
Back Cover
Dacor. all rights reserved
Important Safety Instructions
Model Number Serial Number
Use an adapter plug
Important Safety Instructions
Getting to Know Your Outdoor Grill
Outdoor Grill Features
Optional Grill Cart Features
Grill compartment Locking wheels
Grill compartment
Models OB36 and OBS36
Setting Up Your Outdoor Grill
Assembling the Cooktop
Outdoor Grill Assembly Model OBS52 shown
Side burner cover Side burner grate Drip tray Warming rack
To Connect the LP Tank
Operating Your Outdoor Grill
LP Tank Connection
Selecting and Using Cookware for the Optional Side Burner
Tank-less Gas Supply
Important Operating Information
After Cooking
Lighting the Burners
Lighting and Preheating Grill Compartment
Never use the outdoor grill in windy conditions
Light one burner at a time. Push in on
Burner Knob Locations Model OBS52 Shown
Lighting the Side Burners OB52, OBS52 and OBSB162 Only
Burner Lighting Notes
Manual Lighting Procedures Grill Compartment
To manually light the standard U shaped burners
To manually light the optional sear burner
To manually light one of the optional sear burners
Rotisserie Cooking
Things to Know About the Rotisserie
Preparing to Use the Rotisserie
Rotisserie Operation
Manual Lighting Procedure Rotisserie
Rotisserie burner Electrode Location
Using the Smoker Box
Smoker Cooking
Smoker Wood Chip Types
Adding more wood chips
Using the Optional Sear Burner
Safe Cooking Temperature Chart
To cook using the sear burner
Models OBS36 and OBS52 Only
Care and Cleaning
Cleaning Instructions
Cleaning the Grill Compartment
Grates Flame spreaders
Cleaning the Porcelain Grates and Warming Rack
Cleaning the Rotisserie Burner and Optional Sear Burner
Cleaning the Smoker Box
Cleaning the Rotisserie Parts
Cleaning the Optional Side Burners
Cleaning the Exterior
Knobs and Trim Rings
Rubbing alcohol to help dissolve grime
Light Fixture Locations
Light Bulb Replacement
Back of Lens
Standard U Burner Removal and Replacement
Parts and Accessories
Before You Call for Service
Problem Solution Guide
Warranty and Service
Warranty
What Is Covered
What Is Not Covered
Business Reply Mail
Warranty Information

