Overview of the equipment
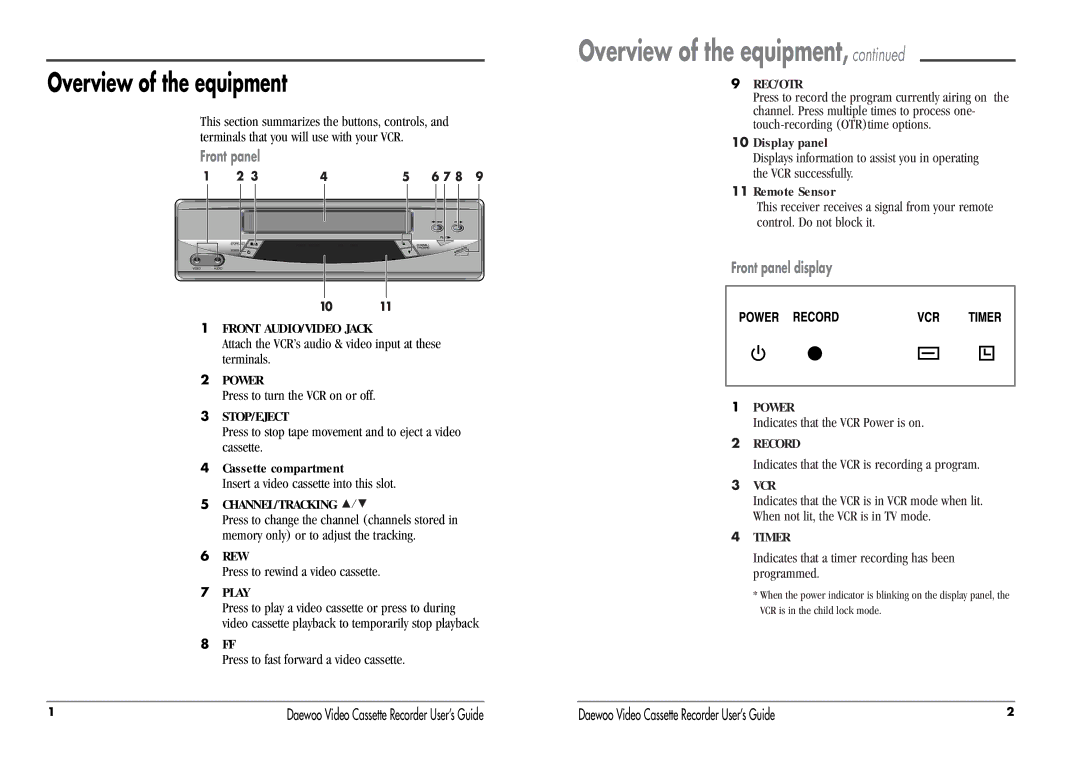
This section summarizes the buttons, controls, and terminals that you will use with your VCR.
Front panel
1FRONT AUDIO/VIDEO JACK
Attach the VCR’s audio & video input at these terminals.
2POWER
Press to turn the VCR on or off.
3STOP/EJECT
Press to stop tape movement and to eject a video cassette.
4Cassette compartment
Insert a video cassette into this slot.
5CHANNEL/TRACKING ![]()
![]()
![]()
Press to change the channel (channels stored in memory only) or to adjust the tracking.
6REW
Press to rewind a video cassette.
7PLAY
Press to play a video cassette or press to during video cassette playback to temporarily stop playback
8FF
Press to fast forward a video cassette.
Overview of the equipment, continued
9REC/OTR
Press to record the program currently airing on the channel. Press multiple times to process one-
10Display panel
Displays information to assist you in operating the VCR successfully.
11Remote Sensor
This receiver receives a signal from your remote control. Do not block it.
Front panel display
1POWER
Indicates that the VCR Power is on.
2RECORD
Indicates that the VCR is recording a program.
3VCR
Indicates that the VCR is in VCR mode when lit. When not lit, the VCR is in TV mode.
4TIMER
Indicates that a timer recording has been programmed.
*When the power indicator is blinking on the display panel, the VCR is in the child lock mode.
1 | Daewoo Video Cassette Recorder User’s Guide | Daewoo Video Cassette Recorder User’s Guide | 2 |
