| IMPORTANT SAFETY INFORMATION |
|
|
|
|
|
|
ENERGY- | Your Danby appliance is designed to be highly efficient in energy savings. |
SAVING TIPS | Follow these recommendations for greater efficiency. |
|
|
1)Select a thermostat setting that suits your comfort needs and leave at that chosen setting.
2)The filter is very efficient in removing airborne particles. Keep the air filter clean. Normally, filters should be cleaned every 2 weeks. More frequent cleaning may be necessary depending on indoor air quality.
3)Use drapes, curtains or shades to keep direct sunlight from penetrating and heating room, but do not allow drapes or curtains to obstruct the air flow around the unit.
4)Start your air conditioner before the outdoor air becomes hot and uncomfortable, to avoid an initial period of discomfort while the unit is cooling off the room.
5)When outdoor temperatures are cool enough, use HIGH or LOW FAN only. This circulates indoor air, providing some cooling comfort, and utilizes less electricity than when operating on a cooling setting.
INSTALLATION
![]() ELECTRIC SHOCK HAZARD: To avoid the possibility of personal injury, disconnect power to the unit before installing or servicing.
ELECTRIC SHOCK HAZARD: To avoid the possibility of personal injury, disconnect power to the unit before installing or servicing.
TOOLS NEEDED FOR INSTALLATION:
Screw Drivers: Both Phillips and flat head
Power Drill: 1/8 inch (3.2mm) diameter drill bit
Pencil | Scissors |
Measuring Tape | Carpenters Level |
Your Room Air Conditioner is designed for easy installtion in a single or
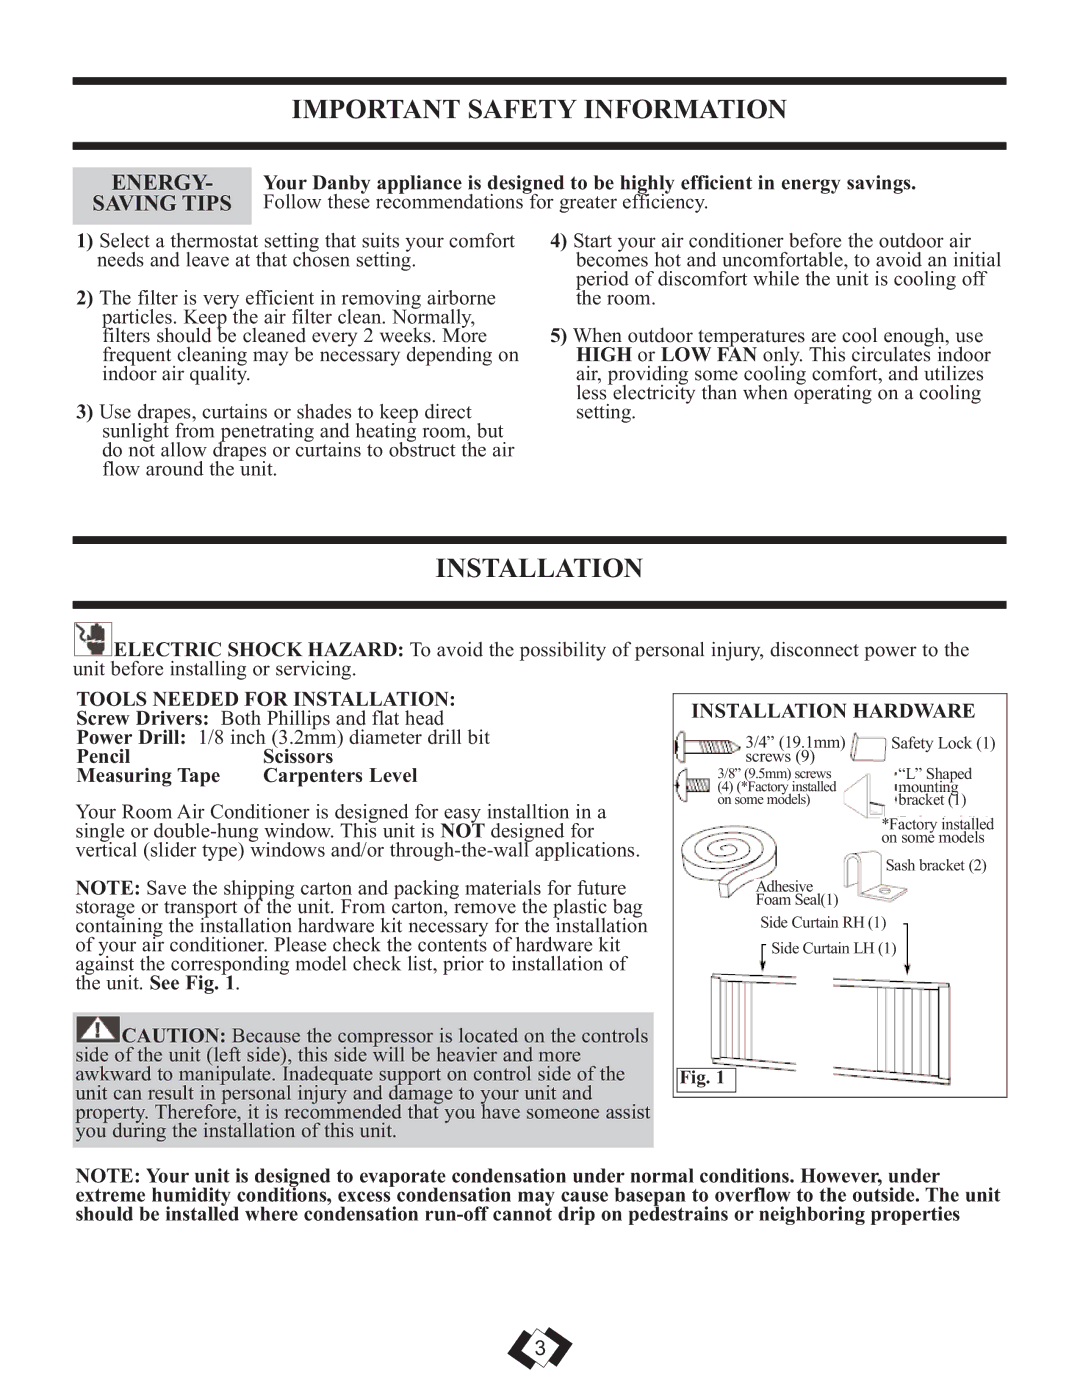
NOTE: Save the shipping carton and packing materials for future storage or transport of the unit. From carton, remove the plastic bag containing the installation hardware kit necessary for the installation of your air conditioner. Please check the contents of hardware kit against the corresponding model check list, prior to installation of the unit. See Fig. 1.
![]() CAUTION: Because the compressor is located on the controls side of the unit (left side), this side will be heavier and more awkward to manipulate. Inadequate support on control side of the unit can result in personal injury and damage to your unit and property. Therefore, it is recommended that you have someone assist you during the installation of this unit.
CAUTION: Because the compressor is located on the controls side of the unit (left side), this side will be heavier and more awkward to manipulate. Inadequate support on control side of the unit can result in personal injury and damage to your unit and property. Therefore, it is recommended that you have someone assist you during the installation of this unit.
INSTALLATION HARDWARE
| 3/4” (19.1mm) |
|
|
| Safety Lock (1) | ||||||
| screws (9) |
|
|
|
|
|
|
| |||
|
|
|
|
|
|
|
| ||||
3/8” | (9.5mm) screws |
|
|
|
|
| “L” Shaped |
| |||
| |||||||||||
(4) (*Factory installed |
|
|
|
|
| mounting |
| ||||
on some models) |
|
|
|
|
| bracket (1) |
| ||||
|
|
|
|
|
|
|
|
|
|
|
|
|
|
|
|
|
| *Factory installed | |||||
|
|
|
|
|
| ||||||
|
|
|
|
|
| on some models | |||||
|
|
|
|
|
|
|
|
|
|
|
|
|
|
|
|
|
|
|
|
|
|
| |
|
|
|
|
|
|
| Sash bracket (2) | ||||
|
|
|
|
|
|
|
|
|
|
|
|
|
| Adhesive |
|
|
|
|
|
|
| ||
|
|
|
|
|
|
|
|
|
|
| |
|
| Foam Seal(1) |
|
|
|
|
|
|
|
|
|
Side Curtain RH (1)
Side Curtain LH (1)
Fig. 1
NOTE: Your unit is designed to evaporate condensation under normal conditions. However, under extreme humidity conditions, excess condensation may cause basepan to overflow to the outside. The unit should be installed where condensation
3