CHILL'N TAPASSEMBLY INSTRUCTIONS CON’T

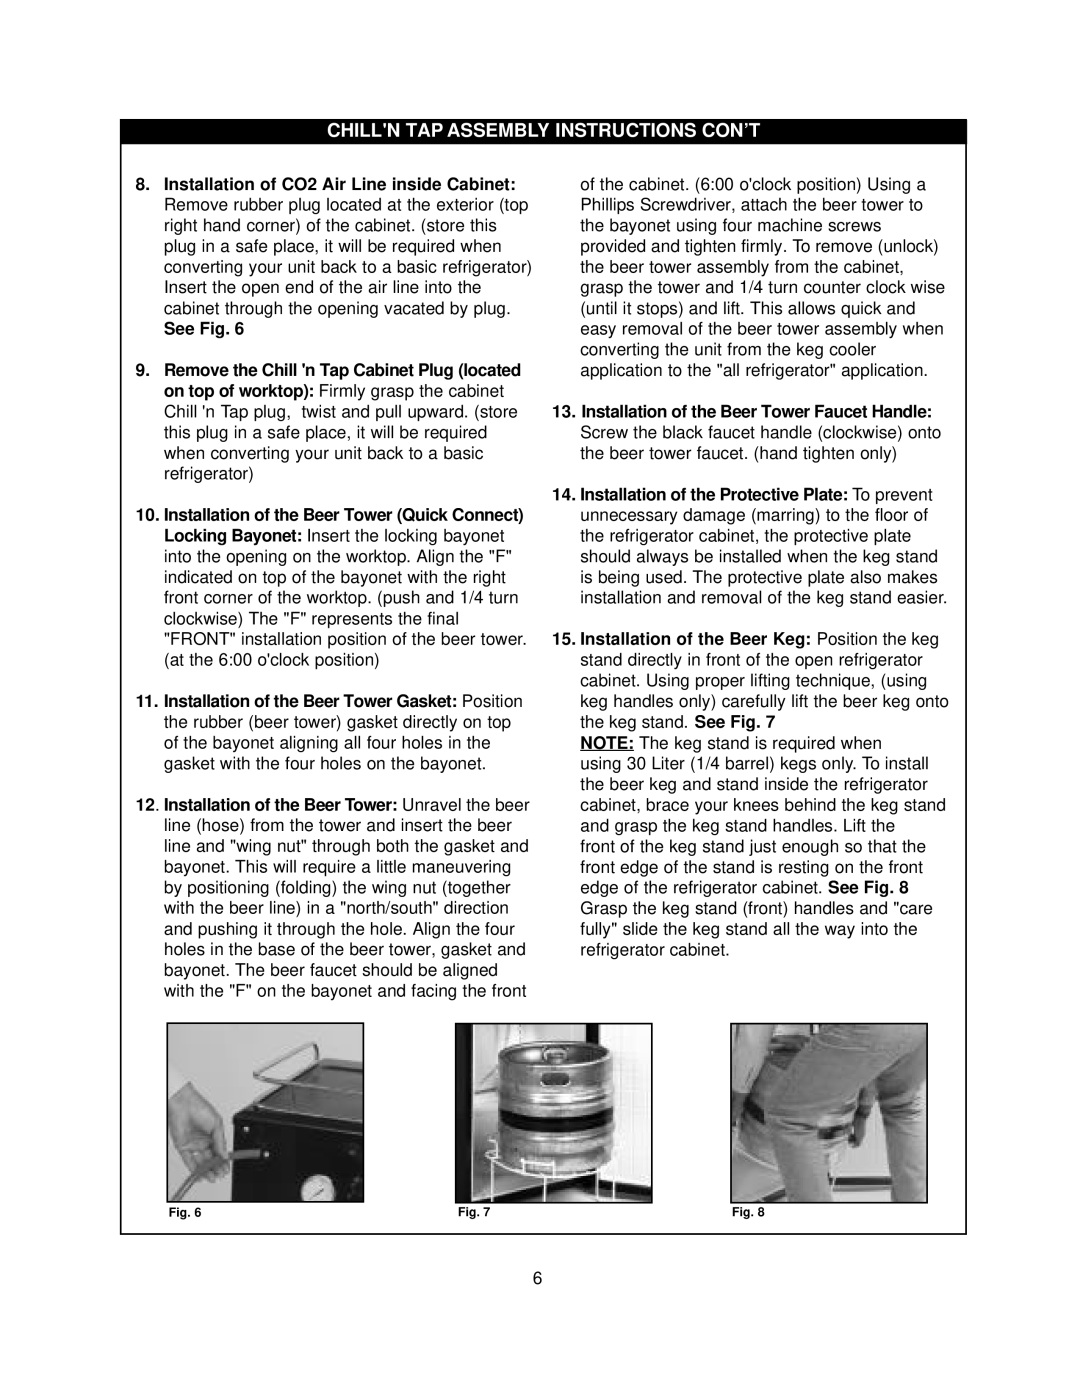
8.Installation of CO2 Air Line inside Cabinet: Remove rubber plug located at the exterior (top right hand corner) of the cabinet. (store this plug in a safe place, it will be required when converting your unit back to a basic refrigerator) Insert the open end of the air line into the cabinet through the opening vacated by plug.

See Fig. 6

9.Remove the Chill 'n Tap Cabinet Plug (located on top of worktop): Firmly grasp the cabinet Chill 'nTap plug, twist and pull upward. (store this plug in a safe place, it will be required when converting your unit back to a basic refrigerator)

10.Installation of the Beer Tower (Quick Connect) Locking Bayonet: Insert the locking bayonet into the opening on the worktop. Align the "F" indicated on top of the bayonet with the right front corner of the worktop. (push and 1/4 turn clockwise) The "F" represents the final "FRONT" installation position of the beer tower. (at the 6:00 o'clock position)

11.Installation of the Beer Tower Gasket: Position the rubber (beer tower) gasket directly on top of the bayonet aligning all four holes in the gasket with the four holes on the bayonet.

12. Installation of the Beer Tower: Unravel the beer line (hose) from the tower and insert the beer line and "wing nut" through both the gasket and bayonet. This will require a little maneuvering by positioning (folding) the wing nut (together with the beer line) in a "north/south" direction and pushing it through the hole. Align the four holes in the base of the beer tower, gasket and bayonet. The beer faucet should be aligned with the "F" on the bayonet and facing the front

of the cabinet. (6:00 o'clock position) Using a Phillips Screwdriver, attach the beer tower to the bayonet using four machine screws provided and tighten firmly. To remove (unlock) the beer tower assembly from the cabinet, grasp the tower and 1/4 turn counter clock wise (until it stops) and lift. This allows quick and easy removal of the beer tower assembly when converting the unit from the keg cooler application to the "all refrigerator" application.

13.Installation of the Beer Tower Faucet Handle: Screw the black faucet handle (clockwise) onto the beer tower faucet. (hand tighten only)

14.Installation of the Protective Plate: To prevent unnecessary damage (marring) to the floor of the refrigerator cabinet, the protective plate should always be installed when the keg stand is being used. The protective plate also makes installation and removal of the keg stand easier.

15.Installation of the Beer Keg: Position the keg stand directly in front of the open refrigerator cabinet. Using proper lifting technique, (using keg handles only) carefully lift the beer keg onto the keg stand. See Fig. 7

NOTE: The keg stand is required when using 30 Liter (1/4 barrel) kegs only. To install the beer keg and stand inside the refrigerator cabinet, brace your knees behind the keg stand and grasp the keg stand handles. Lift the front of the keg stand just enough so that the front edge of the stand is resting on the front edge of the refrigerator cabinet. See Fig. 8 Grasp the keg stand (front) handles and "care fully" slide the keg stand all the way into the refrigerator cabinet.

Fig. 6

Fig. 7

Fig. 8

6

Page 8
Image 8
Danby DKC445BL manual Chilln Tapassembly Instructions CON’T

DKC445BL specifications

The Danby DKC445BL is a versatile and stylish kegerator that brings the bar experience right to your home. Designed to hold a full-size, half-barrel keg or any variety of smaller kegs, this unit is perfect for beer enthusiasts looking to enjoy fresh draught beer without the hassle of going to a pub. The sleek black exterior adds a modern touch to any space, making it an attractive addition to your kitchen, man cave, or outdoor patio.

One of the standout features of the Danby DKC445BL is its precise temperature control. With an internal temperature range of 1°C to 4°C (34°F to 39°F), this kegerator ensures that your drinks are served at the optimal temperature, enhancing the taste and refreshing qualities of your favorite brew. The adjustable thermostat allows for fine-tuning, enabling you to accommodate various types of beer, including lagers, ales, and stouts.

The Danby DKC445BL is equipped with a powerful compressor cooling system, which ensures that your beer retains its freshness and flavor. The interior of the unit is spacious, featuring a removable wire shelf that allows for easy access and cleaning while maximizing capacity. This feature is particularly useful for those who like to host gatherings, as it provides ample storage for multiple kegs and beer-related accessories.

Moreover, the kegerator has a convenient CO2 tank storage compartment, making it easy to set up your draft system without external clutter. The unit is compatible with both 5 lb. and 20 lb. CO2 tanks, giving users the flexibility to choose the size that best suits their needs.

Durability is another key characteristic of the Danby DKC445BL. The unit is built with a robust design, featuring a heavy-duty metal exterior and a UV-protected glass door. This not only enhances the longevity of the kegerator but also protects your beer from harmful UV rays that can alter its flavor.

With its user-friendly features, such as an easy-to-read digital display and adjustable leveling legs, the Danby DKC445BL provides a hassle-free experience for beer lovers. Whether you're hosting a party or simply enjoying a night in, this kegerator makes it easy to serve perfectly chilled draught beer right from the comfort of your home. The combination of style, functionality, and performance makes the Danby DKC445BL a top choice for both casual drinkers and serious connoisseurs alike.