OPERATING INSTRUCTIONS
USING YOUR
RANGE
Top Burner Operation:
Note- When boiling food, the highest temperature that can be reached is the boiling point. When the liquid starts to boil, decrease the size of the flame until you reach the minimum flame that will hold the boil. This will save gas. It will also decrease the possibilty of burning food or boiling over, and help keep your kitchen cooler. Use stable cookware with flat bottoms, and always place the cookware on the burner grate before lighting the burner. Unstable or rounded bottom cookware will not contact properly with the grate and will affect the cooking efficiency. Select cookware large enough to
avoid spillovers, but remember,1
FLAME SIZE | TYPE OF COOKING | |
High | Start most foods; bring water to a boil; | |
| ||
Medium | Maintain a slow boil; Thicken sauces, | |
gravies; steaming. | ||
| ||
Low | Keep foods cooking; poach; stewing. | |
|
|
Top Burner Valves:
The top burner flame size should be adjusted so that it does not extend beyond the edge of the cookware. As a matter of safety, it is urged that you comply with these instructions.A high flame on a surface burner is both inefficient and unsafe. The flame should always be adjusted so that it is no larger than the bottom of a pan. Fluctuations in flame size could be caused by pressure variations, improperly positioned burners, damage, or debris.
Always turn to the full LITE position when igniting the top burners. Then adjust the flame size so it doesn’t extend beyond the edge of the cookware.
Note: Know which knob controls each burner. Place a pan of food on the burner before turning it on, and turn the burner off before removing the pan.
Preheating:
Heat the oven to the desired temperature before placing the food in the oven. Preheat for 10 to 12 minutes.
Opening the Oven Door:
Let hot air/steam escape before removing/replacing food.
Arranging Oven Racks:
The oven racks should be arranged before the oven is turned “ON”. Place the racks so the food is centered in the oven.
Recommended Rack Positions for Broiling,
Baking, and Roasting
RACK | FOOD |
1 Broiling meats, chicken or fish | |
1 or 2 Cookies, cakes, pies, biscuits and muffins | |
2Frozen pies, angel food cake, yeast bread, casseroles, small cuts of meat or poultry
2Turkey, roast or ham
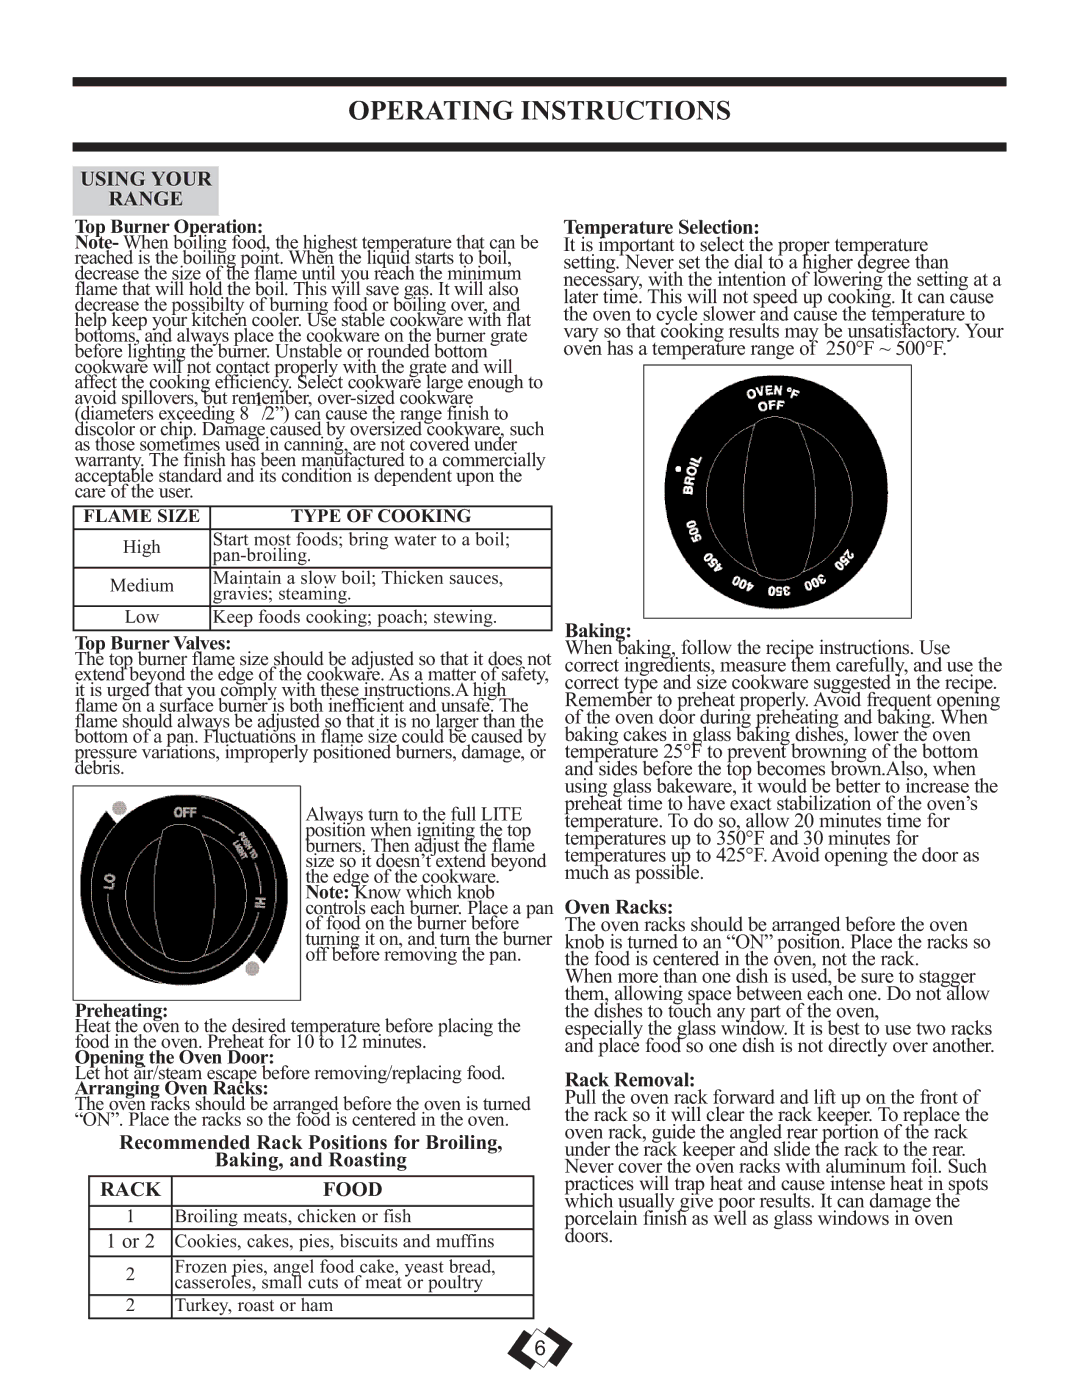
Temperature Selection:
It is important to select the proper temperature setting. Never set the dial to a higher degree than necessary, with the intention of lowering the setting at a later time. This will not speed up cooking. It can cause the oven to cycle slower and cause the temperature to vary so that cooking results may be unsatisfactory. Your oven has a temperature range of 250°F ~ 500°F.
Baking:
When baking, follow the recipe instructions. Use correct ingredients, measure them carefully, and use the correct type and size cookware suggested in the recipe. Remember to preheat properly. Avoid frequent opening of the oven door during preheating and baking. When baking cakes in glass baking dishes, lower the oven temperature 25°F to prevent browning of the bottom and sides before the top becomes brown.Also, when using glass bakeware, it would be better to increase the preheat time to have exact stabilization of the oven’s temperature. To do so, allow 20 minutes time for temperatures up to 350°F and 30 minutes for temperatures up to 425°F. Avoid opening the door as much as possible.
Oven Racks:
The oven racks should be arranged before the oven knob is turned to an “ON” position. Place the racks so the food is centered in the oven, not the rack.
When more than one dish is used, be sure to stagger them, allowing space between each one. Do not allow the dishes to touch any part of the oven, especially the glass window. It is best to use two racks and place food so one dish is not directly over another.
Rack Removal:
Pull the oven rack forward and lift up on the front of the rack so it will clear the rack keeper. To replace the oven rack, guide the angled rear portion of the rack under the rack keeper and slide the rack to the rear. Never cover the oven racks with aluminum foil. Such practices will trap heat and cause intense heat in spots which usually give poor results. It can damage the porcelain finish as well as glass windows in oven doors.
6