NOTICE: To avoid electrostatic discharge, ground yourself by using a wrist grounding strap or by periodically touching an unpainted metal surface (such as the back panel) on the computer.
NOTICE: To help prevent damage to the system board, you must remove the main battery (see Before Working Inside Your Computer) before you begin working inside the computer.
Removing the Display Bezel
1.Follow the instructions in Before You Begin.
2.Remove the display assembly (see Removing the Display Assembly).
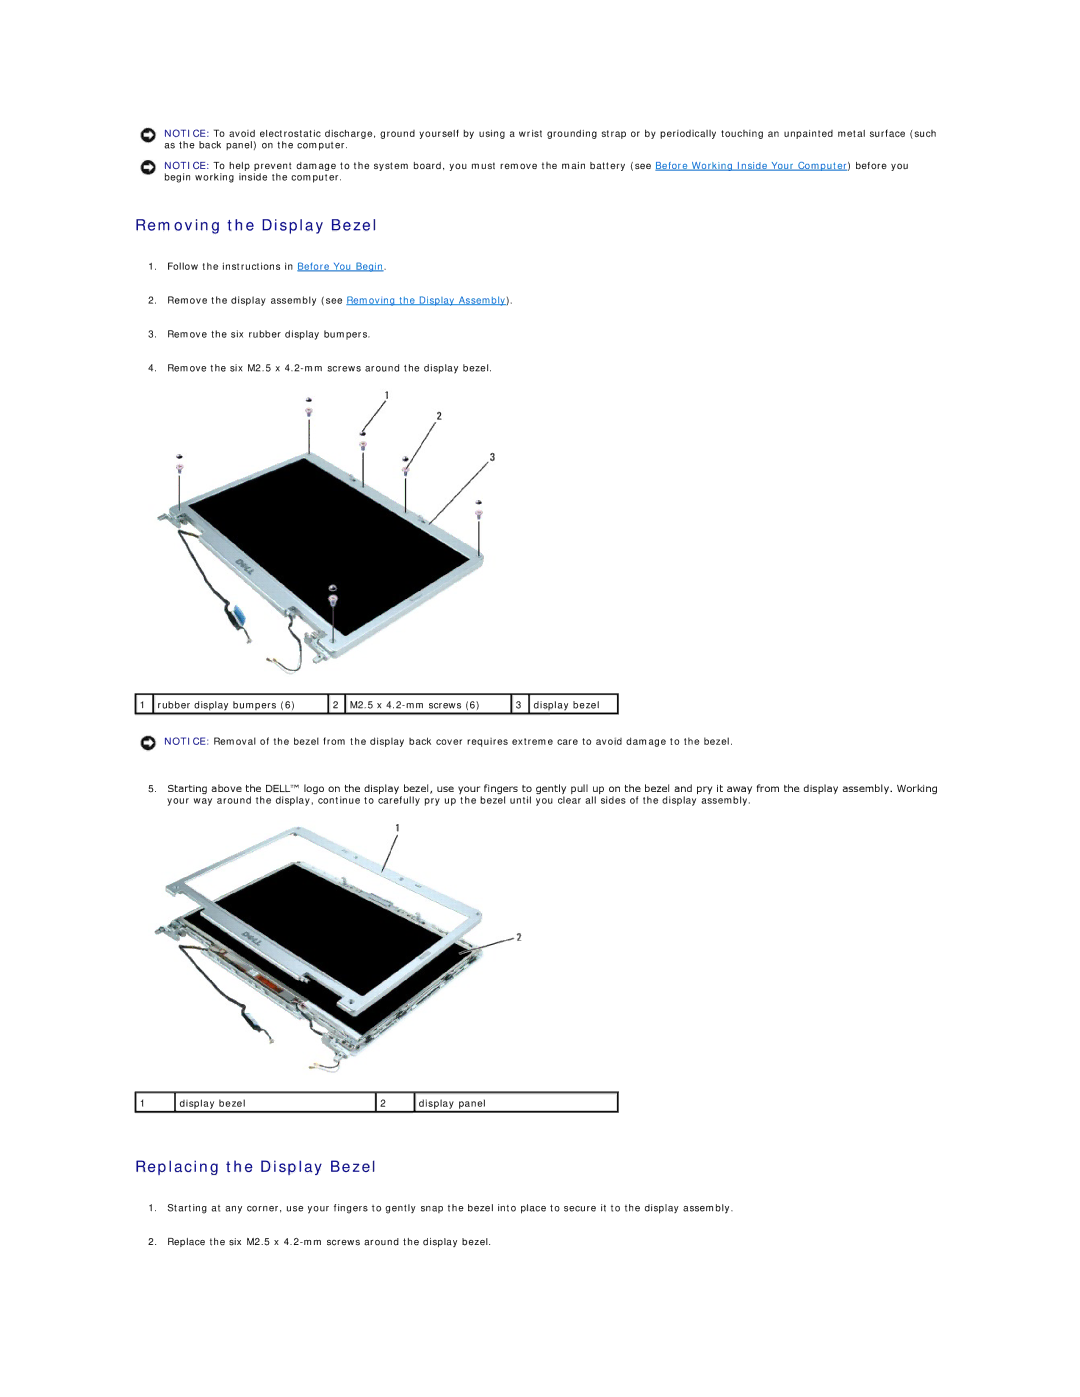
3.Remove the six rubber display bumpers.
4.Remove the six M2.5 x
![]() 1
1 ![]() rubber display bumpers (6)
rubber display bumpers (6)
2 | M2.5 x | 3 | display bezel |
|
|
|
|
NOTICE: Removal of the bezel from the display back cover requires extreme care to avoid damage to the bezel.
5.Starting above the DELL™ logo on the display bezel, use your fingers to gently pull up on the bezel and pry it away from the display assembly. Working your way around the display, continue to carefully pry up the bezel until you clear all sides of the display assembly.
1 | display bezel | 2 | display panel |
|
|
|
|
Replacing the Display Bezel
1.Starting at any corner, use your fingers to gently snap the bezel into place to secure it to the display assembly.
2.Replace the six M2.5 x