While there are many advanced options available in the management interface, there are only three steps needed to configure the tape library in the Chelsio USR. The home screen of the management interface is shown in Figure 4. The home screen provides a menu infrastructure for navigation on the left of the screen as well as the status of the Chelsio USR and any attached tape libraries on the right.
Figure 4 - Management Interface Home Screen
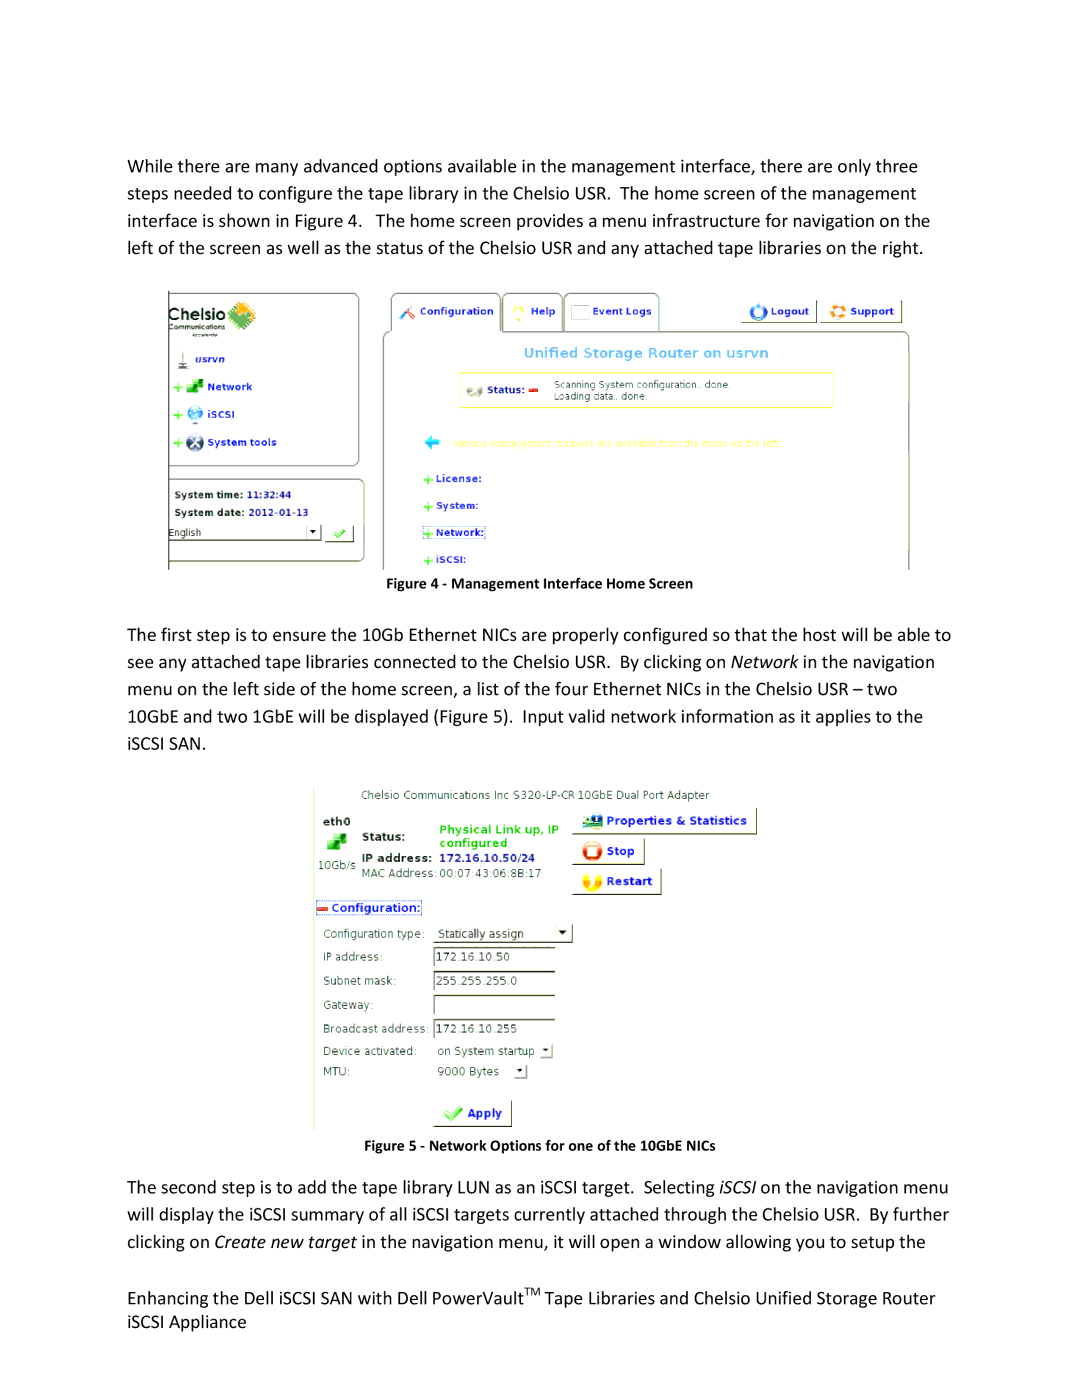
The first step is to ensure the 10Gb Ethernet NICs are properly configured so that the host will be able to see any attached tape libraries connected to the Chelsio USR. By clicking on Network in the navigation menu on the left side of the home screen, a list of the four Ethernet NICs in the Chelsio USR – two 10GbE and two 1GbE will be displayed (Figure 5). Input valid network information as it applies to the iSCSI SAN.
Figure 5 - Network Options for one of the 10GbE NICs
The second step is to add the tape library LUN as an iSCSI target. Selecting iSCSI on the navigation menu will display the iSCSI summary of all iSCSI targets currently attached through the Chelsio USR. By further clicking on Create new target in the navigation menu, it will open a window allowing you to setup the
Enhancing the Dell iSCSI SAN with Dell PowerVaultTM Tape Libraries and Chelsio Unified Storage Router iSCSI Appliance